Archives Март 2024

Battery Testing Basics – Key Pointers for Significant Progress

all about car battery testing

  • How to test a car battery
  • Car battery testing instructions
  • Car batter testing tips
  • FAQs

Batteries wear over time. However, regular car battery testing helps identify potential issues before they become critical. A weak or failing battery can lead to unexpected breakdowns, leaving you stranded in inconvenient or even unsafe situations. By detecting battery problems early, you can replace the battery before it fails. Let’s go through some effective ways and tips for car battery testing.

How to Test a Car Battery

let’s go through the car battery testing basics
There are three car battery testing basics: voltage check, load test and hydrometer test

The average life of regular car batteries is about three to five years. However, testing a car battery is important to figure out if the battery or alternator has gone bad. A car battery can be tested via three basic tests. Let’s go through them in detail:

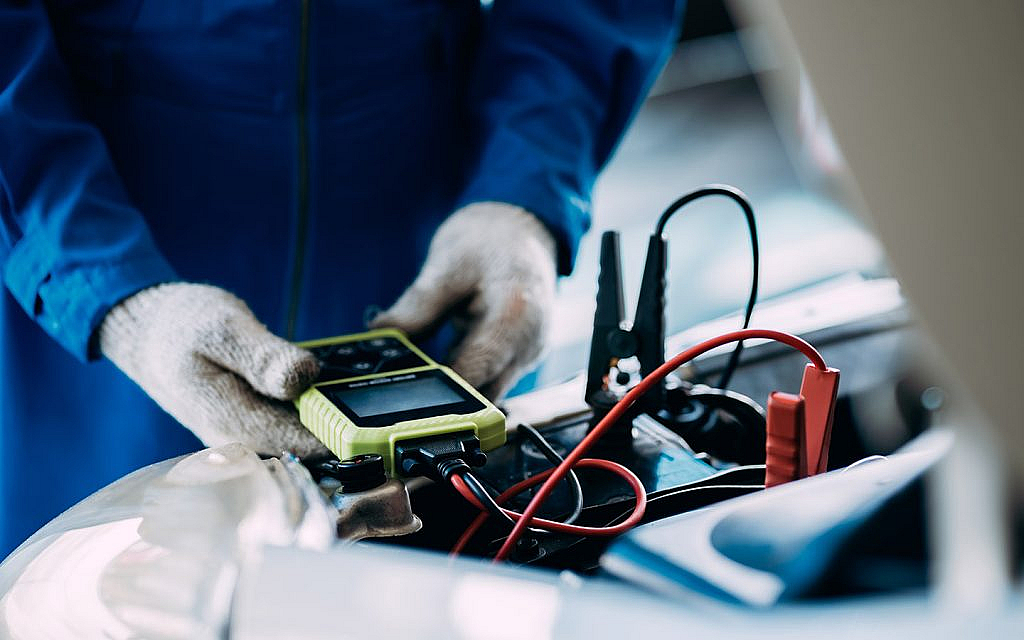
Voltage Check: A simple way to check your car battery’s performance is by using a voltmeter. A fully charged battery should read around 12.6 to 12.8 volts. Anything significantly lower might indicate a weak battery.

Load Test: This test assesses the battery’s ability to hold a charge under load. It involves using a specialised load tester. If the voltage drops below an acceptable level while the load is applied, it might be time to replace the car battery. 

Hydrometer Test (for Conventional Batteries): If you have a conventional battery with removable caps, a hydrometer can measure the specific gravity of the battery’s electrolyte. This helps determine its charge level and overall health.

You can also check the car battery’s performance with these tests.

Car Battery Testing Instructions

let’s go through some important car battery testing instructions
Following the car battery testing instructions is important for a number of reasons

Before starting the testing process, make sure you go through important car battery testing instructions. 

Safety First: Always prioritise safety. Wear protective eyewear and gloves. Work in a well-ventilated area when testing your car battery to avoid inhaling any fumes. Make sure the vehicle’s engine and ignition are turned off during the testing process.

Testing Tools: Gather the necessary tools, which usually include a digital multimeter or a dedicated battery tester. These tools help measure voltage, conductance and other battery parameters.

Voltage Check: Begin by measuring the battery voltage using a multimeter. 

Load Test: Perform a load test to assess the battery’s ability to deliver power under load. 

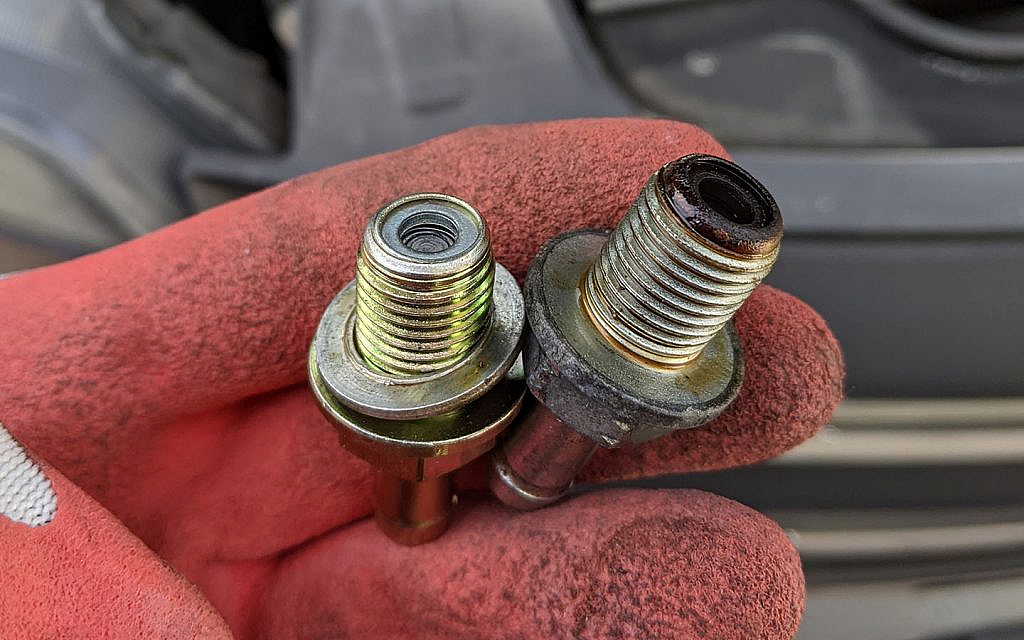
Electrolyte Inspection: For batteries with removable caps, check the electrolyte level. Make sure it covers the battery plates. If it’s low, add distilled water to the appropriate level. However, many modern batteries are maintenance-free, so this step might not apply.

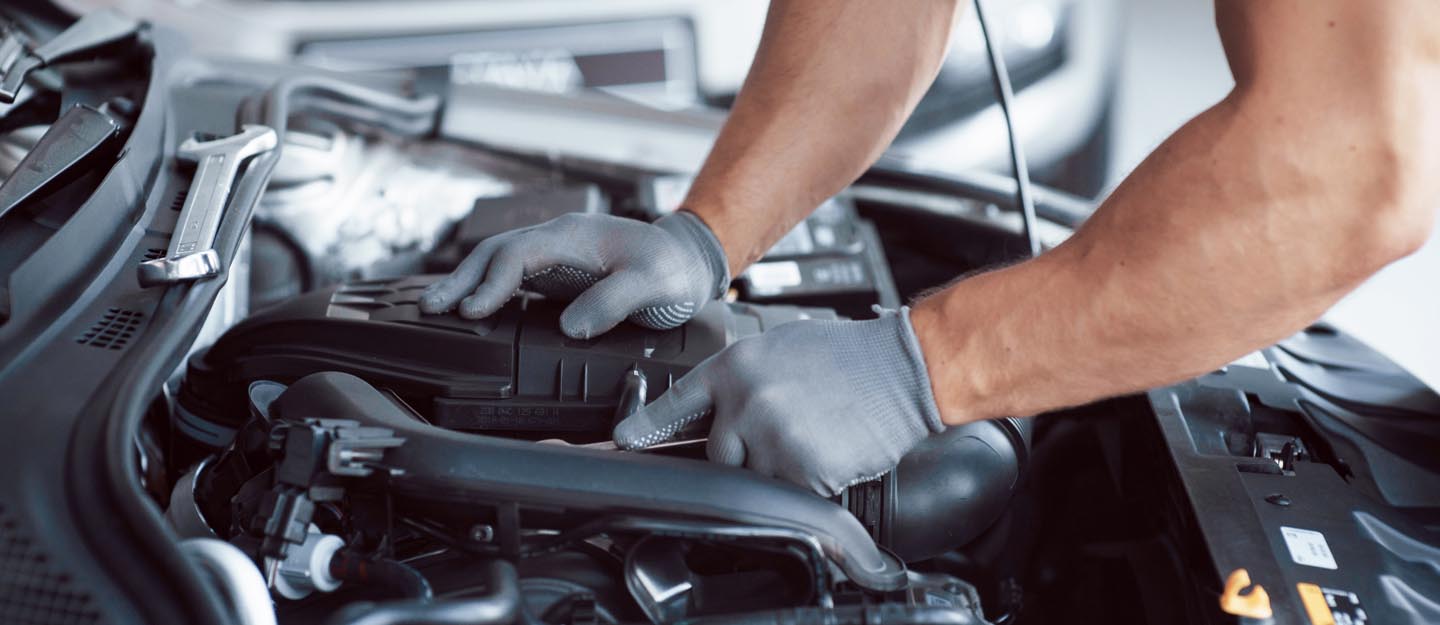
Terminal and Cable Inspection: Examine battery terminals and cables for corrosion, loose connections, or frayed wires. Clean terminals if necessary, ensuring a good connection. Here is a guide to cleaning corroded car battery terminals for better performance.

Charging System Test: A failing charging system can cause battery issues. Check the alternator’s voltage output using a multimeter. It should read around 13.8 to 14.4 volts when the engine is running. If your car battery is not charging, go through these common causes and fixes.

Battery Replacement: If the battery fails any of the tests or exhibits signs of weakness, it’s advisable to replace it. A battery with diminishing performance can lead to various electrical and starting problems. If you are looking to buy a replacement, go through this list of car batteries for sale in the UAE. 

Record Keeping: Keep a record of battery test results and maintenance activities. This helps track the battery’s health over time and assists in future maintenance decisions.

Regular Testing: Perform battery tests regularly, especially before extreme weather conditions or long trips. This proactive approach helps prevent unexpected breakdowns.

Professional Help: If you’re unsure about the testing process or encounter persistent issues, seek professional assistance from a mechanic or auto service centre. Here are some challenging car issues that should be dealt by professionals.

Car Battery Testing Tips 

Car battery testing tips help improve the car battery performance
Important car battery testing tips help prolong its life and overall performance

Inspect your car battery on a regular basis. Make it a habit to visually inspect your battery for any signs of corrosion, leaks, or damage. Catching these issues early can prevent more serious problems. Let’s go through some other important car battery testing tips.

Testing in Different Conditions: Test your car battery’s voltage when the engine is off and when it’s running. This can give you insights into the alternator’s performance as well.

Avoid Short Trips: Short trips don’t allow the battery to recharge fully. If you mostly drive short distances, consider using a battery maintainer to keep the battery charged.

Turn Off Electronics: Before turning off your engine, ensure all electronics are turned off. This prevents unnecessary strain on the battery during startup.

Keep Connections Clean: Corroded or loose connections can hamper the battery’s performance. Regularly clean and secure the battery terminals.

Consider Professional Testing: If you’re unsure about testing or notice consistent battery issues, consult a professional mechanic or auto parts store for a more comprehensive assessment.

FAQS

What is car battery testing?

Car battery testing involves the assessment of a vehicle’s battery to determine its current health, charge level and capacity to deliver power. Testing provides insights into the battery’s ability to start the engine, maintain electrical systems and its overall condition.

What are the three basic battery tests?

The three basic car battery tests include the voltage check, load test and hydrometer test for conventional car batteries.

That is all about car battery testing. Testing car batteries is a preventive measure that helps you avoid unexpected breakdowns. Regular testing and maintenance can extend the life of your battery and keep your vehicle running smoothly. 

Those planning to buy a used car in the UAE should inspect the car battery and alternator to determine if any repairs or replacements are necessary.

Stay tuned to UAE’s top auto blog for more on car battery solutions, DIYs, repair tips and much more.

Share
Tweet
Pin
Share

What are Self-parking Cars

self-parking cars

  • Types of Self-Parking Cars
  • Working
  • Pros and Cons
  • FAQs

Parking a vehicle can be a strenuous job for many drivers, especially when parallel parking. From measuring the distance to coordinating the mirror and gears, parking requires experience. To cater to this, automobile brands have launched self-parking or autonomous parking features. The self-parking feature autonomously parks the vehicle into the parking space without the driver’s input. That said, self-parking can reduce any potential chances of accidents during parking. 

Let’s take a closer look at self-parking cars, their working and their benefits in more detail.

Cars with Self-Park Technology

Self-parking technology is one of the most significant modern car safety features. The autonomous parking feature takes complete control of the vehicle and parks it accurately without human intervention. 

Discussed below is how self-parking cars work, but first let’s learn about the different types of self-parking cars. 

Types of Self-Parking Cars

Based on the level of automation, self-driving cars can be divided into three different categories.

Steering Assist

As evident from the name, the steering assists only controls the steering wheel while the driver has to change the gear. In steering assist, an alert illuminates on the instrument cluster that instructs drivers to lose control of steering and accelerate, reverse or apply brakes when needed. 

steering control in self-driving cars
In steering-assist cars, only the steering system works autonomously, the rest should be controlled by the driver

Parking and Exit Assist

The parking and exit assist is similar to that of the steering assist. The vehicle will autonomously control the steering and instruct drivers to park the car. Additionally, it guides drivers to safely exit the vehicle after parking to avoid any accident. 

Autonomous Parking

Autonomous parking is the most advanced version of self-parking cars, in which the vehicle is completely parked by the system without the driver’s instruction. The autonomous system takes complete control of the vehicle and parks in space accurately.  

How Self-Parking Work

The self-parking cars work in collaboration with a car computer and different car parking sensors. Drivers are only required to stop the vehicle next to a parking spot and turn on the autonomous parking feature. 

Once the feature is turned on, the car will automatically steer itself into the parking spot. However, after parking, the driver has to engage the parking brake and lock the vehicle.

Working of self-driving cars
The self-driving cars detect the parking space with the help of sensors and manicure in the parking spots autonomously

Pros and Cons of Self-Parking Cars

This was all about the function and different types of self-parking features. However, before you opt for self-parking cars on the basis of the above-mentioned information, let’s learn some pros and cons of driving a self-parking car. 

Pros

  • Self-park car technology reduces the stress of parallel parking, especially if you are a new driver.
  • Avoid any potential chances of scratching other cars or causing minor accidents while parking. 
  • Exempt drivers from the hassle of excessive gear shifting, accelerating and braking while parking.
  • The park and exit feature makes the parking process secure, avoiding accidents inside car parking facilities. 

Cons

  • The autonomous feature only works in ideal road conditions and will park vehicles if the spot is properly paved and free from bumps.
  • Extreme weather conditions such as heavy rainfall or dust storms can affect the efficiency of self-parking cars.
  • Cars with self-parking technology are unable to read the parking signs and may park the vehicle in a reserved parking spot such as parking for people of determination or electric cars. 

Self-parking Vs Park Assist Feature in Cars

The self-parking feature and park assist system are often confused with each other. The park assist system in cars is a type of self-parking feature, but it is not completely autonomous. The park assist feature might need some assistance from the driver to accurately park the vehicle. 

On the contrary, the self-parking feature is completely autonomous and can park a vehicle without the driver’s assistance. The level of autonomous parking depends on the automobile manufacturer and car model.

FAQs

Is Park Assist and Self Parking the same feature?

No, park assist only helps drivers when parking the vehicle normally. For instance: it will reverse the car or change the gear automatically. However, the self-parking cars can park themselves without the drivers’ assistance. 

Can cars park themselves without a driver?

Yes, modern vehicles are equipped with self-parking features, which allow vehicles to park automatically without human intervention. 

Can my SUV park itself?

Yes, if your SUV has a self-parking feature, it can park itself without your assistance.

Here we conclude our guide on self-parking cars, their types and function. The self-parking, whether it is park assist or fully autonomous parking, aids drivers in parking a vehicle conveniently. The vehicle’s ability to manoeuvre in the parking spot reduces any potential chances of accidents during parking. Therefore, if you are still driving your old car, it’s time to switch to a more advanced one with a self-parking feature. Browse through these used cars for sale in the UAE and choose the best self-parking cars for yourself as per your budget. 

Besides self-parking cars, there are other features that can help in parking like the Hyundai’s Crab Parking feature.

Stay tuned to dubizzle’s auto blog for more information on cars with self-parking technology.

Share
Tweet
Pin
Share

How to Calculate Your Car’s Mileage Correctly Using a Car Mileage Calculator

car mileage calculator helps in measuring the fuel efficiency

  • Importance of Calculating Car Mileage
  • Calculating Mileage with a Car Mileage Calculator
  • Factors Influencing Car Mileage
  • FAQ’s

Calculating your car’s mileage accurately is crucial for understanding its fuel efficiency and overall performance. With the help of a car mileage calculator, you can also easily determine how far your vehicle travels on a specific fuel level. Whether you’re concerned about cost savings, environmental impact or vehicle maintenance, using a car mileage calculator can provide valuable insights. 

Let’s delve into the definition of mileage and its importance. We will also provide a step-by-step car mileage calculator guide to help you in this regard.

Mileage: Definition and Meaning

Mileage refers to the distance your vehicle travels on a specific fuel level. Moreover, it is often expressed as “miles per gallon” (MPG) in the United States or “litres per 100 kilometres” (L/100km) in many other countries. 

Knowing your car’s mileage can give you insights into how economically your vehicle is performing, helping you save both money and the overall carbon footprints. Besides, using a car mileage calculator allows you to measure how efficiently your car converts fuel into distance travelled. 

Formula to Calculate the Car Mileage 

Let's find out How to calculate car mileage
Cost saving is one of the benefits of car fuel mileage calculator

The formula to calculate mileage is straightforward, for instance:

  • Mileage (MPG or L/100km) = (Total Distance Travelled) / (Total Fuel Consumed)
  • For MPG: Mileage (MPG) = (Odometer Reading at Refill 2 – Odometer Reading at Refill 1) / Fuel Added
  • For L/100km: Mileage (L/100km) = (Fuel Added / Total Distance Travelled) * 100

Why is it Important to Calculate the Mileage of Your Car?

Calculating your car’s mileage using a car mileage calculator offers several benefits:

Cost Savings

Understanding your car’s mileage helps you make informed decisions about your fuel-efficient driving habits and vehicle maintenance. It also improved fuel efficiency translates to reduced fuel expenses over time.

Environmental Impact

A fuel-efficient car emits fewer greenhouse gases and consumes fewer natural resources. It also contributes to a healthier environment.

Maintenance Awareness

Changes in mileage can indicate potential issues with your vehicle’s health. For instance, a sudden drop in mileage might point to problems that need attention. Hence, if you are buying a vehicle from a car auction in Dubai, then don’t forget to check its mileage.

Resale Value

Prospective buyers often consider a car’s mileage when making purchasing decisions. Moreover, a well-maintained, fuel-efficient vehicle typically holds better resale value.

How to Calculate the Mileage of Your Car Using a Car Mileage Calculator

You can easily calculate car mileage by using odometer
Start calculating car mileage by noting down the current odometer reading

Calculating the mileage of your car involves a straightforward process that requires some basic information and a few simple calculations. That said, here’s a step-by-step guide on how to calculate the mileage of your car accurately:

What You’ll Need

  • Full Fuel Tank: Start with a filled fuel tank to ensure accurate measurements.
  • Odometer Reading: Your vehicle’s odometer displays the total distance travelled by your car.

Step-by-Step Guide to Calculate Car Mileage

Record Initial Odometer Reading

Begin by noting down the current odometer reading. This reading also represents the total distance your car has travelled up to this point.

Drive Normally

Use your vehicle as you typically would, without making any drastic changes in your driving habits. This step also ensures that your mileage calculation reflects your regular driving patterns.

Refill the Tank

Once your fuel level has significantly decreased, refill the fuel tank to its maximum capacity. Make sure to note the exact amount of fuel added during this refill.

Record Final Odometer Reading

After refilling the tank, record the new odometer reading. Moreover, this reading represents the total distance your car has travelled after driving with the fuel from the second fill-up.

Calculate Total Distance Travelled

Determine the total distance your car travelled during this period by subtracting the initial odometer reading from the final odometer reading. Use either miles or kilometres, depending on your preference and the unit of measurement displayed on your odometer.

Calculate Fuel Consumed

Calculate the fuel consumed during this period by subtracting the fuel level after the second fill-up from the fuel level after the first fill-up. Make sure to use consistent units for fuel measurement (gallons, litres, etc.).

Calculate Mileage: Now you can calculate your car’s mileage using the formula appropriate for your region:

  1. For Miles Per Gallon (MPG): Mileage (MPG) = Total Distance Travelled / Fuel Consumed
  2. For Liters Per 100 Kilometers (L/100km): Mileage (L/100km) = (Fuel Consumed / Total Distance Travelled) * 100
  3. Interpret the Result: The calculated mileage value will tell you how many miles (or kilometres) your car can travel on a single unit of fuel. Hence, the higher the mileage value, the more fuel-efficient your vehicle is.

Remember that calculating mileage accurately requires consistent units of measurement (e.g., miles for distance and gallons for fuel) and accurate readings from your odometer and fuel gauge. Regularly calculating and monitoring your car’s mileage can help you make informed decisions about your driving habits, maintenance routines and overall vehicle efficiency.

Things that Affect Car’s Mileage 

Manual calculation helps verify the accuracy of odometer
Car maintenance can driving habits can affect the car’s mileage

Knowing your car’s mileage can give you insights into how economically your vehicle is performing, helping you save both money and the environment. Moreover, using a car mileage calculator allows you to measure how efficiently your car converts fuel into distance travelled. 

  • Driving Conditions: Factors such as traffic, weather and terrain can affect mileage. Also, observing mileage over various conditions helps build a more complete picture.
  • Maintenance: Regular maintenance ensures that the vehicle is operating at peak efficiency, which will be reflected in consistent mileage figures.
  • Technological Aids: Modern vehicles may have inbuilt systems to calculate mileage, but manual calculation helps verify the accuracy of these systems.
  • Vehicle Condition: Carrying excess weight in the vehicle or on roof racks increases the workload for the engine and reduces fuel efficiency. Also, poor automotive aerodynamic design, such as open windows at high speeds, can create drag and decrease mileage.
  • Fuel Quality: Using fuel with lower octane levels than recommended by the manufacturer can reduce efficiency. It is also one of the most effective ways to save a vehicle’s fuel.

FAQs

What is the best way to measure car mileage?

The best way to measure car mileage is:

  • Start with a full tank of fuel
  • Record the initial odometer reading
  • Drive normally
  • Refill the tank
  • Record the final odometer reading
  • Calculate the total distance travelled and fuel consumed

Now, use the formula to calculate mileage (MPG or L/100km). Be consistent in refuelling, avoid round numbers and consider multiple measurements for accuracy. Regular vehicle maintenance and varied driving conditions also play a role in accurate mileage measurement.

How do you know if your mileage is bad?

You can determine if your mileage is bad by comparing your car’s fuel efficiency to its manufacturer’s specifications or the average for its make and model. However, if you notice a significant decrease in miles per gallon (MPG) or an increase in fuel consumption, your mileage may be considered harmful.

How can I improve my car’s mileage?

Regular maintenance, proper tyre pressure, using recommended fuel and efficient driving habits can enhance mileage.

How often should I check my car’s mileage?

Regular monitoring, such as with every fill-up or monthly, allows you to spot significant changes, guiding maintenance and driving habits.

How do you calculate km per Litre?

To calculate kilometres per litre (km/L), gather the quantity of fuel in litres consumed since the last fill-up and the distance you covered during that period. Use the formula: fuel consumption in litres divided by the distance travelled, multiplied by 100, equals litres per 100 kilometres (L/100km). This calculator also quantifies your vehicle’s fuel efficiency over a specific distance.

Accurately calculating your car’s mileage is crucial to avoid used car scams. It also helps in gauging the vehicle’s fuel efficiency, environmental impact and overall health. Armed with this knowledge, you can make informed decisions about your driving habits, maintenance routines and even future vehicle purchases.

If you plan to buy a used car in the UAE, follow the simple steps outlined in this guide. You can also use the provided formulas to correctly calculate your car’s mileage. Besides, you can also check if the seller didn’t perform an odometer rollback to show the wrong mileage.

Moreover, those interested in buying fuel-efficient cars under budget can check out these top sedans to buy in the UAE. These cars come with great fuel economy and are available for under 100K AED.

Stay tuned to the dubizzle leading auto blog to get more knowledge on car maintenance.

Share
Tweet
Pin
Share

All About PCV Valve

PCV valve ventilation system

  • What is a PCV Valve in a Car
  • Symptoms of a Bad PCV Valve
  • How to Maintain PCV Valve
  • FAQs

Internal combustion engines are by far the most common type of engine used in vehicles. These engines burn fuel which generates heat energy. That said, the excessive heat energy and gases are flushed out from the engine through the exhaust system. However, a certain proportion of gases pass the exhaust system and enter different parts of the engine. This is when the Positive Crankcase Ventilation (PCV) valve comes into the picture. 

Let’s dive a little deeper into the purpose and significance of PCV valves in cars. 

What Is a PCV Valve in a Car

Crankcase is a car engine part responsible for holding engine oil. Therefore, the gases pass by the exhaust system and enter into the crankcase and mix with motor oil leading to multiple issues. For instance, the mixing of oil and gas inside an engine can create a slimy material known as engine sludge affecting the overall efficiency of an internal combustion engine. 

The gases gathered in the crankcase majorly comprised unburned fuel. That said, the PCV valve in the crankcase absorbs and recirculates these gases to be used in the combustion process again. In this manner, it not only prolongs the engine life but also reduces the carbon footprint of a vehicle.

The process was initially used in military vehicles and was later introduced in conventional cars during the 1960s. Considering its impact on emissions levels, the PCV valve has become a standard in all automobiles. 

Now that you are aware of what is a PCV valve on a car let’s move towards its functioning. 

PCV valve system in cars
The PCV valve in cars flushes out all the excessive gases deposited in the crankcase

PCV Valve Function

The PCV valve’s purpose is to emit excessive gases from the crankcase and reuse it in the combustion process. The valve absorbs all the gases deposited in the crankcase and redirects these gases to the air intake tract. The air intake tract is used to absorb fresh air from the environment for combustion.

The gases supplied by the PCV valve mix with the fresh air making a perfect combination for combustion. The PCV valve continued to recirculate the air till the engine kept running. 

Symptoms of a Bad PCV Valve

PCV valve malfunctioning does not directly impact driving, but it creates multiple underlying issues. Drivers might face issues like engine misfiring or oil leakage when the PCV valve malfunctions. 

Following are some common symptoms that will answer how to know if a PCV valve is bad. 

Hissing or Whistling Sound

The car engine will make a hissing or whistling sound when a PCV valve malfunctions. When gases are not flushed out, it creates excessive pressure inside the crankcase creating small cracks. In worst-case scenarios, it can result in a blown head gasket. When gases under high pressure are released from these cracks, it creates a hissing or whistling sound.   

Poor Fuel Economy

A bad PCV valve can disrupt the air-to-fuel ratio of an engine affecting the combustion process. Inadequate combustion requires more fuel and generates less energy leading to poor fuel efficiency. 

Aside from bad PCV valves, here are some other reasons for high fuel consumption that drivers must look for. 

Oil Leaks

The clogged valve restricts the cylinder’s blowback pressure stressing out the crankcase. After certain pressure, the crankcase leaks resulting in oil leakage from the engine. 

Smoke from Exhaust

When the PCV valve stops functioning, it causes oil leakage allowing it to enter the combustion chamber. The presence of oil in the combustion chamber can be recognised by black smoke from the exhaust. 

Engine Misfiring

Aside from the above-mentioned symptoms, in some cases, engine misfiring is also considered a symptom of a bad PCV valve. Modern vehicles can even illuminate engine check light warning driver regarding a potential flaw in the valve. 

How to Maintain PCV Valve

PCV valves, unlike other engine parts, do not have expiry or need to be changed after covering a certain distance. However, these valves are generally made from rubber or plastic and are prone to damage.

  • The first step in maintaining a PCV system is to inspect it physically. Check all the hoses, o-rings, grommets and fittings. In case any part is brittle or damaged, change it immediately. 
  • Some PCV valves have mesh filters that should be cleaned regularly. Generally, it should be cleaned after driving 30,000 to 80,000 kilometres. 
  • In case the filter is completely damaged or clogged, it’s recommended to replace it. You can replace it at home, but it is suggested to consult with a mechanic. 
old PCV valve should be replaced
Regular maintenance of the PCV valve is necessary to ensure its proper functioning

FAQs

What does a PCV valve do?

The PCV valve works as an exhaust system and flushes out all the excessive gases trapped inside the crankcase. These gases are reused by the vehicle for combustion. 

How much oil can a bad PCV valve burn?

A bad PCV valve does not burn the engine oil; rather, it causes leakage in the engine through which the oil seeps out. The amount of oil seepage depends on the size of the leakage and damage.

How often to replace the PCV valve?

The replacement of PCV valves varies from vehicle to vehicle. However, ideally, it should be replaced after every 80,000 km.

This was all about the PCV valve, its working and its significance in a vehicle. Internal combustion engines are dependent on multiple smaller components to function properly. Therefore, the malfunctioning of even a smaller auto part can affect overall performance. That said, when buying a used car for sale in the UAE, make sure it has a well-maintained and properly functioning combustion engine. 

Besides, if your current vehicle engine is causing trouble, read through our blog on whether it is better to repair or replace the engine and make your decision.

Stay tuned to dubizzle’s auto blog for more information on PCV valve oil consumption.

Share
Tweet
Pin
Share

How to Wash a Car with Vinyl Wrap

all about vinyl wrapped car wash

  • Tools for washing a vinyl wrapper car
  • Steps to wash a vinyl wrapped car
  • FAQs

A vehicle wrap serves as a safeguard for the vehicle’s paint. Nonetheless, it shouldn’t be installed and then neglected. Similar to how you tend to your car’s paint, and ensure its cleanliness as part of regular maintenance, taking care of a vinyl car wrap is equally vital. In order to elongate the wrap’s lifespan and maintain its aesthetic appeal, it’s essential to frequently cleanse the wrap and minimise its exposure to potential contaminants. The vinyl wrapped car wash practice helps safeguard its integrity and prevents vibrant colours from fading. Let’s delve into the details. 

Tools Needed to Wash a Vinyl Wrapped Car

Gather all necessary tools before washing a vinyl wrapped car
Keep all the necessary tools in one place before washing a vinyl wrapped car

Before starting with the vinyl wrapped car wash process, gather all the important tools and materials required. These include:

  • Car wash soap – follow the car manual or detailer’s choice of car wash soap for better results
  • Washcloths – you can use clothes or sponges to wash the car
  • Microfiber towels – these are ideal for drying the vehicle after it’s been washed 
  • Squeegee – this helps for quick drying
  • Pressure washer – this is necessary to clean dirty cars

How to Wash a Vinyl Wrapped Car

Washing a vinyl wrapped car requires special attention
Important steps have to be followed to wash a vinyl wrapped car

Vinyl car wraps protect the car’s exterior from outside pollutants such as dirt, grime, dust, sand, tree sap and bird droppings, among other things. It also protects the car’s exterior from UV sun rays and rain. This is why several people get their cars vinyl wrapped. However, the wraps also require maintenance and care. Here is a guide on vinyl car wrapping. Let’s go through the important steps to wash a vehicle with vinyl wrap. 

Gather all the supplies: Collect all the important tools and materials mentioned above before washing a vinyl wrapped car. Here are some important

Rinse the Car: Start by rinsing the car with a hose or low-pressure washer to get rid of loose dirt and debris from the car’s surface.

Prepare Soapy Water: Add soap to a bucket of water to form a soap-water mixture. Avoid using harsh detergents that can damage the vinyl car wrap.

Wash the Car: Dip the microfiber cloth or sponge into the water bucket and wash the car’s surface gently. Start from the top and work your way down. Use light-pressure water and avoid excessive scrubbing as it can damage the vinyl wrap. Here is a guide to cash wash in Dubai. Moreover, if you want to get your car washed by a professional, go through these car wash services in the UAE.

Rinse: Rinse the car with another bucket of clean water. Also, rinse the microfiber cloth or sponge used to clean the vehicle. This helps prevent dirt from sticking back onto the car’s surface. Then rinse the car thoroughly with the hose or pressure washer.  

After the vinyl wrapped car wash process is done dry the vehicle
Use a microfiber cloth or towel to dry the car after rinsing it

Drying: After rinsing, gently dry the car with a dry microfiber cloth, towel or a soft chamois.

Vinyl Wrap Cleaner: Though this is an optional step, you can always use a specialised vinyl wrap cleaner for better results. Follow the car manufacturer’s instructions and ensure the wrap cleaner goes with the vinyl wrap.

Vinyl Protection: Vinyl wraps not only make your car look expensive but they protect its exterior. As for vinyl protection, this is again another optional step but it helps enhance the vinyl’s appearance and protects it from UV rays. Follow the instructions carefully to make sure the protection goes with the type of vinyl used to wrap your car.

Regular Maintenance: Remember just like your car cleanliness and maintenance, the maintenance of vinyl wraps is also necessary to keep it clean and elongate its lifespan to maintain your car’s vibrant appearance. Here are some expert car cleaning tips.

If your car does not have a wrap and you are planning to get it wrapped, go through this list of car body wrap services in Dubai. Moreover, here are the details for cost of vinyl car wrap in Dubai.

FAQS

How to Wash a Wrapped Car?

A wrapped car can be easily washed with a mild soap and water solution. Always hand wash a vinyl wrapped car with a gentle solution. Auto washing can damage the wrap. Much like the vinyl on your kitchen frying pan that comes off when scrubbed too hard, a car’s vinyl wrap also tends to fade sooner if big brushes or huge cloths for automated car washes are used.

How Often Should a Vinyl-Wrapped Car Be Washed?

The vinyl on your car serves as a shield against various forms of contaminants, whether they originate from nature or are human-made. Nevertheless, it’s crucial to uphold a regular cleaning routine, just as you would for a car without a vinyl wrap. Allowing contaminants to linger on the vinyl for an extended duration can potentially adversely affect its visual appeal and, in more severe cases, lead to vinyl scratching. Such damage can create openings for both moisture and contaminants to permeate the surface.

For How Long Can You Use Soap and Water on Vinyl Wrap?

Rinse off the water and soap cleaning solution promptly. Leaving it on for a long time can lead to soaking and standing. Extended exposure might loosen the underlying adhesive.

That is all about washing a car with a vinyl wrap. Besides, if your car’s appearance is fine but the car has mechanical errors that are expensive, we advise you to change your car. Here is a list of used cars for sale in the UAE. Go through them and have your pick according to preference. 

Stay tuned to UAE’s top auto blog for more on car DIY solutions, car repair tips and much more.

Share
Tweet
Pin
Share

Important Guidelines to Buff a Car

all about car battery testing

Buffing a car is a way of showing appreciation for your vehicle. In addition to car maintenance and its overall cleanliness, car buffing gives your vehicle a sleek, radiant and shiny look. The process rejuvenates your car’s appearance by eliminating the wear and tear it accumulates over the changing seasons. Over time, cars gather dirt and debris that eventually impacts the car paint. Nevertheless, buffing a car takes care of this problem. 

How to Buff Your Car 

Buffing a car goes beyond cosmetic appeal. It plays an important role to maintain the condition and value of the vehicle. Let’s go through some important tips for car buffing. 

Wash Your Car

Washing is necessary before buffing a car
Wash your car thoroughly before buffing it

Park your vehicle in a shaded area, ensuring that the car’s surface is cool. This action prevents the formation of soap stains on the car’s exterior. Subsequently, position the mix of soap and water solution in a gallon-sized bucket. For better outcomes, use car wash-specific soaps. Go through the instructions on the soap’s packaging to determine the appropriate amount of soap to dispense. Then, immerse a sizable sponge in the soapy water.

Retrieve the sponge from the water-filled container, gently squeezing out around fifty percent of the excess liquid. Place the sponge onto the car’s surface, initiating the washing process. 

Move the sponge in circular motions, encompassing the entire car body. Take special care to address recesses and gaps where dirt might be lodged. Begin from the uppermost part of the car and gradually progress downward. Once the vehicle has been cleaned thoroughly, rinse off the soap remnants with a hose. Here is a guide to car wash in Dubai.

Choose a Buffer

choose a buffer for buffing car scratches
Choose an appropriate buffer to buff your car

A high-speed buffer yields optimal outcomes by eradicating surface imperfections and buffing car scratches, resulting in a brilliant shine. That said, mastering its usage requires training. Improper application can lead to permanent damage, like swirls and scratches that strip the paint.

For impressive results with minimal effort, a random orbital buffer is an option. It offers a pleasing sheen and doesn’t demand training. While it may not eliminate all damage, it delivers a great shine. Additionally, it uses less compound, making it cost-effective. Nonetheless, the results might not be as durable as those with a high-speed buffer.

Then, manual buffing is also a cost-effective choice, albeit the most labour-intensive, providing comparatively fewer effective results. It’s time-consuming and might yield an uneven finish with shorter-lasting results compared to other methods.

After selecting a buffer, acquire a polishing or compound product suited to your car’s needs. Compound addresses deep scratch repair and helps restore faded car paint. On the other hand, polish enhances existing paint. Besides, a DIY car paint correction also helps improve the paint.

Tailor your choice to the car’s make, model and condition. Both products can be used with the buffer. Seek product recommendations from trusted sources like friends or reputable car enthusiasts.

Apply Polish to the Buffing Pad

When using a fresh pad, spritz a small amount of detailer on it before putting on the polish. Add some lubrication and dispense four small portions of polish, akin to the size of peas, onto the pad. Ensure that you shake the polish bottle adequately before application.

The easiest approach for polishing your vehicle entails working in segments. Set up a space that measures two by two feet. Before buffing a car, gently press the pad onto the section you’re about to treat. Subsequently, switch the buffer to its lowest setting and delicately spread the polish across the designated region. 

At this stage, your goal isn’t to buff the car’s exterior; instead, you’re merely spreading a thin layer of polish.

Start Buffing 

Buff your car to remove the imperfections on the vehicle
Carefully start buffing your car to give it a shiny new look

Following the application of the spread polish to the designated area, it’s time to engage in buffing. If an orbital buffer is in use, adjust the power setting to five or six. Gently press down on the buffer’s top with your hand while operating it. Proceed to move across the section using horizontal lines that overlap by 50%. Subsequently, repeat this motion in a vertical direction.

Upon completing both vertical and horizontal buffing, consider this a single pass. After executing three to four passes on the same area, your task is accomplished. On average, each area requires three to four minutes for completion. 

Avoid exerting excessive pressure on the buffer. As you buff, you’ll notice the polish taking on a chalky appearance—let this transformation signify that the polish is effectively performing the work.

Wipe it Down

After buffing a car is done wipe it down
Wipe down the vehicle with a microfibre cloth to remove the polish remnants

After the process of buffing a car is complete, some remnants of the polish might remain, but there’s no need for concern. Use a microfibre cloth to eliminate the residue by gently rubbing it away using either circular motions or straight vertical lines. Using a microfibre cloth is among the important tips for car cleaning.

Change or Clean Pads

If you want to buff a car weekly keep changing the pads
Change the buffing pads every month if you plan to buff your car every week

For those aiming to maintain their vehicle’s polish, it’s advisable to replace buffing pads every few months. However, irrespective of a pad’s age, it’s necessary to clean it after finishing each section or two.

A straightforward approach to cleaning the pad involves setting the buffer to a moderately low setting and brushing it with a toothbrush that has soft bristles. You’ll recognize the effectiveness of this process as you observe accumulated debris vanishing.

FAQS

What kind of soap should be used to wash a car before buffing it?

A mild soap should be used to wash the car exterior before buffing it. For better results, use a car wash-specific soap. Go through the instructions on the soap’s packaging to determine the appropriate amount of to dispense.

What should be done after car buffing?

After buffing the car use a micro fiber cloth to wipe down the car exterior.

That is all about car buffing – not only does the process improve the car’s cosmetic appeal it also removes imperfections, protects the vehicle from oxidation, preserves the pain integrity and enhances its therapeutic and resale value. If you wish to get car buffing from a professional, visit these car detailing service companies in Dubai.

If your vehicle is facing significant problems beyond just paint damage, leading to repair and upkeep expenses that surpass your budget, it’s recommended to consider purchasing a different car. Take a look at the selection of pre-owned cars for sale in the UAE and choose the one that suits your preferences.

Stay tuned to dubizzle’s auto blog for more on car maintenance solutions, repair tips and much more. 

Share
Tweet
Pin
Share

Alternator Overcharging: Symptoms, Causes and Fixes

alternator overcharging

An alternator is a crucial part of a car battery. It converts chemical energy into electrical energy for a car’s running. It also powers other car components and accessories. However, at times, an alternator can become overcharged and malfunction. It occurs due to numerous reasons. That said, we have compiled a list of different causes of alternator overcharging and how to fix it. 

But first, we will go through the symptoms to help identify this problem in car alternators. 

ALTERNATOR OVERCHARGING SYMPTOMS 

An alternator overcharging means it generates more than the required voltage. A 13.5 or 14.4-volt output is a standard for alternators. At times, some car parts malfunction, indicating such problems. It is easy to confuse these symptoms with a bad car battery or an alternator. To clear up this uncertainty, let’s go through the common symptoms of an overcharging alternator.  

Flickering Dashboard Lights or Headlights

One might notice flickering headlights or dashboard lights due to excessive power output. It happens when the alternator pumps more charge, making the lights too bright and then back to normal. 

alternator overcharging symptoms such as flickering headlights
Flickering headlights and a shortened bulb life are among the top symptoms

Shortened Bulb Life

An overcharging alternator affects car electronics. Since there is too much power supplied to electric components, it puts an increased strain on the components. As a result, they wear out faster. Car bulbs have a different average life span, depending on their type. These include:

  • Halogen: 450 to 1,000 hours
  • HID: 6,000 to 24,000 hours
  • LED: 30,000 to 50,000 hours

High Voltage Readings

Another sign of alternator overcharging is high voltage readings. A voltage reading above 14.5 volts on the vehicle’s voltmeter or dashboard gauge indicates overcharging. When voltage ratings are unbalanced, they also create an open loop fault in cars.

Strange Smells

Overcharging leads to excessive heat in the alternator. As a result, a burning smell emanates from the engine compartment. It indicates the formation of hydrogen sulphide gas and that battery is no longer safe to use. 

Battery Damage

Over time, an overcharging alternator damages the vehicle’s battery. Excessive voltage causes the battery to overheat, dry out and have a reduced lifespan. It also causes the battery to corrode and one might notice a bulge in the battery. This will also lead to the car battery not charging.

symptoms of an Overcharging Alternator like corroded battery
A corroded or bulging battery indicates overcharging in the alternator

Battery Warning Light

Many modern vehicles have a car battery warning light on the dashboard. If this light is illuminated while driving, it could indicate an issue with the charging system, including potential overcharging.

How to Test an Overcharging Alternator? 

It is important to confirm that the alternator is indeed the problem if the car shows the above-mentioned symptoms. Therefore, here are the steps on how to test an overcharging alternator:

  • Disconnect the battery cables to prevent any sparks from occurring while testing the alternator.
  • Set the multimeter to DC voltage with a range set to 20 volts or more.
  • Touch the red probe of the multimeter to the positive battery terminal.
  • Touch the black probe of the multimeter to the negative battery terminal.
  • Start the engine and let it run for a few minutes.
  • The multimeter should read between 14.2 and 14.7 volts. If the reading is higher than 14.7 volts, then the alternator is overcharging.
  • Turn on the headlights and other electrical accessories. The multimeter reading should not change significantly. If the reading does change, then there may be a problem with the alternator or the electrical system.
  • Turn off the engine and reconnect the battery cables.

ALTERNATOR OVERCHARGING CAUSES

Now we are aware of the common symptoms of alternator overcharging which lead to different issues such as a car dying while driving. Let’s learn the common causes.

alternator overcharging causes such as faulty regulator and wiring
An alternator may get overcharged due to multiple reasons

Voltage Regulator Malfunction

The voltage regulator is a critical component of the charging system in a car. It regulates the output voltage of the alternator to power the vehicle’s electrical systems within the required range. If the voltage regulator fails, it can cause the alternator to generate excessive voltage, leading to overcharging of the battery. This results in damage to the car battery and other electrical components.

Wiring Issues

The connection between the alternator and the battery is crucial for the proper functioning of the charging system. If the connections are loose or corroded, it creates a resistance in the circuit, causing voltage fluctuations. These fluctuations cause the alternator to produce higher voltage levels than necessary, resulting in overcharging. 

Faulty Engine Control Module (ECM)

The Engine Control Module (ECM) controls various aspects of the vehicle’s electrical system, including the alternator. It might malfunction or send incorrect signals to the alternator. As a result, a faulty ECM causes overcharging.

Problems With the Car’s Electrical System

The alternator’s voltage output is influenced by the demand from the vehicle’s electrical system. If there’s a malfunction or excessive demand from various components like car headlights, it causes the alternator to produce more voltage than required.

Short Circuit in the Alternator 

A short circuit within the alternator’s internal components can disrupt the normal flow of electrical current. It also causes irregular voltage output leading to damage in car computers. If certain parts of the alternator become short-circuited, it leads to overcharging of the battery. Moreover, short circuits can occur due to wear and tear, manufacturing defects, or damage caused by external factors.

Bad Alternator Bearing

The alternator contains various internal components, including bearings that allow the rotor to spin smoothly. If one of these bearings goes bad, it causes the alternator to spin irregularly or produce excessive friction. This leads to alternator overcharging. In addition, a failing bearing might produce unusual grinding or whining sounds.

alternator overcharging causes such as bad bearing
A bad bearing causes the alternator to generate more charge than required

ALTERNATOR OVERCHARGING FIXES

There are two practical ways to fix an overcharging alternator. They include the following methods. 

Replace the Voltage Regulator

Here’s how you can do so. 

  • Begin by disconnecting the negative (black) cable from the battery to ensure safety and prevent any electrical mishaps.
  • The voltage regulator is usually located on the alternator itself. It might appear as a small box attached to the back of the alternator. In some cases, especially in older vehicles, the voltage regulator is a separate component mounted elsewhere in the car.
  • Use the appropriate car mechanical tools to carefully remove the screws or bolts holding the voltage regulator in place.
  • Ensure that the new voltage regulator is the correct type for the car’s make and model. Align the new regulator with the mounting holes and secure it in place using the screws or bolts removed earlier.
  • Reattach the negative (black) battery cable to its terminal. This will complete the replacement process.
alternator overcharging fixes by replacing the components
Replace the regulator or the alternator itself to resolve the issue

Replace the Alternator 

If the regulator is a functioning problem, then the problem lies within the alternator. Here’s how to replace an alternator with these steps. 

  • As with the voltage regulator replacement, start by disconnecting the negative (black) cable from the battery.
  • Locate the alternator in the vehicle’s engine bay. One or more bolts are securing it in place. Using the appropriate tools, carefully remove these bolts and set them aside.
  • The alternator is connected to the electrical system through a series of wires. Disconnect these wires, making sure to note their locations for reconnection.
  • With the mounting bolts and wiring disconnected, remove the old alternator from its position.
  • Position the new alternator in the same orientation as the old one and secure it with the previously removed mounting bolts.
  • Reconnect the wires to the new alternator in the same locations from which they were removed earlier.
  • Tighten the mounting bolts to the manufacturer’s recommended torque specifications. This ensures that the alternator is properly secured in place.
  • Finally, reattach the negative battery cable to its terminal.

Apart from the above-mentioned methods, it is suggested to seek professional advice. Also, always refer to the vehicle’s repair manual for specific instructions and safety precautions. Regular maintenance of the car battery, alternator and electrical system also helps prevent issues like overcharging.

FAQs

What causes an alternator to overcharge?

Alternator overcharging is caused due to multiple reasons. These include wiring issues, bad alternator bearing, faulty ECM and issues in the voltage regulator. 

How to fix an alternator overcharging?

An overcharged alternator can only be replaced with a new one. If the voltage regulator is the issue, it must be replaced. 

Is 15 or 17 volts too high for an alternator? 

The normal voltmeter reading for an alternator is between 13.5-14.5 volts. If it exceeds the limit, then there is a problem with the alternator and it is generating charge more than required. 

All in all, these were the symptoms and causes of alternator overcharging. We have also provided common fixes to solve the issue. Therefore, if you find such issues persistent in your car, it is time for a change. Go through these used cars for sale in the UAE for budget-friendly options.  

Stay connected to dubizzle’s cars blog to learn more about different car components and their functions. 

Share
Tweet
Pin
Share

Projector Vs Reflector Headlights: Which Is Better?

Explore the differences between projector vs reflector headlights

When it comes to automotive lighting technology, headlights play a crucial role in ensuring driver safety and enhancing the overall driving experience. Over the years, two primary car headlight types have dominated the market: projector headlights and reflector headlights. Both have their unique advantages and disadvantages, but which one is better? Following we will delve into the intricacies of projector vs reflector headlights to help you make an informed decision.

However, before that, you must understand the difference between projector vs reflector headlights, how they work and their basic components.

Understanding Projector Headlights

Projector headlights produce a sharp and well-defined beam
Projector headlights allow for creative design options

You can find different types of car headlights that can help you with safe driving. However, projector headlights are a more modern and advanced form of automotive lighting. They are also characterised by their distinct design, featuring a lens system that focuses and directs the light beam. The basic components of a projector headlight include:

  • Bulb: The light source, typically a halogen, HID (High-Intensity Discharge), or LED bulb, emits the light that will be directed by the projector assembly.
  • Reflector: This component gathers and focuses the light emitted by the bulb onto a specific point.
  • Lens: The lens is a key element of the projector assembly. It works to further focus and shape the light emitted by the bulb and reflector, allowing for precise light distribution on the road.
  • Cutoff Shield: One of the defining features of projector headlights is the presence of a cutoff shield. This shield helps create a distinct cutoff line in the light beam, preventing excessive glare for oncoming drivers. This feature also enhances safety by reducing the risk of blinding other motorists.

How Projector Headlights Work

When the bulb emits light, the reflector gathers and focuses this light towards the lens. The lens then refracts and focuses the light even further, allowing for better control over the light beam’s shape and direction. Moreover, the inclusion of a cutoff shield ensures that the light is directed downwards and prevents it from shining too high, reducing glare for oncoming traffic.

Advantages of Projector Headlights

Knowing the advantages and importance of car headlights in the UAE is important for a safer driving experience. This is why, we have compiled some advantages of projector headlights used in a vehicle.

Precise Light Distribution

Projectors offer more focused and controlled dim headlights in cars. The use of a cutoff shield ensures that the light is directed downward and prevents glare to oncoming traffic, improving overall safety.

Enhanced Visibility

One of the common differences between projector vs reflector headlights is that projector headlights produce a sharp and well-defined beam pattern that helps drivers see the road ahead more clearly, especially in adverse weather conditions. Besides, auto levelling headlights also serve the purpose and adjust automatically considering the driving conditions. Here is some more to explore about auto-levelling headlights.

Customisation

Projector headlights allow for creative design options, such as different lens shapes and unique light signatures, providing an opportunity to personalise the appearance of your vehicle. However, the degradation of car headlights can make your car look expensive and give it a new look.

Improved Aesthetics

The sleek and modern look of projector headlights adds a touch of sophistication to the vehicle’s front end.

Disadvantages of Projector Headlights

Projector headlights are generally more expensive to manufacture
Projector headlights are more expensive and complex to install

Some of the common cons of using a projector headlight in your vehicle could be:

Complex Installation

Retrofitting projector headlights into a vehicle that originally came with reflector headlights can be complex and may require modifications to the headlight housing.

Higher Cost

Projector headlights are generally more expensive to manufacture and replace, which can lead to higher maintenance costs.

Understanding Reflector Headlights

Reflector headlights are a traditional type of automotive lighting technology that has been used for many years in vehicles. They operate using a simpler optical system compared to projector headlights. Besides, in reflector headlights, the primary focus is on reflecting and scattering light in a way that provides illumination for the road ahead.

The main components of a reflector headlight include:

  • Bulb: Similar to projector headlights, a light source such as a halogen, HID (High-Intensity Discharge), or LED bulb is used to emit light.
  • Reflector Housing: The reflective housing is a bowl-like structure that surrounds the bulb. Its inner surface is designed to scatter and reflect the emitted light in various directions.

How Reflector Headlights Work

When the bulb emits light, the reflector housing is strategically shaped to direct the light outward and onto the road. The shape and contour of the reflector cause the light to bounce off its surfaces, creating a scattered light pattern that illuminates the surrounding area.

Advantages of Reflector Headlights

Reflector headlights often produce a less focused and more scattered light beam
Reflector headlights are more durable and cost-effective

The advantages of reflector headlights include:

Simplicity

Reflector headlights have a simpler design and are generally easier to manufacture and install.

Wider Availability

Many older vehicles are equipped with reflector headlights, making replacement parts more readily available.

Durability

The design of reflector headlights can often make them more durable and less susceptible to damage.

Cost-Effectiveness

Due to their simpler construction, reflector headlights are generally more cost-effective to produce and replace.

Disadvantages of Reflector Headlights

The disadvantages of reflector headlights are: 

Less Precise Light Distribution

Reflector headlights often produce a less focused and more scattered light beam, which can lead to uneven illumination and glare for oncoming drivers.

Reduced Visibility

The light output from reflector headlights may not be as sharp and defined as that of projector headlights, potentially impacting nighttime visibility. Moreover, here are some night time driving safety tips to help make your driving experience secure. 

Limited Customisation

Reflector headlights offer fewer options for creative design and personalisation compared to projector headlights.

Comparison Between Projector and Reflector Headlights

The answer to this question depends on your priorities and preferences. If safety, visibility and a modern aesthetic are your primary concerns, projector headlights are likely the better choice. Also, their precise light distribution and reduced glare make for a safer driving experience, especially during nighttime and adverse weather conditions.

On the other hand, if cost-effectiveness and simplicity are your main considerations, reflector headlights might be more suitable. Besides, they are a practical choice for many older vehicles and can provide adequate illumination for daily driving. If you are planning to buy new car headlights for your vehicle, then check car headlights for sale in the UAE.

Ultimately, the choice between projector or reflector headlights boils down to your individual needs and the specific requirements of your vehicle. Also. if you’re looking to upgrade your car lights, consider consulting with automotive experts or professionals to determine the best option for your situation. Besides, you can also learn how to adjust headlights for safe driving and better visibility.

That said, with this, we end all about projector vs reflector headlights. Both projector and reflector headlights have their merits and drawbacks. However, prioritising safety, aesthetics, or budget for your used car in the UAE requires understanding the differences between projector and reflector headlights. This knowledge also empowers you to choose wisely based on your driving preferences and requirements.

Moreover, if your current headlights need restoration only, here is how you can restore car headlights and make them shine like a new one.

Stay updated with the dubizzle’s auto blog to know more about car headlights and other parts.

Share
Tweet
Pin
Share

Keep It Clean: How and When to Sanitise Car Interior

all about car interior sanitising

Car interior sanitising is important for a clean and safe environment for your vehicle. Not only does this maintain a tidy look but also makes sure the vehicle is hygienic, preventing drivers and passengers from various illnesses and outbreaks of germs. Let’s go through the details on how and when to sanitise your car interior. 

How to Sanitise Your Car’s Interior

Sanitising car seat is an important part of car interior sanitising
Avoid using abrasive objects when sanitising the car interior

While vacuuming dirt and wiping dust from hard surfaces can give the appearance of a clean vehicle, eliminating bacteria, viruses, and other unseen germs requires additional effort. Here are some useful ways to sanitise the car interior. 

Gather Supplies

Before you start car interior sanitising, gather all the necessary supplies including disinfectant wipes, alcohol-based sprays, microfibre cloths and gloves. Make sure to use suitable products for cleaning car interiors that won’t damage the surfaces. Here is a list of important car interior cleaning products.

Ventilate the Car

roll down the windows before your car interior sanitise
Before starting the car interior sanitising process open the car windows or doors for proper ventilation

Roll down the windows or open the car doors before you start sanitising the car. This ensures proper ventilation with fresh air to circulate.

Clear the Car

Bacteria and viruses grow where there is warmth, a food source or moisture. Remove food particles, clutter and personal items from the car. This makes it easy to clean and disinfect all car interior surfaces. Here is how to clean the car interior roof. As for the dashboard, go through these important ways to clean car dashboard.

Start with High-Touch Areas

start with car interior sanitising with the high-touch areas
Sanitise and disinfect the high-touch areas of the car’s interior regularly

Prioritise sanitising high-touch surfaces. These include door handles, steering wheel, gear shift, buttons, touchscreen, seat belts, rearview mirror, sun visor and any other frequently touched areas. High-touch areas should be disinfected on a regular basis. The frequency depends on your car’s usage. Here are some efficient ways to disinfect a car.

If you drive a car all by yourself, consider sanitising it every two weeks for car interior protection. Those with families should consider car interior sanitising on a weekly or daily basis. Moreover, here is how to clear the car sun visor.

Clean Upholstery and Surfaces

Clean the car upholstery and surfaces using appropriate cleaning agents. These include cleaning agents for leather, fabric, plastic, and glass. Wipe down seats, armrests, dashboard, console, and other interior parts. 

Pay Attention to Nooks and Crannies

Don’t forget to clean hard-to-reach areas like between seats, air vents and cup holders. Here are some important ways to disinfect your car.

Sanitise Child Car Seats

In addition to normal seats make sure to clean and sanitise child car seats regularly. Here is how to clean car seats without leaving water spots.

Allow Drying Time

Once done with the car interior sanitising process, give the surfaces some time to dry. This step is especially important if you use a liquid disinfectant.

Wash Your Hands

wash your hands after sanitising the car interior
Wash your hands after sanitising the car’s interior

After the car interior sanitising process is done, wash your hands thoroughly with soap and water or use hand sanitiser. It is also important to keep a car hand sanitiser. 

When to Sanitise Car Interior

The frequency of car interior sanitising depends on vehicle use
The more you and your family use a car, the more it should be sanitised

The frequency of car interior sanitising and car interior detailing depends on the vehicle’s use and its exposure to external elements. That said, it is recommended to sanitise your car interior at least once a week. This frequency can be enhanced if you frequently transport passengers or after visiting crowded places.

It is also advisable to sanitise the car interior more frequently during flu season when you or your passengers are unwell or if you have been in contact with potentially contaminated surfaces.

Most people who have a personal conveyance, spend several hours of their day in their car when commuting to work or school. This makes it important for the car to be well-organised and neat. Apart from car interior cleaning, here are some useful car cleaning tips that will help keep your vehicle tidy inside out.

Whether you want to buy a used car for sale in the UAE or prefer a brand-new vehicle, it is necessary to keep the vehicle’s interior clean and sanitised to avoid illnesses. 

Stay tuned to dubizzle auto blog for more on car cleaning solutions, repair tips and much more. 

Share
Tweet
Pin
Share

What RPM Should a Car Idle At? And Why Does It Matter?

what rpm should a car idle at

Car idling refers to a stationary position when the engine’s running without any load applied to it. When a car idles, the engine speed must be in the optimal range, i.e. 600 to 900 RPMs. However, if it’s higher or lower than the manufacturer’s recommended range, you may encounter a crucial problem. What RPM should a car idle at? How does it impact engine performance?

Let’s learn more about the ideal RPM when a car idles and what are the causes behind lower or higher engine speeds.

WHAT RPM SHOULD MY CAR IDLE AT?

idle rpm of car is 600 to 900 revs
Idle RPM refers to the engine speed when the car engine is running but not under any load

The ideal idle RPM value is specific to each car’s make and model. It depends on various factors, including engine design, fuel type and environmental conditions. Although the normal RPM of an idle car ranges from 600 to 900 revolutions per minute, some engine problems can be a reason behind RPM fluctuations while driving or idling.

When the RPM falls out of range, it can be concerning for drivers. Commonly, an engine revs higher when warming, but if the RPM is higher after the engine temperature is normal, it might be a crucial problem.

Let’s learn about the vehicle RPM before diving into what RPM should a car idle at.

WHAT IS A CAR RPM?

RPM stands for Revolutions Per Minute. It refers to the number of times the engine’s crankshaft completes one full rotation in a minute. The RPM is an essential parameter to monitor the engine’s speed. Also, it helps drivers determine the appropriate gear and throttle position for optimal performance and fuel efficiency.

RPM tachometer and what does it tell
RPM tachometer includes values from 1 to 10

Most cars have a tachometer on the dashboard, which displays the current RPM, allowing the driver to monitor the engine’s status. It displays numbers from 1 to 10. You can multiply it by a thousand. Speaking of that, the tachometer shows you a range from 0 to 10,000 revolutions per minute.

When a car is idle, the RPM should be between 500 and 900. Typically, one digit is divided by two bars. RPM should be less than one on the tachometer when idling.

SYMPTOMS OF IDLE CAR RPM ISSUES

Issues with idle car RPM can manifest through various symptoms. A higher or lower RPM at idle can indicate potential problems with the engine or other related components. RPM falling out of range at idle is an obvious symptom. Here are a few more signs that indicate a problem with engine speed.

car jerks or engine stalling can be due to idle RPM issues
When the idling is rough, drivers can face sluggish acceleration or engine stalling

CAR JERKS

Rough RPM can be a reason for car jerks while accelerating or braking. It could be due to an inconsistent air-fuel mixture or misfiring engine cylinders.

JUMPY ACCELERATION

Idle RPM problems can sometimes affect the car’s performance during acceleration. A driver may feel a sluggish acceleration caused by several problems. For instance, bad spark plugs, fuel delivery issues or a clogged fuel or air filter can cause hesitation when accelerating.

STALLING ENGINE

The engine might stall or shut off unexpectedly when idling. It can be due to the heavy load on the engine when it is too cold. However, it may not happen in the UAE due to hot weather conditions.

Therefore, finding out the reasons behind car engine stalling becomes essential. You can use the onboard diagnostic (OBD) scanner, or the tachometer on the dashboard will tell the RPMS values.

Other symptoms can be the check engine warning light on the dashboard. Also, the engine can consume more fuel due to extra load.

CAUSES OF HIGHER OR LOWER IDLE CAR RPM

Several factors can cause the idle RPM to be higher or lower. While the normal RPM range at idle is 600 to 900, older car models can rev up to 1200 RPM. Here are the problems that can cause a car’s idle RPM to fluctuate higher or lower.

FAILING IDLE AIR CONTROL VALVE

rough idle RPM due to a failing idle air control valve
A bad IACV can also cause rough idling

The idle air control valve controls the amount of air that enters the engine when the throttle is closed. When the car’s idle RPM goes high or low, it is a symptom of a malfunctioning idle air control valve. A bad IACV can lead to erratic or incorrect airflow, resulting in fluctuations in RPM.

DAMAGED THROTTLE BODY POSITION SENSOR

The throttle body controls the amount of air that enters the engine. It is a sign of a damaged throttle body position sensor that doesn’t regulate the airflow properly. For that reason, it leads to irregular idle RPM. It is often a result of a clogged air intake or cracked intake tube.

FAULTY MASS AIR FLOW SENSORS

A Mass Air Flow (MAF) can keep the idle RPM within the range
MAF sensors supply the right amount of air and maintain the idle RPM

The MAF sensor measures the amount of air entering the engine and sends this data to the engine control unit (ECU). When the RPM of an idle car goes higher, it may be due to the bad MAF sensor causing the rough idling.

VACUUM LEAK

Another cause of rough car idling is vacuum leaks. It occurs due to unintended gaps or cracks in the engine’s intake system. When the car doesn’t idle at the normal RPM, you can detect the car vacuum leaks and fix the issue to avoid other problems popping up. These leaks happen due to certain after-market modifications to the engine, exhaust, or intake system that can affect the engine’s idle RPM. 

MALFUNCTIONING ECU

Car computers can also malfunction. The ECU controls various engine parameters, including idle RPM. The engine control unit may not send or receive accurate signals, causing higher RPMs when the car idles. That said, it can also cause engine surge when the vehicle is idling.

FAQS

SHOULD MY RPM BE AT 1 WHEN PARKED?

Car idle RPM is less than 1000 revs
When idling, car RPM should be less than 1 on the tachometer

It should be between 600 to 900 revolutions per minute. As discussed above, an RPM tachometer typically shows a value from 1 to 10. Therefore, it should be lower than 1.

IS IT NORMAL TO IDLE AT 1500 RPM?

1500 revolutions per minute are way above normal. Older engines can rev up to 1200 RPM to warm the engine. However, if the engine has already warmed up and it still revs higher, it may be due to the above-discussed reasons. 

This was all about what RPM should a car idle at. These values can fluctuate when starting the vehicle as the engine is cold and requires more load. However, if it surges after that when the car idles, you may be facing some common car problems. Therefore, when you are sifting through the options for used cars for sale in the UAE, you must check the vehicle idling.

Keep reading the dubizzle autos blog and learn more about car problems that may not seem one.

Share
Tweet
Pin
Share