Archives Март 2024

Step by Step Guide to Vehicle Reconditioning

all the steps for vehicle reconditioning

  • Steps for Vehicle Reconditioning
  • FAQS

Vehicle reconditioning not only enhances the aesthetic appeal of your car it also extends your car’s lifespan and helps retain its value. Reconditioning can include improving the vehicle’s safety features, making it eco-friendlier and more cost-effective. It also gives your car a personal touch. Let’s go through the important steps for vehicle reconditioning in detail.

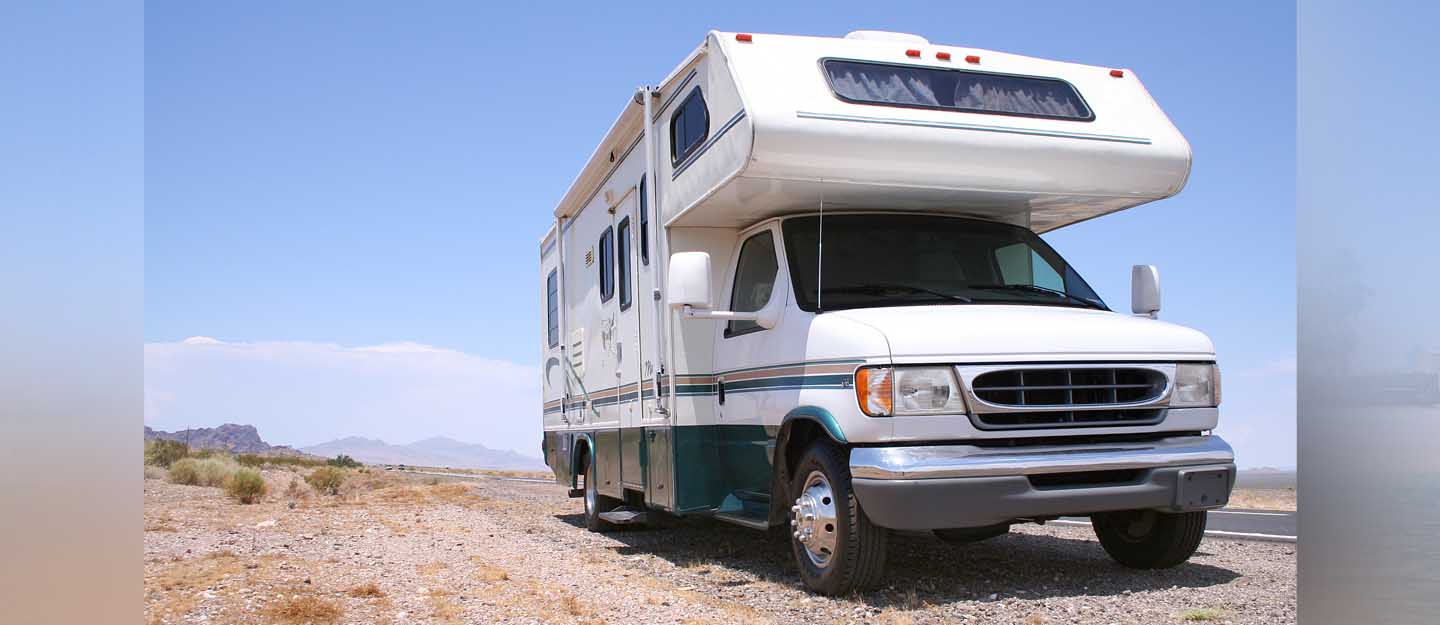
Automotive Rejuvenation: Step-by-Step Guide to Achieving a Fresh Look for Your Vehicle

The vehicle reconditioning checklist helps give your car a fresh look
Let’s go through the process of vehicle reconditioning in detail

For the best results, make use of skilled experts for your vehicle reconditioning process. Reconditioning teams consist of diagnostic specialists, repair mechanics, bodywork and painting professionals, as well as interior and exterior detailing technicians.

Certain dealership networks boast expansive facilities spanning across vast areas, entirely dedicated to vehicle reconditioning. While the sequence may vary, the steps for vehicle reconditioning typically follow a consistent pattern.

Let’s go through the vehicle reconditioning checklist in detail. 

Reconditioning Step 1: The Inspection

Inspection is the first step for vehicle reconditioning
The process of revitalising a vehicle includes a careful inspection

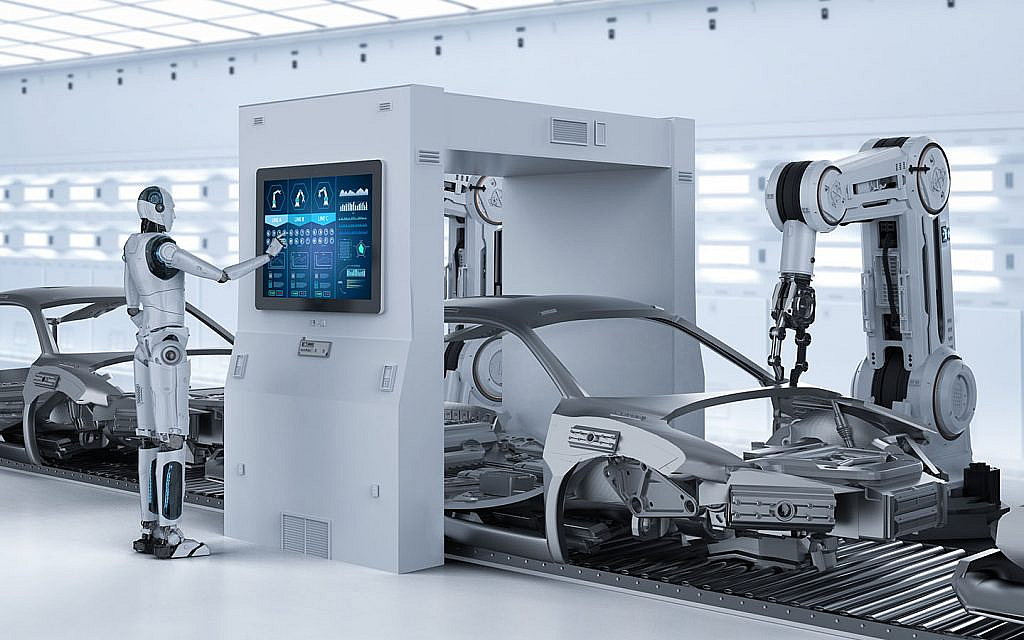
Every car that goes through a large dealership’s business process is reconditioned to some extent. The process starts with a meticulous examination, typically covering more than a hundred specific checkpoints. This assessment uncovers significant issues that could hinder the vehicle’s sale value, such as mechanical malfunctions or body impairments.

While conducting the inspection, the technician documents the necessary repairs or services needed to render the car fit for sale. Frequently, this task is streamlined using a tablet or computer interface, ensuring comprehensive records of the vehicle’s condition. 

This digital trail helps the dealership monitor expenditures on each vehicle, facilitating the assessment of profit or loss associated with that specific car.

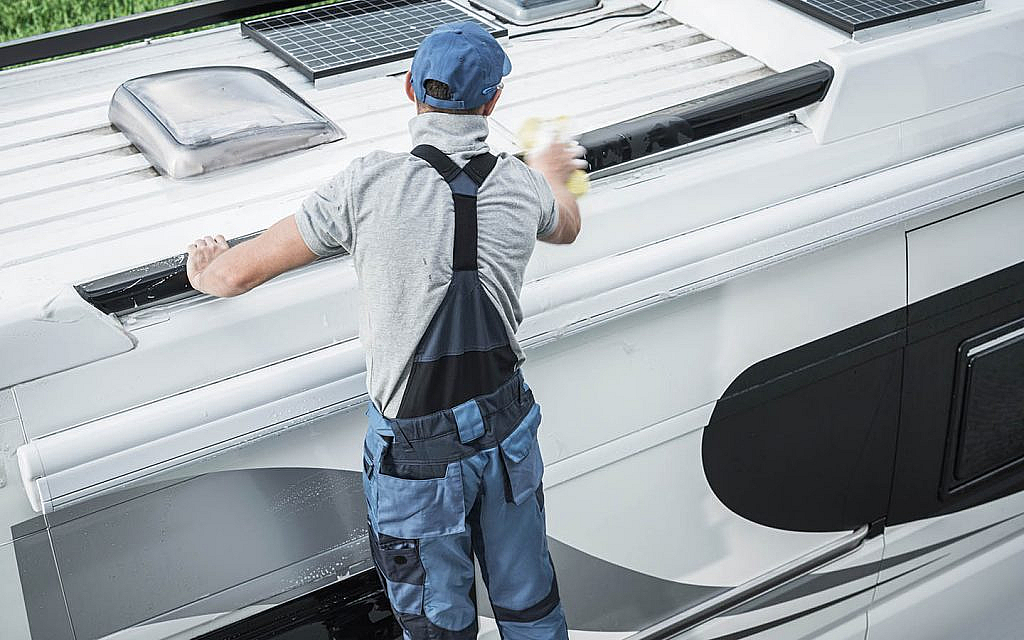
Step 2: Clean Up and Refreshing the Look

clean up is also an important process for vehicle reconditioning
A thorough clean-up is crucial for revitalising your vehicle, resulting in a refreshed appearance

After inspection, the first task that has to happen among other steps for vehicle reconditioning is a comprehensive cleaning and detailing. This involves careful removal of bumper stickers, parking permits, and most customised decorations and trim pieces that deviate from the car’s original design. 

Thoroughly cleaning the car serves a dual purpose—it can unveil any issues overlooked during the inspection. It ensures flawless bodywork or paint repairs and eliminates any remnants of previous wax or paint treatments.

Additionally, tackling odours is vital. Whether stemming from food spills, cigarette smoke, or pet aromas, the common denominator is that no potential buyer wants a malodorous vehicle. Here are some expert car cleaning tips.

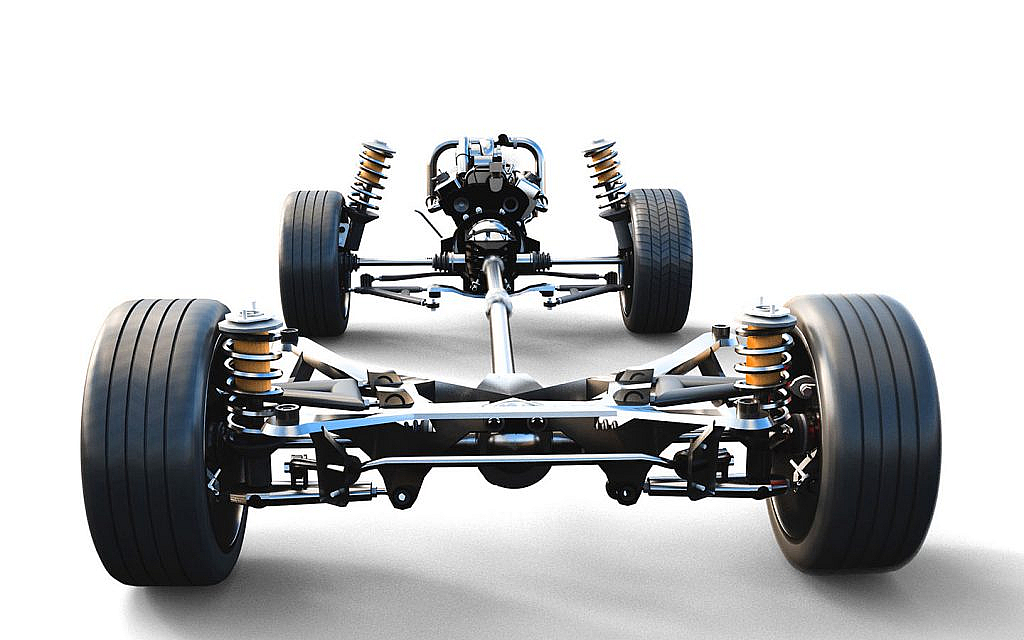
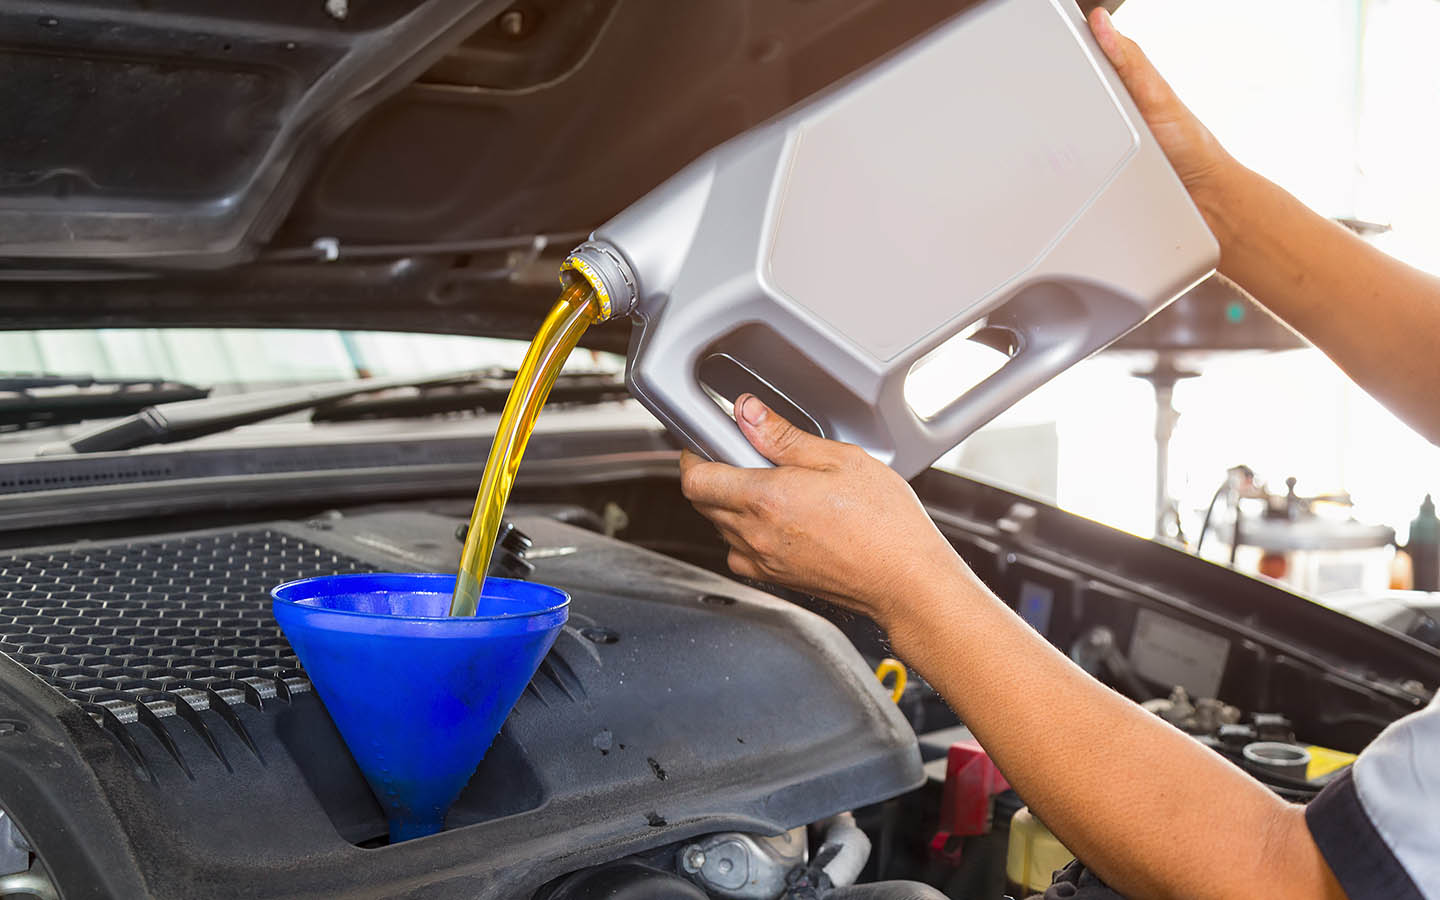
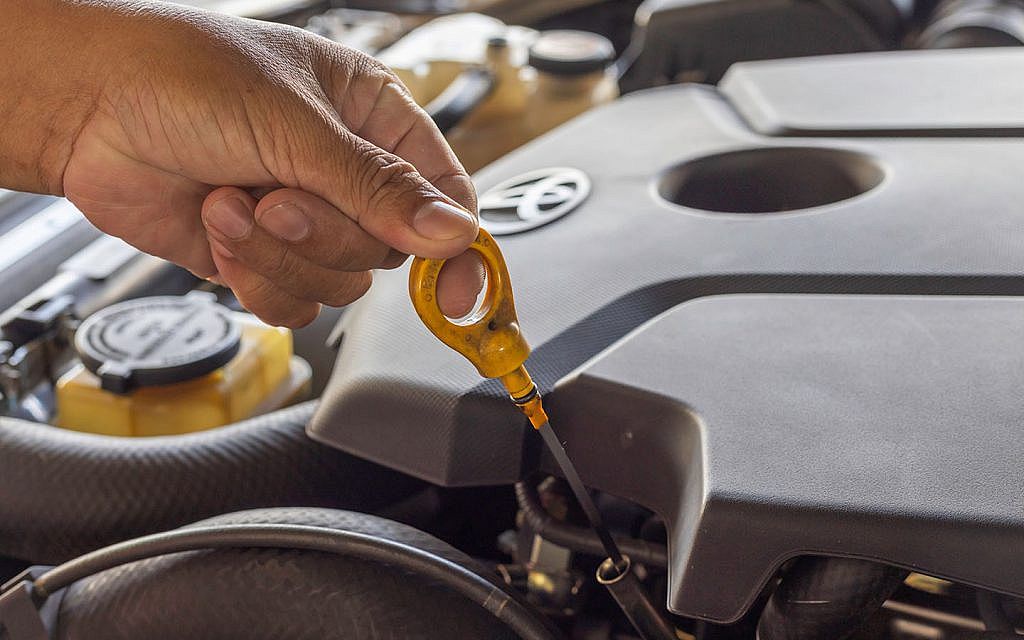
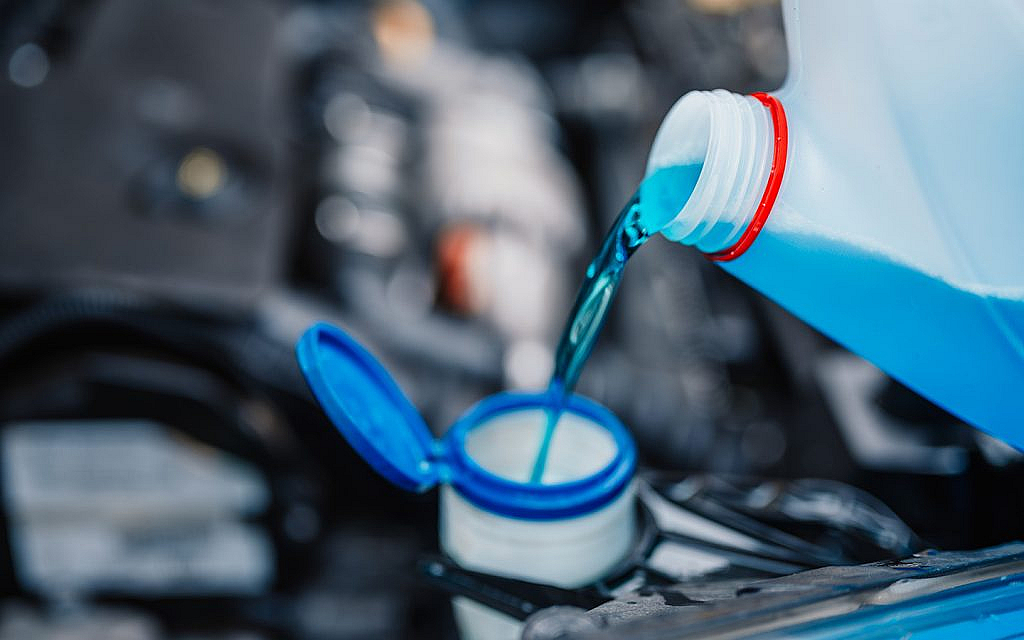
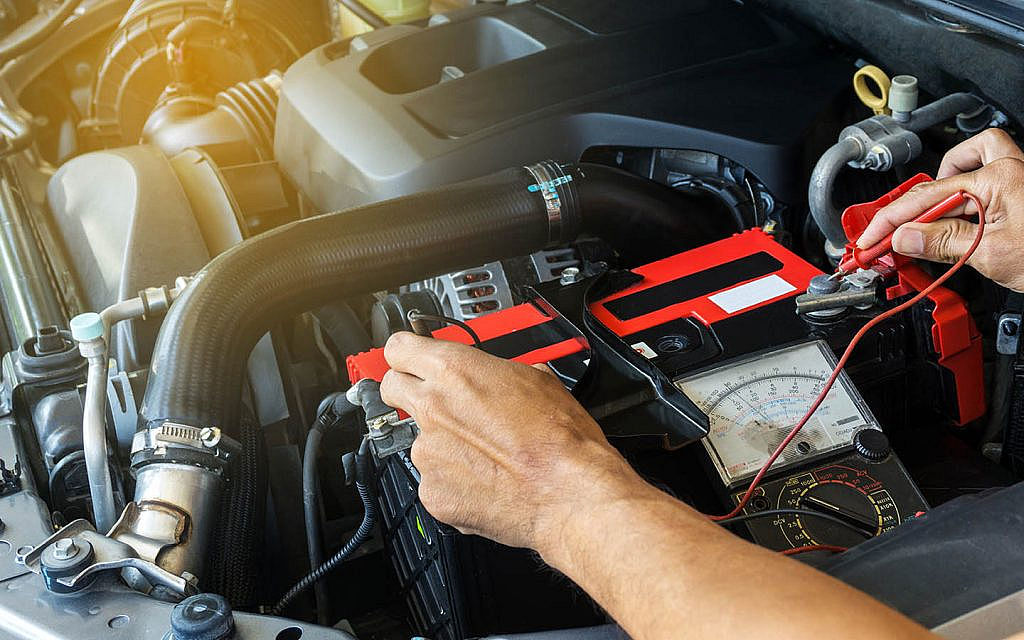
Reconditioning Step 3: Mechanical Repair and Maintenance

Mechanical repair and maintenance are important automotive reconditioning services
Performing mechanical repairs and regular maintenance work contributes to boosting the overall car performance

The next step for vehicle reconditioning is to fix all mechanical and technical errors. At this stage, some preventive tender loving care, TLC takes centre stage. Technicians embark on a test drive, subjecting the car to a rigorous evaluation that uncovers any lurking issues. 

A comprehensive inspection of the car’s undercarriage is conducted while it’s elevated on a lift. As an important tip for vehicle reconditioning, while the car is up, technicians typically perform an oil change and ensure that all essential bearings and moving components are properly lubricated.

If necessary, they may also change the brake fluid, transmission oil, and axle oil replacements. Often, a fresh set of tyres is necessary.

When it comes to automotive reconditioning services, mechanical fixes take the spotlight. Case in point: if a car has to be resold and when a dealership sells a used car, the last thing they want is for it to return with problems that should have been tackled before the sale.

Such instances not only tarnish the dealership’s reputation but also inflate expenses. Should the reconditioning process unveil major issues, the dealer might opt to forego repairs due to their high costs and instead send the car to a dealer auction.

Besides, if you are looking to buy a pre-owned car online, go through this list of used cars for sale in the UAE. 

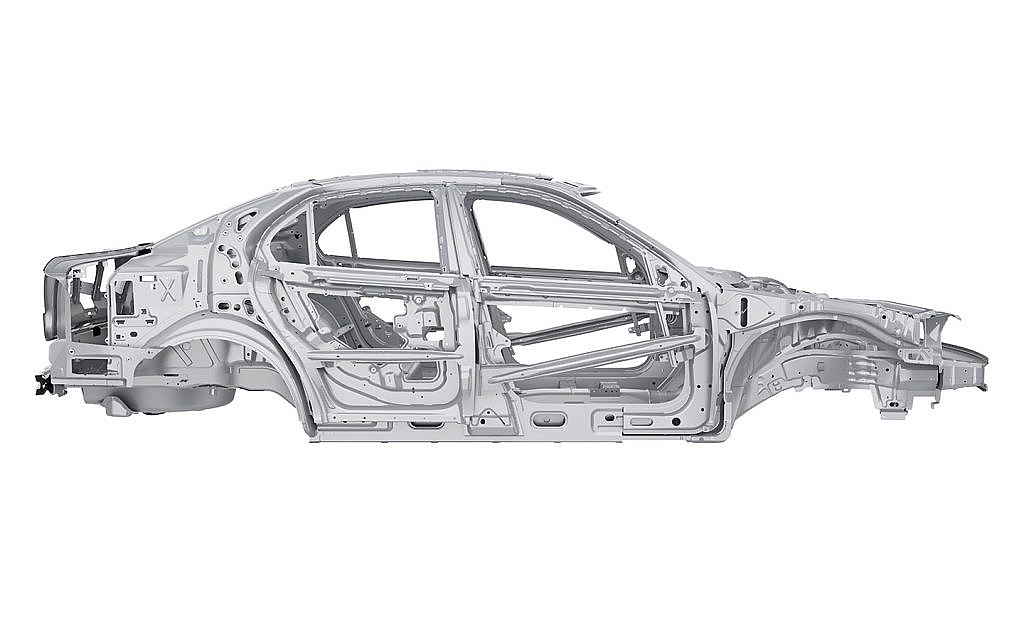
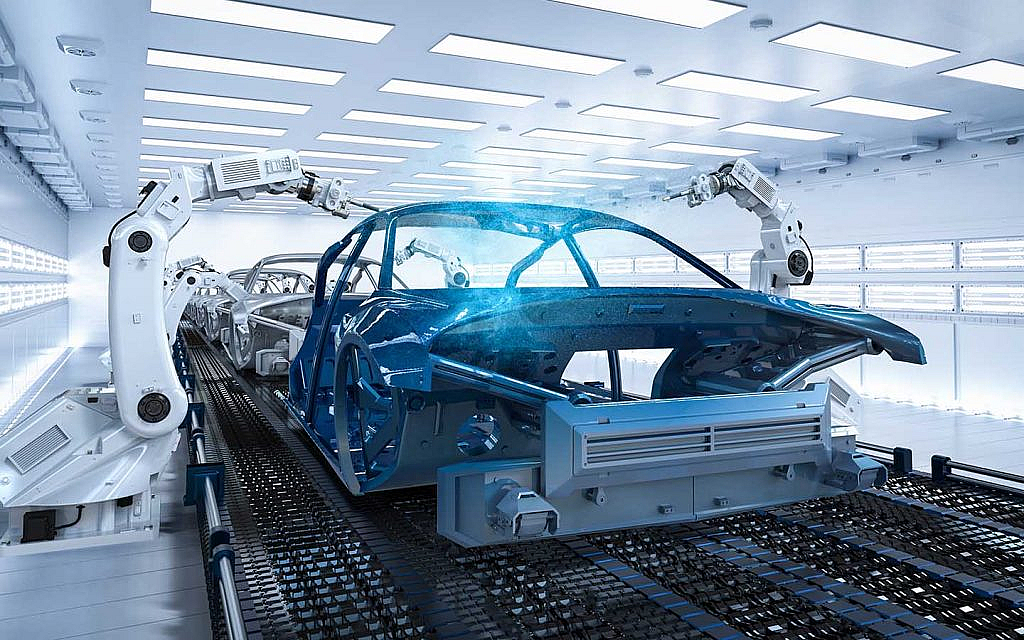
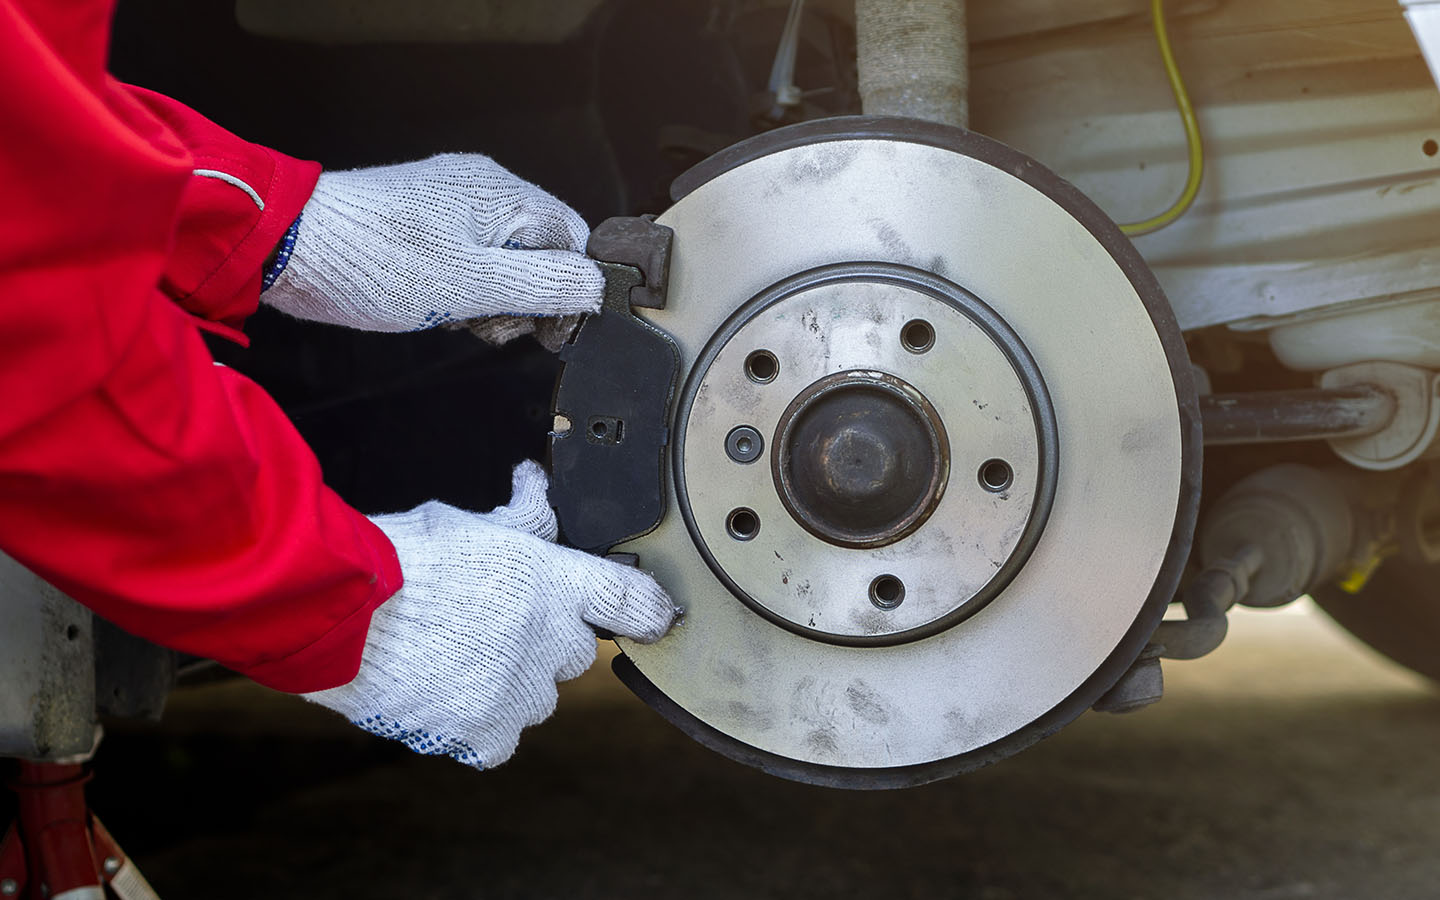
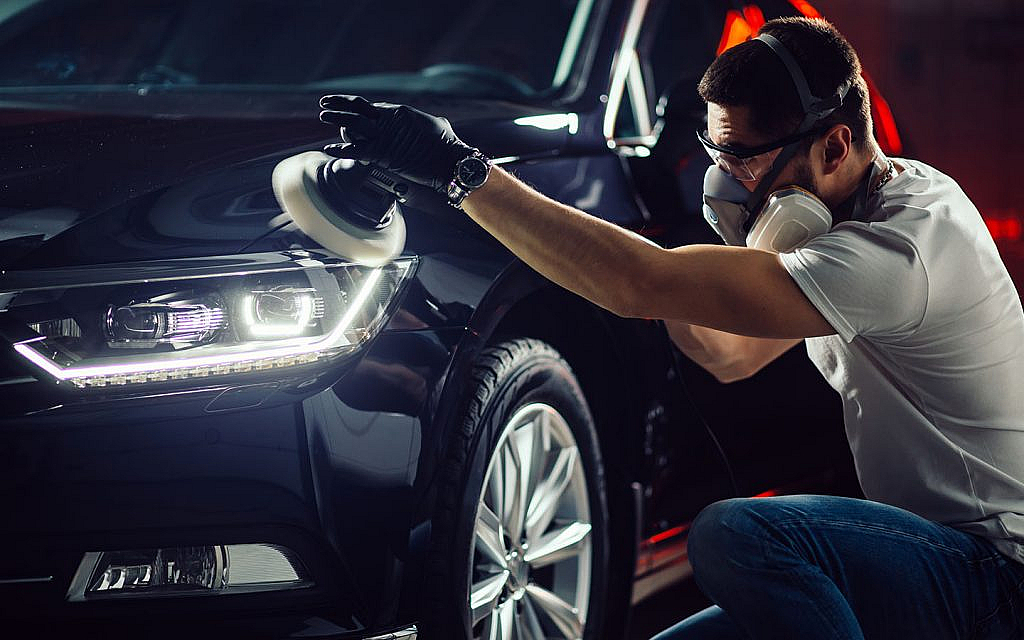
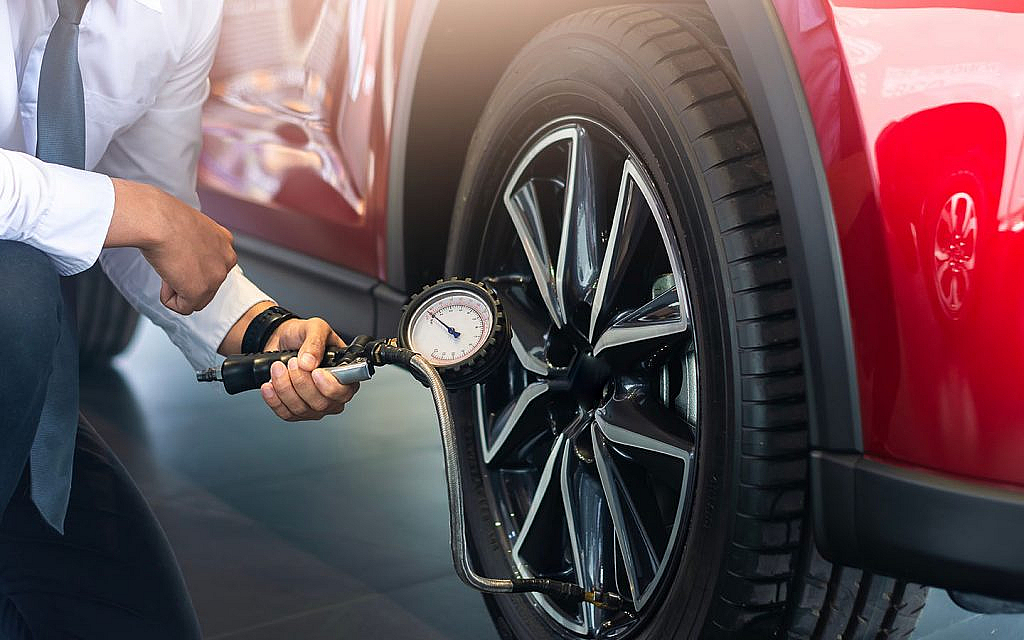
Reconditioning Step 4: Body and Paint Repairs

Body paints and repairs are among the important steps for vehicle reconditioning
Body and paint repairs help significantly improve the car’s external appearance

After the mechanical improvements have been carried out, the focus shifts to the body and paint rejuvenation phase. This is where any unsightly car scratches and dents are given a makeover. When possible, the preferred technique is paintless dent removal, but for more significant damage, the solution might involve fitting new body panels and a stint in the paint shop.

Throughout this process, the body and paint experts meticulously assess the vehicle for any missing or loosely attached trim components. They scrutinise the condition of windows, address any issues with exterior mirrors, and mend any bumper damages.

A thorough inspection of the wheels is repeated, checking for curb damage. If necessary, the wheels are sent to specialists for repairs. Go through dubizzle car inspection services, if you are willing to resell your car.

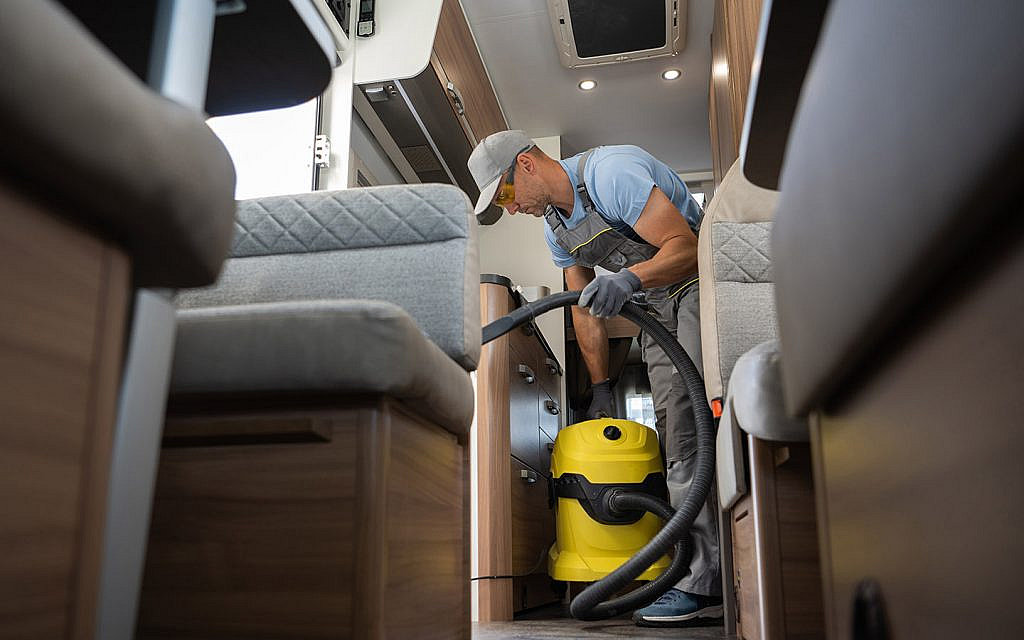
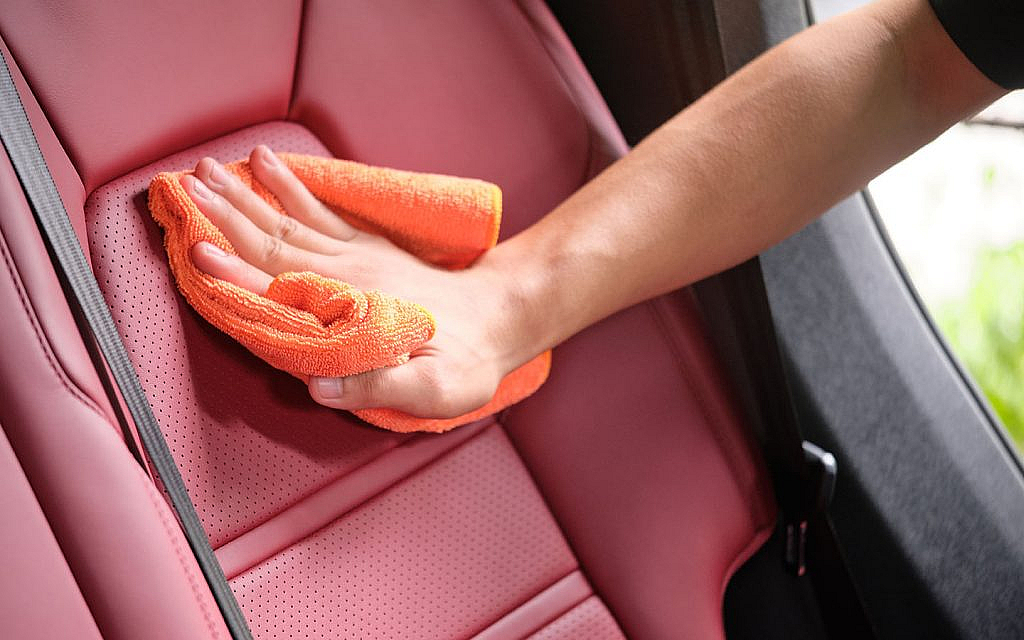
Reconditioning Step 5: Interior and Technology Repairs

The interior and technology repairs are among the necessary tips for vehicle reconditioning
Fixing the interior and addressing technical issues not only gives the car a fresh, new appearance but also ensures a comfortable experience for passengers

Once the vehicle’s exterior has been rejuvenated, it’s time for our interior experts to work their magic. They dive into any potential concerns related to the infotainment system’s smooth operation, speaker sound quality, the comfort of seat upholstery and adjustments, the effectiveness of climate control and the seamless functioning of windows. 

For those lucky enough to have a sunroof or moonroof, our experts ensure it operates seamlessly and stands up to rain without leaking. Furthermore, they meticulously inspect and replace any cabin light bulbs as required.

This step takes on particular importance because the cabin is where passengers spend most of their time. Wrapping up this step is a special fragrance treatment, giving a pre-owned car that iconic “new car smell” that everyone loves.

Reconditioning Step 6: Warranty and Recall Check

Other important steps for vehicle reconditioning include dealers thoroughly examining all cars to identify any necessary warranty repairs or manufacturer recalls. Remember, recalls aren’t inherently negative. They signify that the original automaker has acknowledged a problem with their product and is committed to rectifying it at no cost to the current vehicle owner. 

If you suspect a recall might be in the pipeline for a particular vehicle, make a note of the car’s VIN (vehicle identification number), which can be found on the driver’s side dashboard at the windshield’s base.

Reconditioning Step 7: Photos and Resale

If you want to sell a reconditioned car, take good photos
Quality photographs enhance the process of selling a reconditioned car

After all the concerns have been resolved, the car undergoes a final round of thorough cleaning and detailing, getting it in prime condition. In case of a resale, the dealer ensures to capture its essence through a series of photographs, as virtually all dealerships now showcase their inventory online. The car is meticulously photographed from every angle before being put up for sale. Here are some expert tips for car photography.

Once settled on the lot, the car receives regular cleaning to maintain its pristine appearance. The dealership’s goal is to swiftly find a new home for every vehicle, which motivates them to invest the necessary effort in enhancing the appeal of each car.

FAQs

Is there a difference between car reconditioning and auto detailing?

Yes, there is a difference between car reconditioning and auto detailing. The former addresses damage to a vehicle’s exterior and interior while the latter focuses on cleansing and preserving the car’s body and interior components.

Is car cleaning a part of auto reconditioning?

Yes, car cleaning is an important step for vehicle reconditioning. Not only does this step improve the car’s overall look, it also ensure flawless bodywork, paint repairs and helps eliminate any remnants of previous wax or paint treatments.

Those were some important steps for vehicle reconditioning that not only make the car look as good as new but also help with its resale.  If you are interested in getting your car serviced before reselling it, here is a list of auto service providers in the UAE.

Stay tuned to dubizzle auto blog for more on car reconditioning services and much more.

Share
Tweet
Pin
Share

Auto Anatomy: Oil Pump

oil pump

  • Function
  • Parts
  • Signs of a Failing Oil Pump
  • FAQs

An oil pump is an integral component of a car’s lubrication system. It maintains the optimal working conditions for an engine by circulating the oil through the various parts. Besides, the oil pump’s effectiveness is crucial for maintaining the engine’s efficiency and longevity. That said, let’s learn the anatomy of an oil pump, how it works and the consequences of its failure. 

FUNCTION OF AN OIL PUMP 

An oil pump is among the essential internal combustion chamber parts. It is located in the oil pump housing of the oil pan and the crankshaft or timing belt drives it. When the pressure builds up in the pump, it directs the engine oil through the engine block and cylinder head. 

In simpler terms, the function of an oil pump is as follows:

Lubrication

The primary purpose of an oil pump is to supply engine oil to various moving parts within the engine. These include pistons, crankshafts, camshafts and bearings. The lubrication prevents direct metal-to-metal contact, reducing friction and wear between components.

main function of an oil pump in a car engine
An oil pump regulated the flow of engine oil throughout the system

Cooling

As the engine oil circulates throughout, it absorbs heat generated by the friction of moving parts. The oil then carries this heat away from the components, regulating the engine’s operating temperature and preventing overheating.

Friction Reduction

The oil pump reduces friction by creating a thin layer of oil between moving parts. It minimises wear and tear on the engine’s components, prolonging their lifespan and maintaining efficiency.

Preventing oil leaks

The engine block is sealed to the oil pan using a gasket, effectively stopping oil from escaping the engine.

Noise Reduction

Proper lubrication provided by the oil pump helps dampen the noise generated by moving engine parts. Components that are adequately lubricated produce less noise due to reduced friction. 

Protection Against Corrosion

Engine oil contains additives that protect metal surfaces from corrosion and oxidation. The oil pump distributes this treated oil throughout the engine, preventing rust and deterioration of engine components.

PARTS OF AN OIL PUMP

The anatomy of an oil pump comprises different components. The design of this type of pump in the car varies according to the type. However, here are the fundamental parts:

  • Housing: The housing is the outer casing enclosing the internal components of the pump. It provides protection and support for the pump’s internal mechanisms.
  • Gears or Rotors: Oil pumps often feature gears or rotors that draw in and pressurise the oil. These gears rotate within the pump housing, creating a suction effect that pulls oil into the pump and then pushes it out at a higher pressure.
  • Suction Pipe/Tube: The suction pipe or tube extends from the oil pump into the pan. It draws oil from the bottom of the oil pan and directs it into the pump for further circulation.
  • Pressure Relief Valve: The pressure relief valve is a safety mechanism that helps regulate the oil pressure within the engine. If the oil pressure becomes too high, the valve opens to release excess pressure and prevent damage to the pump and other components.
the anatomy of an oil pump consists of various parts
The anatomy of an oil pump comprises different components
  • Oil Filter Bypass Valve: Some oil pumps include a bypass valve that allows oil to bypass the oil filter if the filter becomes clogged. It ensures that oil can flow through the engine and clogged filters.
  • Oil Filter Mounting: The oil pump may have a mounting or connection point for the oil filter. It allows the oil to go through the filter before entering the pump and being pressurised.
  • Drive Mechanism: The oil pump is driven by the engine’s crankshaft or the car’s timing belt, depending on the engine’s layout. This drive mechanism provides the necessary rotational force to operate the pump.
  • Seals and Gaskets: Various seals and gaskets prevent oil leaks from the pump and its connections. These seals ensure that pressurised oil flows through the intended pathways and not into unwanted areas.
  • Oil Passages: Internally, the oil pump contains passages and channels that direct the oil from the suction side to the pressure side. These passages oversee the oil flow through the pump and into the engine.
  • Mounting Points: The oil pump is securely mounted to the engine block or other car engine components to ensure stability and proper alignment.

TYPES OF AN OIL PUMP 

Different types of oil pumps are used in cars, each with its own design and operational characteristics. The choice of oil pump type depends on factors like the engine’s layout, performance requirements and manufacturer preferences. Here are the two main types:

types of oil pump
The type of oil pump depends on the engine layout

Gear Oil Pump

It is one of the most common types of oil pumps. It consists of two intermeshing gears that rotate to draw in oil through the pump’s suction side and then push it out at a higher pressure through the discharge side. Gear oil pumps are known for their simplicity and reliability. 

Rotor Oil Pump

Also called a rotary vane pump, this type uses a rotor with multiple vanes that sweep oil through the pump’s internal chambers. As the rotor turns, the vanes create pockets that draw in and trap oil. The oil then flows from the suction to the pressure side. Rotor oil pumps are known for their smooth operation in various engine designs.

SIGNS OF A FAILING OIL PUMP 

Like any car part, an oil pump is prone to wear and tear. Recognising the signs of a failing oil pump is crucial to prevent the engine from failing. Here are some common symptoms to watch out for:

Engine Misfiring 

A bad oil pump causes a car engine to misfire due to inadequate lubrication and increased friction. It results in poor combustion and misfiring of cylinders due to insufficient oil reaching critical engine components.

Engine Noise

A failing oil pump leads to insufficient oil circulation, causing increased friction between moving parts. That can result in a tapping or knocking noise from the engine, especially at startup or when the engine is under load.

signs of a failing oil pump and effect on engine
A bad oil pump leads to engine failure

Drop in Oil Pressure

If you have access to an oil pressure gauge, you might notice a sudden and significant drop in car oil pressure while the engine is running. It is a strong indication that the oil pump is not functioning properly.

Engine Overheating

Insufficient oil circulation leads to poor heat dissipation. If the engine starts to overheat, it might be due to the oil pump’s inability to cool the engine components properly.

Low Oil Pressure Warning Light

One of the most common indicators of a failing oil pump is the illumination of the low oil pressure warning light on the dashboard. If the oil pressure drops below a safe level, the oil pressure sensor will signal a warning light in the dashboard.

FAQs

How does an auto oil pump work?

An auto oil pump operates with gears or rotors to circulate engine oil from the oil pan and pressurise it. It ensures consistent circulation to lubricate, cool and protect engine components and maintain their performance and longevity.

What are the parts of an oil pump?

Many components make up an oil pump. These include housing, rotors, suction tube, pressure relief valve, oil filter mounting and valve, drive mechanism, seals, oil passages and mounting points. If any of these components are broken or get damaged, the pump won’t work properly, resulting in an engine oil leak.

What happens if the oil pump fails?

A failing oil pump leads to engine failure. Common symptoms include a ticking noise in the engine, overheating, a drop in oil pressure and engine misfiring. 

That is all on the anatomy of an oil pump. It regulates the engine oil flow and ensures optimal performance of the engine. Besides, when buying a used car in the UAE, ensure all these essential parts are working properly, providing adequate car performance. 

For more on car parts, their working and issues, keep reading dubizzle’s cars blog.

Share
Tweet
Pin
Share

All About RV Wash and Wax Service

RV Wash and Wax

  • RV Detailing
  • Things to Consider
  • RV Wax and Wash Services
  • FAQs

Recreational Vehicles (RVs) are trailers or trucks with attached living quarters. These on-the-wheel homes are a perfect blend of comfort and adventure. That said, the versatility of RVs allows owners to explore diverse landscapes and cover long distances. However, like any conventional vehicle, RVs also require regular maintenance. Aside from mechanical work, its waxing and polishing is a significant part of its maintenance. 

Let’s discuss the RV wax and wash services in the UAE and what to expect from the services in more detail. 

RV Detailing – Wash and Wax Service

RV detailing service is more or less similar to that of a common car detailing. However, detailing the vehicle along with the living quarters requires some additional steps. 

Here, we have mentioned what to expect from RV detailing services. 

Exterior Cleaning

Cleaning an RV exterior is a daunting task, as it includes a mobile home and a vehicle with it. Moreover, travelling long distances on different landscapes exposes the exterior to varied dust, debris and stains. To remove each type of material, a unique type of cleaning technique and chemicals are required. For instance, if your RV’s roof is of rubber, a specialised rubber cleaner will be used to avoid discolouration or damage to the roof.

Similarly, all the air vents and windows are also required to be cleaned properly. In case you are cleaning your RV by yourself, follow these expert car cleaning tips for effective results. 

Washing exterior of an RV
The RV exterior features different parts that should be cleaned panel by panel

Interior Detailing

RV interiors vary from vehicle to vehicle and can include multiple items ranging from a comfortable bed to plug-in electric coolers. The basic service package will include conventional car interior detailing, including carpet vacuuming, seat scrubbing and removing dirt and debris. 

Continuously being on the road and excessive usage might require more than regular cleaning. That said, in some cases, normal car interior detailing will not be effective for an RV. Following are some additional cleaning services that you can opt for a sparkling vehicle interior. 

Infestation Removal

RVs can be affected by different types of infestations, as it is difficult to maintain hygiene while being on the road. Therefore, an additional infestation removal service might be required. Whether it is removing mould from the interior or dealing with a rodent infestation, the RV wax and wash service will take care of it.

Cleaning interior of an RV to get rid of infestation
To get rid of mould and other types of infestation, proper interior detailing of the RV is necessary

Stain Scrubbing 

RVs are a typical mobile home that provides the convenience of a home to travellers. That said, like any conventional home, RVs also require regular cleaning. Although, it is difficult to adhere to a car maintenance checklist while being on the roads. Therefore, a special stain removal and cleaning process is a must to maintain hygiene and cleanliness level inside the vehicle. 

Tyre Repair

Despite the UAE’s road quality standards, regular tyre repairs and checkups are necessary to avoid any travelling hassle. This can include checking tyre tread wear, cleaning tyres and replacing worn-out ones. If new tyres are out of your budget, browse through these used tyres for sale on dubizzle and purchase a tyre as per your budget.  

Things to Consider When Choosing RV Wax and Wash Service

Cleaning an RV is not similar to regular car cleaning; therefore, it requires a lot of expertise to clean these vehicles. Mentioned below are some things to consider when selecting an RV wax and wash service in the Emirates. 

Detailing Steps

The first thing to consider when opting for an RV wash service is to inquire about the detailing steps. Due to their large size, RVs should be cleaned panel to panel, contrary to conventional vehicles. Therefore, expert service providers divide the detailing process into different parts. 

Remote Services

Many car detailing shops in Dubai and other Emirates offer remote detailing services. This allows you to clean your RV at different locations without travelling to the workshop. 

Steam Cleaning

Pressure and steam car wash allow tough stains and debris to wash off from the vehicle. Since RVs are more exposed to the environment, steam and pressure washing is significant for proper cleaning. 

Vacuuming the carpet of RV
Make sure to get your carpets vacuumed and other parts steamed washed from the RV wax and wash service provider

Miscellaneous Cleaning Services

RVs are mobile homes with many things to clean besides the auto parts. That said, when dealing with the RV wax service, inquire whether their staff is flexible for other types of cleaning or not. This will help you properly clean your mobile home with professional assistance. 

Cleaning Products

Using different cleaning products on vehicles results in paint and body damage. Therefore, it is recommended to use car cleaning products that are specifically manufactured for vehicles. Make sure the service provider is using all the car-specific cleaning products. 

RV Wax and Wash Services in the UAE

RV owners can opt for the following places to get wax and wash services in the UAE. 

Crystal Shine Auto Centre

  • Location: Exit 45, Sheikh Zayed Road, Dubai
  • Contact: +971 50 428 8468 | +971 4 338 3303
  • Timings: Monday to Sunday (06:00 am to 05:00 pm)

Kenzie’s Car Wash UAE

  • Contact: 600 56 56 93 | +971 55 270 9113
  • Timings: Monday to Saturday (08:00 am to 06:00 pm)

Ovation

  • Location: Gargash Warehouse # 3, 318th Road, Al Quoz Industrial Area 3, Dubai
  • Contact: +971 50 709 4430
  • Timings: Monday to Friday (10:00 am to 07:00 pm), Saturday (09:00 am to 02:00 pm)

FAQs

How do you clean and wax an RV?

RVs are full-size mobile homes and their cleaning involves a number of objects, including sofa, kitchenware, bed and carpet. Ideally, it should be cleaned panel by panel using a pressure washer and steam cleaner. 

How often should you wash and wax your RV?

It depends on the usage of the vehicles. Typically, it should be cleaned once in a season or after returning from a week-long trip. 

How much does it cost to wash and wax my RV?

The price of RV wax and wash service depends on multiple factors like vehicle length, type and number of services availed. Generally, it starts from AED 183 for basic interior and exterior cleaning. 

This is all about RV wax and wash service in the UAE. RVs provide a balance of long-distance yet comfortable travelling. Resting, cooking and cleaning places inside the home allow travellers to relax and camp anywhere during their journey. 

If you are also interested in availing these facilities, browse through these used RVs for sale in the UAE and buy your very own RV as per your budget. 

Besides, if you are new to these vehicles, here are some tips for RV beginners that can help you.

Stay tuned to dubizzle’s auto blog for more information on mobile RV detailing services.

Share
Tweet
Pin
Share

What Is a Car Chassis? Everything You Need to Know

car chassis gives structure to a vehicle

  • Meaning
  • Functions
  • Components
  • Types
  • FAQs

When you buy a car, you may hear terms like Chassis Number and Vehicle Identification Number. While many confuse chassis with the vehicle frame, a chassis is more than that. A car chassis is a load-bearing part of the vehicle frame. Besides, its arrangement is in such a way that allows the flow of power from the drivetrain to the wheels.

Whether the vehicle is moving steadily or at rest, the main function of the chassis is to hold the vehicle’s load and frame. Let’s understand the details about the car chassis, its function and its different types.

CAR CHASSIS MEANING

A car chassis is the primary structural framework of a vehicle. It is the foundation for all other components, including the engine, body, steering and suspension system. Moreover, it provides structural integrity, supports the vehicle’s weight and plays a crucial role in safety and performance.

CAR CHASSIS FUNCTIONS

A car chassis under development
A chassis holds the structure of the vehicle and plays an important role in safety

The car chassis provides structural integrity and rigidity to the vehicle. It withstands various forces and stresses, such as those encountered during acceleration, braking and cornering. Mainly, chassis have the following functions:

  • Prevents excessive body roll 
  • Improves the car’s ability to navigate corners and uneven terrain
  • Contributes to noise, vibration and harshness (NVH) technology 
  • Allows efficient power transfer from the engine to the wheels

CAR CHASSIS COMPONENTS

Car chassis components can vary depending on the make and model of the vehicle, but here are some common ones found.

  • Clutch
  • Transmission System  
  • Universal Joint
  • Axle
  • Rear Suspension
  • Shock Absorbers
  • Stabiliser Bar
  • Springs
  • Wheels and Tyres

TYPES OF CAR CHASSIS

A car chassis can be distinguished into the following types:

LADDER FRAME CHASSIS

ladder frame chassis has a body-on-frame structure
Body-on-frame chassis is much stronger than other types

A ladder frame chassis, also known as a body-on-frame chassis, is common in SUVs and pickup trucks. It consists of two parallel longitudinal rails (or ladder rails) that run the length of the vehicle, connected by cross members. Here are its pros and cons:

Pros

  • It handles heavy loads and rough terrain, making it ideal for trucks and SUVs designed for off-road use.
  • Ladder chassis have high towing capacities due to their structural strength.
  • The separation of the body and chassis allows for easy modifications.
  • Its design provides ample ground clearance and the ability to flex, making it suitable for off-road applications.

Cons

  • It is heavier than unibody chassis designs, which can negatively impact fuel efficiency and handling.
  • The rigid frame can result in a stiffer ride compared to vehicles with unibody construction.
  • A higher centre of gravity affects handling and stability, especially in sharp turns.

MONOCOQUE CHASSIS

A monocoque car chassis, well-known as unibody or unitary construction, integrates the body and chassis into a unified structure. This design approach is commonly used in automobiles, aircraft and racing vehicles. Moreover, it is common in hatchbacks and sedans.

Monocoque chassis type for sedans
A unilateral chassis frame is common in sedans with more aerodynamics

Pros

  • It is lighter than traditional body-on-frame designs because it eliminates the need for a separate heavy frame.
  • This design distributes loads and stresses more evenly across the entire structure, resulting in enhanced structural integrity and safety in the event of a collision.
  • No separate frame takes up space, resulting in a roomier cabin and better cargo capacity.
  • It contributes to better handling and road-holding characteristics because the body and chassis work together to provide stability and control.
  • Monocoque designs can be more aerodynamic, reducing air resistance and improving fuel efficiency.

Cons

  • Repairing a damaged monocoque chassis can be more complex and costly compared to a traditional body-on-frame vehicle.
  • Monocoque structures may not be as durable as ladder-frame car chassis.
  • The initial cost of designing and setting up production for a monocoque chassis can be higher.
  • It has a reduced efficiency when off-roading.

SPACE FRAME CHASSIS

A space frame chassis consists of interconnected nodes and struts. Made from materials such as steel or aluminium, it is used in automotive and aerospace applications due to its strength-to-weight ratio and flexibility. 

The basic concept involves a three-dimensional grid structure, where the nodes are points of intersection, and the struts form the framework’s elements.

PROS

  • Space frames are exceptionally lightweight compared to traditional chassis designs.
  • Despite their lightweight nature, space frames are incredibly strong and rigid, providing excellent structural integrity and safety.
  • The inherent design of space frames dampens vibrations and reduces noise.
  • Individual components of a space frame can often be replaced or repaired without the need for extensive reconstruction.

CONS

  • The design and assembly of space frame chassis can be more complex and time-consuming than traditional monocoque or ladder-frame structures.
  • They are more expensive to produce than simpler chassis designs.

BACKBONE CHASSIS

A Chassis manufacturing process
For heavy-duty vehicles, a backbone chassis frame is common due to its rigid frame

A backbone car chassis is common in trucks, buses and larger vehicles. Its design includes a rigid, ladder-like frame structure that forms the vehicle’s core.

PROS

  • The backbone chassis provides excellent strength and durability, making it suitable for heavy-duty applications. 
  • The inherent rigidity of the backbone chassis contributes to the vehicle’s stability. 
  • Backbone chassis designs are relatively simpler and allow easy modification.

CONS

  • It is heavier than other chassis designs, such as monocoque (unibody) structures. The additional weight can reduce fuel efficiency and payload capacity.
  • The stiffness of the backbone chassis leads to a harsher ride compared to vehicles with more flexible chassis designs.

FAQs

WHERE CAN I FIND THE CHASSIS NUMBER?

In the UAE, you can typically check the car chassis number, also known as the Vehicle Identification Number or VIN, on the driver’s side dashboard near the windshield or on the driver’s side door frame.

CAN A CAR CHASSIS BE REPAIRED?

Yes, a car chassis can be repaired in many cases. The extent of the repair will depend on the extent of the damage. Minor chassis damage can often be repaired through welding and reinforcement.

HOW TO CHECK CAR HISTORY WITH CHASSIS NUMBER

To check a car’s history in the UAE with the chassis number, you can apply for the service on the Roads and Transport Authority (RTA) website or mobile app. They provide a Vehicle History Certificate that allows you to obtain essential information about the vehicle’s history, including ownership, accidents and more. 

A car chassis holds the structure of a body and offers protection during an accident. Let's find out more.
From suspension system to drivetrain, all components play a vital role in chassis

This is all about car chassis, its design, types and functions. When you choose a new or used car for sale in the UAE, getting prior knowledge of the car’s components can help with its repairs. Speaking of that, you can read the car glossary to learn more about different vehicle components.

You can learn how to check VIN and engine numbers in the UAE before buying a used car to check its history.

Stay tuned to dubizzle cars blog and learn more about different systems, design components and systems.

Share
Tweet
Pin
Share

Enjoy Smooth Rides With Correct Car Tyre Pressure

find correct car tyre pressure

  • Check Car Tyre Pressure
  • Maintain Car Tyre Pressure
  • Importance of Car Tyre Pressure
  • Factors Affecting Car Tyre Pressure
  • FAQs

When it comes to your vehicle’s performance, every little detail matters. One often overlooked detail is the tyre pressure. The key to a balanced and enjoyable driving experience lies in maintaining the correct car tyre pressure. This is because the tyre pressure impacts everything from road handling and fuel economy to braking and tyre lifespan.

Here we will discuss how to find the correct car tyre pressure, its importance and the factors affecting it.

How to Find the Correct Car Tyre Pressure

Check the correct car tyre pressure using a pressure gauge
You may find the correct car tyre pressure in the car owner’s manual or on the sticker snugged inside the driver’s door jamb

The first step in ensuring your tyres perform effectively is to identify the correct car tyre pressure. This information can usually be found in your car’s owner’s manual or on a sticker inside the driver’s side door jamb. You may also find the recommended car tyre pressure on the rear edge of the car door or sometimes even on the fuel filler door or in the glove box. 

The recommended tyre pressure is usually expressed in pounds per square inch (PSI). It varies based on factors such as the type of vehicle, load and tyre size. The listed pressures are for the original tyre size. If you’ve changed tyre size, those pressures might not work for you. That said, the number on the tyre sidewall is the maximum safe pressure, not the recommended one for your vehicle.

Moreover, it is important to remember that between the hot and cold tyre pressure, the recommended tyre pressure is the latter one. Therefore, check the pressure when the car has been in the shade for a while. But watch out for environmental factors like parking area temperature, as they can affect the reading.

It is important to ensure car tyres safety in the UAE as ill-maintained tyres pose a major threat on the road. For this purpose, the car tyre validity in the UAE is not more than 5 years.  

How to Maintain Proper Tyre Pressure

check car tyre pressure regularly and fill the tyres as needed
Regularly check your car tyre pressure to ensure that the tyres are properly inflated for improved fuel efficiency and smoother rides

Once you have determined the correct car tyre pressure, it is important to maintain it. Many modern cars are equipped with a tyre pressure monitoring system (TPMS). Such a system aware the driver of under or over-inflated tyres by illuminating the TPMS light on the car dashboard.

However, one should not completely rely on the TPMS and check the tyre pressure timely using a tyre pressure gauge.

Here are the basic steps to check the car tyre pressure.

Step 1: Remove the Valve Cap

Take off the cap from the tire’s valve stem. It looks like a little cap on a stick.

Step 2: Press the Gauge

Press the gauge onto the valve stem firmly. You might hear a hissing noise, that is, a bit of air escaping but that small air displacement doesn’t impact the car tyre air pressure.

Step 3: Read the Gauge

The gauge will show the pressure in PSI. Read the number.

Compare the number on the gauge with the recommended pressure for your car. You can find this info in your car’s manual or on a sticker inside the driver’s door frame.

Step 5: Adjust the Pressure, If Needed

If the pressure is too low, add air until it reaches the recommended level. If it’s too high, you can press the valve slightly to let some air out.

Importance of Correct Car Tyre Pressure

Maintaining the correct car tyre pressure is important for many reasons. Some of them are detailed below.

Road Safety

Proper tyre pressure helps your car grip the road better, especially during turns or sudden stops. This reduces the risk of accidents and helps you maintain control.

If your existing tyres have reached their lifespan, you should replace them by buying tyres in Dubai, Abu Dhabi or any other Emirate where you reside.

Fuel Efficiency

Under-inflated tyres create more rolling resistance, which means your car has to work harder to move. This leads to lower fuel efficiency and more trips to the fuel station, increasing the financial burden. 

Tyre Longevity

When your tyres are at the right pressure, they wear out more evenly. Maintaining car tyre pressure increases tyre longevity, so you don’t need to replace them quite often. Incorrect pressure can cause certain parts of the tyres to wear out faster, leading to premature replacements.

Braking Performance

Adequate tyre pressure improves your car’s ability to stop quickly and safely. Under-inflated tyres can increase braking distance and make your car less responsive.

Ride Comfort

There are different types of car tyres available in the auto market, which you may choose depending on your driving conditions and ride comfort. Properly inflated tyres provide a smoother ride. Over-inflated tyres can make your ride feel bumpy, while under-inflated tyres might feel sluggish.

Environmental Impact

Using the right tyre pressure reduces carbon dioxide emissions because your car burns less fuel. This contributes to a greener environment.

Factors Affecting Car Tyre Pressure

Several factors affect the car tyre pressure. Such factors include:

Temperature

Temperature changes can cause car tyres to lose pressure. Seasonal changes like summers can cause the air inside the tyres to expand, increasing pressure. Cold weather makes the air contract, lowering pressure. 

Driving Distance

Driving heats the tyres, causing the air inside to expand. This can lead to higher pressure readings if you check them immediately after a long drive.

Cargo Load

Carrying heavy loads can compress the tyres more, leading to higher pressure. Many vehicles have different recommended pressures when carrying heavy loads.

Tyre Age and Condition

Older or damaged tyres might not hold air as well, causing them to lose pressure more quickly. This is when you should consider changing your car tyres as the previous ones are not safe to use.

Valve Leaks

Faulty or leaking valve stems can cause gradual pressure loss.

Tyre Punctures

A punctured tyre can lead to pressure loss. If you’re consistently losing pressure, it’s important to check for punctures or damage.

Driving Habits

Aggressive driving, like sudden braking or sharp turns, can affect tyre pressure by increasing heat and pressure.

Type of Tyre

Different types of tyres might have different pressure requirements. For example, between summer and winter tyres, the latter ones might need slightly higher pressure.

FAQs

Can I check my car tyre pressure without a pressure gauge?

Yes. You can check car tyre pressure without a pressure gauge but it is not as effective as checking it through a car tyre pressure gauge.

How often should I check car tyre pressure?

You should check the tyre pressure of your car at least once a month. Additionally, check tyre pressure before long trips. Also, inspect it when there are significant temperature changes, as these factors can affect tyre pressure.

This was all about how to find and maintain correct car tyre pressure and the factors affecting it. Maintaining the correct car tyre pressure is a simple yet vital aspect of responsible car ownership. It not only ensures safety but also contributes to fuel efficiency and overall vehicle performance. 

That said, if your car tyres are reaching their life expectancy, it is better to switch to new tyres. Browse through these wheels and tyres for sale in the UAE to find your compatible car tyres.

Up for more informative tips on car maintenance? Tune in to the dubizzle car blog for the latest car tools and features.

Share
Tweet
Pin
Share

DIY: 7 Common Car Repairs You Can Tackle Yourself

diy car repairs for owners

  • Oil Change
  • Brake Pads Replacement
  • Coolant Replacement
  • Car Battery Replacement
  • Windshield Wiper Replacement
  • Car Lights Replacement
  • Car Tyre Replacement/Rotation
  • FAQs

Automobiles are of great convenience in many ways. Easy mobility, storage options and flexibility, the benefits are plenty. However, vehicles remain prone to damage. Either by lack of maintenance, damage or normal wear and tear. While fixing certain damages can cost a fair amount of time and money, some repairs can be done at home. These DIY car repairs for owners can help save money upfront.

Moreover, drivers need not to be automobile experts to carry out these simple repairs. We have compiled a list of some easy DIY car repairs for owners to help them save time and money.

DIY Car Repairs for Owners

Maintenance remains an integral part of owning a vehicle. Owners following the car maintenance checklist typically avoid issues such as premature wear of parts. Issues in some components may also lead to further deterioration in major engine components.

While complex issues require a professional expertise, others are rather easy to fix at home. Addressing issues promptly can also increase a vehicle’s running life. Besides, fixing non-complex issues helps save time and money.

Let’s go through some DIY easy car repairs for owners that can be done at home.

OIL CHANGE

oil changing is one of the diy car repairs for owners
Changing vehicle is an easy DIY job car owners can do

Engine oil plays an important role in the smooth running of engine components. Therefore, delaying vehicle oil change can have dire effects on the engine. Fortunately, the process to change engine oil is rather simple and can be done at home.

It is important to know when to change engine oil. Experts advise changing oil every 5,000 km to 12,000 km. However, for synthetic oil, the range expands to about 160000 km. Additionally, it is advisable to change engine oil 2-3 hours after the car is driven as the liquid might be too hot.

Also, be sure to change the oil filter when changing engine oil. A filter separates debris and contaminants and prevents harmful particles from entering the engine.

STEPS TO CHANGE VEHICLE OIL

  • Raise the vehicle to a good height.
  • Place the pan below the oil tank and remove the plug. Make sure all oil is drained.
  • Locate the oil filter and replace it.
  • Once done, reinstall the cap on the tank.
  • Use a funnel to refill the required amount of oil.
  • Check the vehicle for any sorts of leaks.
  • Run the engine idle and wait for oil to settle.

BRAKE PADS REPLACEMENT

brake pads are an integral part of vehicle safety
Vehicle owners can also change brake pads at home

Brake pads are perhaps the most important part of vehicle safety. Several factors affect brake pads’ lifespan such as bad driving habits, pads quality and more. Whatever the reason might be, timely replacement of brake pads is pivotal to ensure safety.

Luckily, brake pad replacement is one of the easy DIY car repairs for owners to do at home. A brake pad box contains all the required tools to change the pads. While replacing brake pads, be sure to lubricate them to avoid squealing.

Moreover, follow these brake maintenance tips to take better care of these important safety components.

STEPS TO CHANGE BRAKE PADS

  • Remove the vehicle’s wheel.
  • Carefully remove the slider bolt.
  • Incline the calliper up.
  • Pull out the old brake pads.
  • Be sure to replace the changing clip.
  • Fit in the new brake pads.
  • Inspect the brake fluid level.
  • Position the calliper to the original position.
  • Reinstall the slider bolts.
  • Take a test drive in safe conditions to ensure pads are properly installed.

COOLANT REPLACEMENT

For a smooth and safe ride, vehicle coolants should be at the optimal level at all times. Those driving cars with low coolant levels put safety at risk. Additionally, low coolant levels can cause serious damage to the engine. These can lead to issues like engine overheating, blowing a head gasket or other major components.

The process is rather simple as owners have to flush the existing coolants and replace them with new ones. However, it is important to go through the vehicle manual to check the service intervals. Moreover, be sure to check the coolants regularly for freezing or overheating.

STEPS TO CHANGE COOLANTS

  • Apply the handbrake to ensure the vehicle doesn’t move and make sure the engine is cold.
  • Use a jack stand to raise the front part of the vehicle.
  • Remove underbody shielding (if any).
  • Place the container pan below the radiator and open the drain valve.
  • Let coolants completely drain into the container pan.
  • Remove the tank to remove any debris and place it back into its place.
  • Replace the drain valve.
  • Fill the new coolants up to the optimal level.

CAR BATTERY REPLACEMENT

replacing a car battery is also among the eas diy car repairs for owners
Changing a car battery is also among the DIY car repair jobs

The battery is pivotal for the smooth running of a vehicle. Its significance has further increased for modern cars as smart systems need power to operate. Therefore, it is important to be mindful of the car battery check light and other symptoms of a bad battery.

Regardless of the factor impacting performance, replacing a battery is among the simple DIY car repairs for owners to do. Make notes of the terminals to avoid connecting any wrong wires. Additionally, ensure timely car battery maintenance for the smooth running of the component.

STEPS TO CHANGE CAR BATTERY

  • Locate the car battery and remove cables from the terminals.
  • Remove any bolts or screws holding the battery to the car.
  • Remove the battery and check the space for any signs of dirt and debris.
  • Clean the place and place the new battery.
  • Bolt all the screws to ensure the battery doesn’t move from its place.
  • Plug in the cables in the respective terminals of the new battery.

WINDSHIELD WIPER REPLACEMENT

Replacing windshield wipers is also among the basic car fixes for owners. The windshield wipers play an integral role in ensuring clear road visibility. Moreover, most car windshield wipers have a universal fit – making them easier to fit.

Considering the easy process, some suppliers offer free installation when buying windshield wiper blades from them. However, doing this easy replacement at home can save a trip to the mechanic shop.

STEPS TO CHANGE WINDSHIELD WIPERS

  • Buy the appropriate wipers for your vehicle.
  • Lift the wipers and put something between the windshield and wipers to protect the screen.
  • Lift the wipers up to 90 degrees or more as per the mechanism. Some wipers may have screws while others can be easily removed from this position.
  • Clip in the new wipers or screw them as per their type. Position them to the original functioning state and try them before going for a drive.

CAR LIGHTS REPLACEMENT

Rather similar to replacing bulbs at home, car light replacement is also one of the easy DIY car repairs for owners. The replacement job does not require any special tools other than the ones owners have in their arsenal.

However, safety should be in check when changing car headlights or any other lights of the vehicle. Be sure to wear safety gloves to avoid electrical shocks and other related hazards.

STEPS TO CHANGE CAR LIGHTS

  • Turn off the vehicle and avoid touching any wires with naked hands.
  • Wear safety gloves and open the vehicle’s hood to locate the light’s housing.
  • Disconnect all wires from the headlights.
  • Carefully remove the headlight. In some vehicles the housing may be surrounded by other components. Therefore, be sure to avoid removing any other wires.
  • Remove the old bulb and replace it with a new one.
  • Place the headlight to its original position and reconnect all the wires.
  • Turn the engine on and test the headlights before hitting the road.

CAR TYRE REPLACEMENT/ROTATION

change car tyres at home is one of the Car maintenance for owners to follow
Changing vehicle tyres does necessarily not require a trip to the mechanic

Rotation of tyres prevents premature wear and prolongs the running life of the major components. It is basic car maintenance for owners to follow for any vehicle. Whether using seasonal, EV tyres or any other types, rotation can be of great help to the owners.

Fortunately, tyre rotation is among the most common do-it-yourself auto repairs. Instead of taking the vehicle to the auto shop and spending money, the job can be done at home. Go through these car tyre-changing FAQs to get answers to all related questions.

STEPS TO CHANGE CAR TYRES

  • Park the vehicle at a safe place and apply the parking brake.
  • Apply wheel wedges to ensure the vehicle doesn’t move during the process.
  • Remove the wheel cover if your vehicle has one. Once done, loosen the lug nuts.
  • Place the jack along the flat tyre and raise the vehicle.
  • Remove the lug nuts and pull the tyre out.
  • Place the new tyre on the hub. Place the lug nuts and gently tighten the lug nuts.
  • Lower the vehicle back to its original place and remove the jack stand.
  • Tighten the lug nuts carefully and place the wheel cover back.
  • Check tyre pressure before taking the vehicle out for a spin.

All the aforementioned DIY car repairs for owners are doable at home. However, be sure to have the right tools when doing any of the repairs. Moreover, if you are unaware of any of the processes, it is best to let a mechanic handle the job.

FAQs

What Can I Fix Myself on a Car?

There are several repairs car owners can do on their own. Some of these include changing tyres, brake pads, coolant, battery, windshield wipers and lights among more.

What is the Easiest Thing to Fix on a Car?

Changing car battery, tyres, lights, oil and coolants remain some of the easiest car repair jobs.

This brings us to the end of the simple car repair tasks owners can do at home. Some easy repairs can help car owners save a fair amount of time and money. However, for major repairs, it is advisable to take the vehicles to the repair shop.

Check out these repairs not to do yourself as you may do more harm than good. For complex repair jobs, there are many car repair services in the UAE to help get the job done professionally.

If your vehicle requires frequent repairs and visits to the mechanic, it is a considerable option to go for a vehicle change. Browse through these used cars for sale in the UAE and have your pick from a wide variety of vehicles listed.

Stay tuned to dubizzle’s auto blog for information about DIY car repairs for owners and more.

Share
Tweet
Pin
Share

DIY Changing Car Headlights: Lighten up Your Way with New Lights

DIY Change Car Headlights

  • Steps to Change Car Headlights
  • Causes of Headlight Failure
  • FAQs

Properly functioned car headlights are essential for both road and vehicle safety. However, you may experience flickering car headlights or sometimes the bulb won’t light up at all. It can happen due to many reasons and this is where it becomes vital to change car headlights. 

Changing car headlights might seem daunting for some when it comes to taking care of cars. However, anyone interested in DIY car care can do it. Once the car headlights are replaced, your car will illuminate the road better and make your nighttime drive safer.

This detailed step-by-step tutorial helps you with clear steps to change car headlights. 

DIY How to Change Car Highlights

an auto expert can change car headlights if you do not want to do it yourself
You can change car headlights yourself or get them changed by an auto expert

A car with dim headlights is a major hazard on the road. Due to this reason, UAE traffic law mandates the use of proper and well-maintained car lights. Those with dim car lights in the UAE are prone to fines and black points. 

Regular maintenance and prompt replacement of faulty components can help prevent headlight failure and ensure safe driving conditions. There are different types of car headlights but the steps to replace them are more or less similar. Here we have mentioned a basic step-by-step tutorial on how to change a car headlight. 

Required Tools 

car headlight bulbs are among the tools needed to change headlights
You need new compatible car headlights to replace the older ones
  • New headlights (those which are compatible with your car)
  • Screwdriver (usually Phillips-head)
  • Gloves
  • Cleaning cloth

Step-by-Step Tutorial to Change Car Headlights

Follow these steps on how to change a car headlight bulbs.

Step 1: Park Your Car and Turn it Off

The first step is to park the car on a levelled surface and turn off the engine. Put on gloves to avoid getting dirt and oil on the new headlights.

Step 2: Open the Hood

Locate the hood release lever, usually beneath the steering wheel. Open the hood and secure it with the prop rod.

Step 3: Access the Headlight Housing 

Look for the back of the headlight assembly. You might need to remove a cover or access panel to reach the bulb compartment to change car headlights.

Step 4: Remove the Old Bulb 

For car headlight bulb replacement, disconnect the electrical connector carefully from the back of the bulb. Release any metal clip or retainer if it is holding the bulb. Gently twist the old bulb in the opposite direction (usually counterclockwise) to remove it.

Step 5: Insert the New Bulk

Take your new bulb and insert it into the socket. Give it a gentle twist clockwise to secure it.

Step 6: Reconnect Electrical Connector

Attach the electrical connector to the back of the new bulb. Make sure it’s snug and secure.

Step 7: Test the Headlights

After changing car headlights, turn them on to make sure the new bulb is working properly. If everything looks good, turn off the headlights.

Step 8: Reassemble

If you removed any covers or access panels, put them back in place. Secure them properly.

Step 9: Close the Hood

Lower the hood carefully and ensure it’s properly closed after changing the car headlights.

Causes of headlight failure

man holding worn out car bulb which is one of the causes of car headlight failure
Car headlight bulbs tend to age or wear out for multiple reasons which can cause their failure

Headlight failure can happen for various reasons. Some common causes include:

Worn Out Bulbs

The most frequent cause of dim car headlights is burnt-out bulbs. Headlight bulbs have a limited lifespan, and they eventually wear out and stop working. Vibrations from driving on rough roads or extended use can contribute to bulb failure over time

Electrical Issues

Problems in the electrical system, such as faulty wiring, blown fuses or issues with relays, can lead to headlight failure. Corroded or loose connectors can disrupt the electrical connection between the bulb and the vehicle’s wiring as well. This makes car headlight bulb replacement of prime importance.

Flickering or dimming headlights

Dimming or flickering headlights could indicate voltage fluctuations, often caused by problems with the alternator or voltage regulator.

Damaged Lens or Housing

Cracked or damaged headlight lenses or housings can expose the bulb to moisture, debris and other environmental factors that may lead to failure.

Collision Impact

Physical impact, such as hitting a pothole or being involved in a minor collision, can cause the filament in the bulb to break, resulting in a burnt-out bulb.

Overheating

Excessive heat due to a malfunctioning cooling system or poor ventilation can cause the headlight bulbs to overheat and fail prematurely. That said, you may browse through these car lighting parts for sale in the UAE to replace the existing ones.

FAQs

Do I need to disconnect the car battery to change the headlight?

On a safer note, you should disconnect any electrical connections, that is, your car battery before performing any electrical car work. The same goes for car headlight bulb replacement.

Do headlights drain a car battery?

Yes. If left switched on for a longer period, car headlights can drain the battery quickly.

Can you change a headlight without tools?

Some headlight bulbs do not require tools for removal. However, most of the time a flathead or Phillips screwdriver is required to change car headlights.

That is all about how to change car headlights yourself. It is an easy and cost-effective DIY task that should top your car maintenance checklist. Remember, with a few simple tools and careful steps, you can handle basic car maintenance tasks like a pro. Similarly, if your car’s tail lights are broken, head over to this guide for tail light replacement and follow the basic steps. Nevertheless, if you are not comfortable with changing the headlights yourself, consult a professional mechanic to fix it. 

Sometimes, you may notice that your headlights are deteriorating. To prevent it from worsening or complete failure, you can use these car headlight restoration tips and turn them anew.

That said, if your car parts are posing recurrent issues, try replacing them with these auto accessories and parts for sale in the UAE.

Up for more tips on car care? Tune in to the dubizzle car blog for exciting car maintenance tips.

Share
Tweet
Pin
Share

Guardians of the Undercarriage: All About Car Rocker Panels

All About Rocker Panels in Cars

Beyond the gleaming exterior and roaring engine, a car’s design incorporates several essential components that often go unnoticed. Among these lesser-known automotive design features, rocker panels are crucial. 

Running between the front and rear wheel wells, a car rocker panel plays a vital role in absorbing collision forces and protecting the overall structure from potential damage. Let’s delve into more details about this important vehicle design component.

What are Car Rocker Panels Made of? 

Rocker panels are typically made of steel, a strong and durable material that can withstand the wear and tear of everyday driving. It is also relatively inexpensive, which makes it a cost-effective choice for car manufacturers.

In recent years, some car manufacturers have started using aluminium rocker panels. Aluminium is lighter than steel, which can improve fuel efficiency. However, aluminium is not as durable as steel, so it is not as common.

Some luxury cars even have carbon fibre rocker panels. Carbon fibre is lighter than steel and aluminium, and even stronger than both. However, it is also more expensive. Given the material’s lightweight, carbon fibre wheels in EVs are installed to help boost its electric range and efficiency.

Where Is a Car Rocker Panel Located on a Vehicle?

exploring car rocker panels location
Rocker panels define the vehicle’s side profile while ensuring structural rigidness

Rocker panels in cars are structural components that run along the bottom side of the vehicle. Connecting the front and rear wheel wells, these components are located just beneath the car doors. 

Furthermore, the car rocker panel often serves as a step for entering and exiting the cabin of taller vehicles. Alongside functionality, rocker panels define the vehicle’s side profile. Depending on the type of car door design, the positioning of rocker panels can have a significant on the car’s overall aesthetics. 

What Do Rocker Panels Do for a Car?

Made of strong materials, such as steel, aluminium or carbon fibre, a vehicle rocker panel can help to absorb the collision impact to some extent. It can also help keep the car’s body from sagging, twisting or bending due to the collision. 

In addition to their structural role, rocker panels can help improve the car’s aerodynamics. The shape of the rocker panels can help to reduce drag and improve the car’s fuel efficiency. To learn more about vehicle aerodynamics, read here.

Way to Protect Your Car Rocker Panels

Here are some useful ways to way to protect your car rocker panels from damage
Some useful tips for maintaining car rocker panels

Depending on the vehicle’s ground clearance, rocker panels are often located very close to the ground. This makes them prone to different types of damage, such as corrosion, dents and cracks. That said, here are useful tips for maintaining car rocker panels. 

  • Applying a coat of wax or polish on your car regularly will help protect rocker panels among other exterior parts from salt, dirt and moisture. Make sure to be aware of the difference between car wax and car polish before cleaning your car rocker panels.
  • Another way to create a barrier between the rocker panel and damaging elements is to have your car undercoated. 
  • You can also search through car accessories for sale in the UAE to look for rocker panel guards. By installing these metal or plastic-made shields, you can protect rocker panels from potential damage. 

Can a Car Be Driven without Rocker Panels?

Yes, a car can be driven for a short period without rocker panels. However, it is advisable not to drive it at all, as the absence of rocker panels compromises the car’s structural integrity. Without rocker panels, the forces of an accident can impact other body parts more severely. Meanwhile, if you’re interested in useful tips for safely escaping a car rollover accident, you can read them here.

What is a Slip-on Rocker Panel?

A slip-on rocker panel is a replacement rocker panel. Typically made of plastic or fibreglass, these types of rocker panels are attached to the vehicle using screws, rivets or adhesive. Nevertheless, slip-on rocker panels are a less expensive alternative to welding ones. 

They are also a good option if you only need to replace a small section of the rocker panel. That said, slip-on rocker panels are not as strong as their welded counterparts and cannot provide the same level of protection in a collision. Therefore, instead of considering this temporary rocker panel replacement, it is better to have the damaged component repaired.

Rocker Panels Vs Side Skirts: What’s the Difference?

difference between rocker panels and side skirts
Side skirts are aftermarket additions to enhance the car’s aerodynamics and appearance

People often confuse side skirts and rocker panels, but these two parts serve different functions. Rocker panels are structural components, whereas side skirts are aftermarket additions. 

Side skirts are attached to the rocker panels to improve the car’s aerodynamics and enhance its sporty appearance. However, when driving a lowered car, rocker panels and side skirts should be protected from potholes and speed bumps.

This was everything you need to know about a car rocker panel. Ensuring structural rigidity and vehicle appearance, it is among the most underrated car components. For more useful tips on maintaining car parts and extending their lifespan, read here.

From rocker panels to door hinges, carefully check every structural component when buying a used car in the UAE and choose wisely.

Stay connected for more tips on how to install rocker panels in cars and their maintenance.

Share
Tweet
Pin
Share

Auto Reconditioning or Auto Detailing: Deciphering the Differences

Auto reconditioning or auto detailing - let's find out what your car needs

  • Auto Reconditioning
  • Auto Detailing
  • FAQS

Usually, people think auto reconditioning or auto detailing is the same term that can be used interchangeably. However, they are two different processes. Auto reconditioning addresses significant damage to both a vehicle’s exterior and interior. 

On the other hand, auto detailing focuses on cleansing and preserving the car’s body and interior components.

Auto Reconditioning Vs Auto Detailing – What Sets Them Apart

all about auto reconditioning or auto detailing
Auto reconditioning involves repairing and restoring a car’s body

For a more detailed understanding, let’s go through the difference between auto reconditioning and auto detailing. 

Auto Reconditioning

Auto reconditioning involves the comprehensive process of rectifying and restoring a car that has endured significant damage to its body. This method rejuvenates the vehicle to its pre-damaged condition or at times, it even enhances its overall state. Popular The service extends to include a range of other offerings:

  • Painting of the car body
  • Conducting mechanical repairs
  • Repairing engines and transmissions
  • Replacement and repair of brakes
  • Substituting car windows
  • Replacing spare parts
  • Performing preventive maintenance
  • Restoring headlights
  • Renewing plastic trim
  • Rectifying cigarette burn holes
  • Repairing paint chips caused by rocks
  • Addressing issues with vinyl and leather
  • Reviving carpets through dyeing
  • Eliminating odours
  • Applying for clear bra protection

Auto reconditioning services have gained popularity over the years because it serves as a means to boost the trade-in or resale value of one’s car. Given the steep cost of new vehicles, individuals are increasingly favouring the purchase of pre-owned cars. Enhancing a vehicle’s appearance stands as a definite strategy to captivate potential buyers. Besides, if you are looking to buy a used car for yourself, here is a list of pre-owned cars for sale in the UAE. 

Auto Detailing

auto reconditioning and auto detailing are two different processes
The process of complete cleaning and preventing the car’s interior and exterior from minor scratches is auto detailing

Auto detailing encompasses a comprehensive and meticulous cleansing process for both a vehicle’s outer and inner areas. Additional services can entail the correction and prevention of minor scratches.

Certain car owners might undertake details on their own. Nevertheless, this DIY approach might not attain the same level of thoroughness as the work of a seasoned car detailing professional. 

The option to have your car detailed is readily available at an auto detail shop. Within such a setting, an expert in auto detailing carries out the complete car detailing process. This includes proficient auto washing services in addition to auto detailing procedures for both the exterior and interior of the vehicle.

Expertise in professional auto detailing lies in the adept application of precise techniques and solutions tailored to meet the unique auto detailing needs of each vehicle.

Consider, for instance, a seasoned auto detailing specialist who possesses a deep understanding of the ideal water pressure or steam intensity to employ. 

Moreover, they adeptly select the right car detailing equipment, eco-friendly solutions, and polishing agents to attain a flawless shine on specific car surfaces, ensuring a blemish-free exterior.

Comprehensive detailing services by skilled auto detailing professionals encompass the following tasks, all geared towards the preservation of both the interior and exterior of the automobile:

  • Washing
  • Waxing
  • Bug and tar removal
  • Clay bar car surface
  • Using degreaser
  • Dressing outside plastics and rubber
  • Waxing or wax sealant
  • Buffing
  • Cleaning and dressing tyres
  • Cleaning the engine
  • Minor dent repair
  • Cleaning and restoring headlights including removing fog from the headlights
  • Touch-up painting
  • Fixing scratches
  • Ventilation refinement
  • Applying paint and protective coating
  • Vacuuming the car’s interior and trunk space
  • Cleaning windows and mirrors
  • Door jambs cleaning
  • Steam cleaning 
  • Cleaning dashboard, console, and vents
  • Cleaning and dressing interior leather, vinyl and rubber sidings
  • Spot cleaning the interior roof
  • Shampooing seats, mats, carpets and door panels

If you are looking for professional car detailing companies, here is a list of companies offering car detailing services in the UAE.

FAQS

What is the difference between Auto Reconditioning and Auto Detailing?

Auto reconditioning and auto detailing are two different processes. The former rejuvenates and repairs a car’s damaged body and the latter includes complete cleaning and scratch prevention of a car’s interior and exterior. 

What are some common professional auto detailing services?

Common professional auto detailing services include car washing, waxing, buffing, clay bar, cleaning the tyres and engine, removing minor dents, headlight restoration and touch-up painting, among others.

What are some common professional auto-reconditioning services?

Common auto reconditioning services include car body paint, mechanical repairs, repairing engines and transmissions, brake repair and replacement, eliminating odours, repairing paint chips caused by rocks and reviving carpets through dyeing, among others. 

That is all on the difference between auto reconditioning and auto detailing. Moreover, if you are looking to keep your car’s interior hygienic, you can opt for car interior detailing services. 

For more on various car services and tips, stay tuned to UAE’s top auto blog.

Share
Tweet
Pin
Share

Routine Car Checks: Monthly Maintenance Checklist

Monthly Car Maintenance Checklist

  • Maintenance Checklist
  • FAQs

When you own a vehicle, it comes with maintenance responsibilities to ensure its optimal performance. If we state it simply, a car benefits from regular maintenance like a human body improves with checkups. Therefore, setting a monthly car maintenance checklist will allow one to take care of minor problems that can become crucial if not taken care of.

Here we have curated a monthly basic car maintenance checklist to keep your vehicle in optimal condition and avoid breakdowns. 

What Car Maintenance Checks to Perform Each Month?

Proper car maintenance ensures longevity, safety and optimal performance. Some maintenance tasks should be performed at specific intervals. For example, check fluid levels and maintain them every month. 

These checks help you identify potential issues earlier. That said, it prevents major car repairs due to minor issues. Here is a curated monthly car maintenance checklist to keep your vehicle running. Remember, regular maintenance extends the car’s life and contributes to your safety on the road.

Check Engine Oil Level

a man checking engine oil using a dipstick
Use a dipstick to check the engine oil level and fill it if it’s low

Checking your engine oil level and oil filter every month is a good practice to ensure proper functioning and longevity. You can check the engine oil level yourself with a dipstick. However, you must learn the steps to read the dipstick before checking the oil level. If the oil level is low, fill the oil until the dipstick indicates full.

Check Car Filters

Since there are different types of car filters, checking them each month becomes essential. Especially in the UAE, where the temperature is usually high, checking air, oil and cabin filters should be a part of the monthly car maintenance checklist. Moreover, inspecting fuel filters is necessary to avoid fuel delivery issues in cars.

These filters can catch dirt and become clogged, affecting the vehicle’s performance. Besides, checking air filters and replacing them should be part of the monthly vehicle maintenance checklist. 

Inspect Tyre Pressure and Condition

checking tyre pressure manually every month can help avoid many problems
Checking tyre pressure regularly is also important to avoid any mishaps

Checking tyre condition and pressure is essential. You must check the reasons why tyres lose pressure. Additionally, if the pressure is low, drivers won’t be able to drive the vehicle smoothly. Fuel consumption becomes higher and vehicle handling is difficult when tyre pressure is low.

Although modern vehicles have tyre pressure monitoring systems (TPMS), always check the tyre pressure manually. Also, check the type of tyre tread wear, if there’s any. One can also inspect the tyres with a coin. 

Clean Wiper Blades

include wiper blades inspection in monthly vehicle maintenance checklist
There may be cracks on windshield wipers over time due to dust and grime

Including wiper blade cleaning in your monthly car maintenance checklist is a good practice. Wiper blades are essential for maintaining good visibility while driving, especially during adverse weather conditions. Over time, dirt, dust and grime can accumulate on the wiper blades, which can lead to streaking, smearing and reduced effectiveness.

You can lift the blades, wipe with a mild solution, rinse and dry. It’s a quick step to safer driving. Inspecting the windshield and wiper blades for any cracks is essential. Check the car windshield washer fluid. Since it can become a home to bacteria, cleaning its reservoir is of utmost importance. 

Check Coolant 

check and fill car coolant every now and then
Checking coolant level is crucial to avoid car heating up and causing problems

Regularly checking the car coolant level in your vehicle in the UAE is crucial due to the extreme temperatures. Coolant is an essential car fluid that maintains engine temperature and prevents overheating, corrosion and leaks. Also, it ensures optimal performance. In this hot climate, coolant checks every month help prevent costly engine damage and maintain your vehicle’s efficiency.

Pay Attention to the Warning Lights on the Dashboard

all the dashboard warning lights to keep an eye on
Keep an eye on the dashboard warning lights and resolve the issues timely

You should pay attention to the warning lights on the dashboard regularly because they provide crucial information about the health and safety of your vehicle. Ignoring these warnings could lead to potential mechanical issues, safety hazards and costly repairs. If not addressed promptly, it can cost a fortune. 

Regularly monitoring the dashboard lights helps you catch problems early and ensures the overall well-being of your vehicle. This should be a regular habit and part of the monthly car maintenance checklist. Besides, a properly maintained car also helps with a car trade-in.

FAQs

What Car Service Should be Done at 5000 Kilometres?

At 5000 kilometres, you should generally consider performing an oil change and checking the tyre pressure and fluid levels. Inspect the overall vehicle condition. Also, refer to your car’s owner’s manual for specific recommendations.

How many KMs to Drive Before a Monthly Maintenance?

Monthly maintenance doesn’t depend on a specific mileage but a time interval. However, when creating a checklist, ensure to change the oil every 5,000 to 10,000 kilometres according to the manufacturer’s recommendations.

What Is the 10000 KM Maintenance Checklist?

a man checking car battery as part of car maintenance checklist
Check the car battery, fluids and other components now and then to ensure the smooth functioning of the vehicle

The 10,000 km maintenance checklist can vary depending on the make and model of your vehicle, as well as the manufacturer’s recommendations. However, here’s an ultimate car maintenance checklist of tasks that you must perform around the 10,000 km mark:

  • Oil Change
  • Tyre Rotation
  • Fluids
  • Air Filter
  • Brakes
  • Suspension and Steering system
  • Belts and Hoses
  • Battery
  • Lights
  • Exhaust System
  • Wheel Alignment
  • Wipers
  • Spark Plugs

Adhering to a monthly vehicle maintenance checklist ensures smooth performance. If you buy a used car in the UAE, ensure to check the car AC, filters, oil and coolant levels regularly due to the hot temperatures. Also, ensure that you don’t make car maintenance mistakes and pay attention to each part equally.

Stay tuned to the dubizzle cars blog to learn more about the ways to maintain and repair cars.

Share
Tweet
Pin
Share