Archives Февраль 2024

Auto Diagnosis: Causes and Implications of Fuel Dilution in Engine Oil

Fuel Dilution in Engine Oil

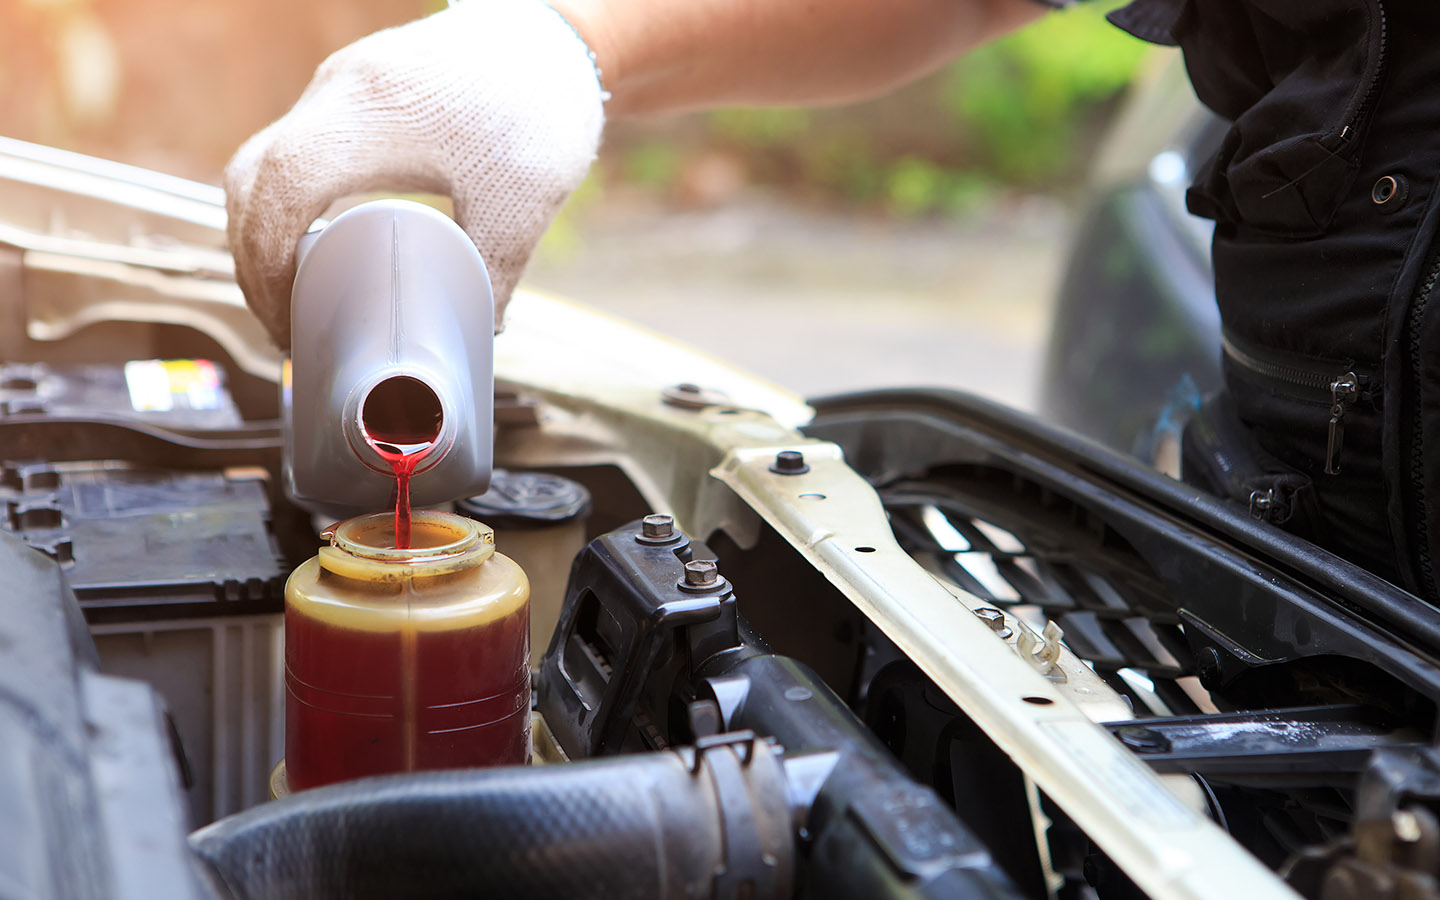
Engine oil plays a vital role in cars with combustion engines. It serves as a protective barrier between moving parts, reducing friction and wear. Regular inspection and maintenance of engine oil are crucial for efficient engine performance. One common yet often-overlooked problem is fuel dilution in engine oil. If unaddressed, it can impact the quality of engine oil and harm engine performance and longevity. 

Let’s find out more about what fuel dilution is, why it happens and ways to tackle this silent engine saboteur.

What is Fuel Dilution in Engine Oil?

More about the problem of fuel dilution in motor oil
Excessive fuel dilution contaminates engine oil and lowers its viscosity

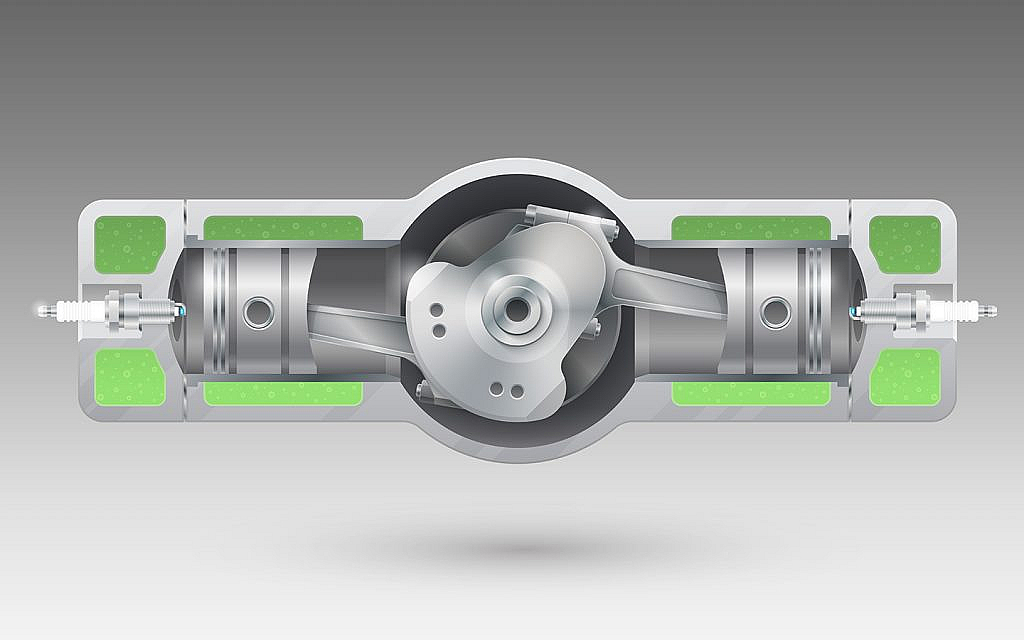
Fuel dilution indicates the problem of raw, unburnt fuel infiltrating the crankshaft of an engine. The fuel contaminates the oil and lowers its viscosity and flash point, creating friction-related wear. 

Regardless of the engine oil type, mixing with unburnt fuel reduces its viscosity, impacting load-carrying ability. This consequently impacts the oil’s flash point temperatures, diminishing its load-carrying ability. 

A high fuel dilution over a short period or a moderate fuel dilution over an extended time can severely damage components. The oil-wetted parts that can be damaged include bearings, gears and pistons, among other components. 

What are the acceptable fuel dilution limits?

Ideally, no fuel should mix with the motor oil. That said, some fuel dilution is inevitable. In petrol engines, 2.4% is a cautionary fuel dilution limit, provided the oil viscosity has not significantly changed. Likewise, the acceptable limit goes up to 3.4% in diesel engines. Any fuel dilution that surpasses these limits should be addressed promptly to prevent any engine performance issues or damage.

Common Causes of Fuel Dilution in Engine Oil

causes of fuel dilution in engine oil
Reasons behind fuel dilution in oil

Some of the common reasons for fuel dilution in engine oil are listed below.

Bad Fuel Injector

Bad fuel injectors can contribute to fuel dilution in oil. When fuel injectors malfunction, they may spray excessive fuel into the combustion chamber, leading to incomplete combustion. Unburnt fuel can then seep past the piston rings and mix with the engine oil, diluting it and reducing its effectiveness. 

How to Fix It

Regular maintenance and timely replacement of faulty fuel injectors are crucial to prevent such fuel dilution problems. Make sure other parts in a car carburettor are also working efficiently.

Worn Piston Rings

Worn piston rings are another common cause of fuel dilution in engine oil. As piston rings wear out, they lose their ability to seal the combustion chamber properly. This allows unburnt fuel to bypass the rings and enter the crankcase, mixing with the engine oil. The diluted oil loses its lubrication properties leading to increased friction and wear on engine components. 

How to Fix It

Keep a close check on the causes of damaged piston rings and symptoms indicating trouble. Replace the worn components to avoid fuel dilution and maintain the engine’s performance.

Engine Idling and Short-Trip Driving

Excessive engine idling and frequent short-trip driving are significant causes of fuel dilution in engine oil. During extended idling and short trips, the engine does not reach its optimal operating temperature, causing incomplete combustion. As a result, partially burnt fuel accumulates in the crankcase and mixes with the engine oil.

How to Fix It

To mitigate fuel dilution, it’s essential to limit excessive idling and consider taking longer drives more frequently. It is to ensure the engine reaches its optimal temperature for complete combustion and proper oil function.

Symptoms of Fuel Dilution

fuel dilution in engine oil signs
Common symptoms of fuel dilution in motor oil

Here are some of the common warning signs indicating excessive fuel dilution in engine oil

Motor Oil with Less Viscosity

Reduced oil viscosity is one of the key symptoms of fuel dilution in engine oil. When carbonised fuel mixes with the oil, it lowers its viscosity. A thinner-than-intended oil consistency is a noteworthy fuel dilution impact.

Excessive Engine Oil Consumption

Fuel dilution can also be among the key reasons behind high engine oil consumption. The thinning of oil simply causes the engine to consume more oil than usual. It is among the common fuel in engine oil symptoms.

Burning Smell

Fuel dilution in oil can cause overheating and a noticeable odour. It can be one of the causes of a burning smell in a car that should not be overlooked. 

The quick fixes discussed above can be handy for the resolution of this car trouble. However, for a safe, optimal and long-term solution, it is better to take your car to a certified auto technician.

These were some common causes, symptoms and fixes of fuel dilution in motor oil. These mechanical issues may impact the performance of petrol and diesel cars. Therefore it is important to regularly inspect and maintain all the car engine parts for optimal performance and longevity.

When buying a used car for sale in the UAE, don’t forget to add engine inspection to your checklist. Get all of its engine components carefully inspected before sealing the deal.

For more insightful auto parts and repair updates, keep reading dubizzle’s cars blog.

Share
Tweet
Pin
Share

Different Types of Car Engine Layouts

Types of Car Engine Layouts

When it comes to automobiles, the engine is a powerhouse. Being a significant part of the vehicle, engines have remained in the spotlight of automobile brands. Each brand designs and produces internal combustion engines to come up with an efficient and powerful machine.

Automotive brands have come up with different designs, layouts and cylinder configurations for engines. That said, the cylinder configuration and layout affect the engines’ power generation and working efficiency.

Here we have mentioned different car engine layout types and their impact on the performance and efficiency of the vehicle. 

List of Car Engine Layouts

Internal combustion engines are the earliest forms of engine used in cars. The combustion engine has come a long way from a basic combustion chamber to varied layouts. 

Following are some of the most common types of car engine layouts that are used in vehicles. 

Straight/Inline Engine

An inline or straight engine is the most commonly used engine layout. In a straight engine, the cylinders are arranged vertically in a row next to each other. Depending on the space under the hood, the engine can be positioned perpendicular or parallel to the car.

Generally, an inline 4-cylinder engine is used in compact cars providing optimum engine displacement. However, the engine displacement can be increased by adding more cylinders in a row. Ranging from Mercedes-Benz to Mazda, all have unveiled sedans with straight-line engines.

Straight or inline engine
An inline or straight engine is often used in compact cars in which the space under the hood is minimum

V Engine

In V engines, the cylinders are arranged alternatively in two rows at a 60 angle. An equal number of cylinders are present on each row making a perfect V shape. The minimum number of cylinders in the V engine can be 2 and the maximum cylinders used to date are 24, but more cylinders can be added.

In V engines, a single drive shaft is used to connect the pistons of all the cylinders. Moreover, the smaller crankshaft of V engines enables more power to the flywheel making it suitable for luxury cars.

V engine
V engines are known for their efficiency and power generation capacity

Flat Engine

Flat engines are similar to boxer engines in which the cylinders are arranged opposite to each other. The cylinders are arranged horizontally in two rows facing each other outwards. This flat arrangement reduces the car’s centre of gravity providing vehicles with better handling, higher agility and driveability.  

Despite its benefits, flat engines are rarely used by automobile manufacturers. Porsche uses a flat-cylinder engine in the 911/Carrera series to provide a car with higher speed and stability. If you are interested in experiencing the efficiency of flat-engine cars, browse through these used Porsche 911 for sale in the UAE and buy your car with a flat engine.  

Cylinder configuration of flat engine
In flat engines, the cylinders are arranged opposite to each other similar to the boxer engine

W Engine

The layout of the W engine features cylinders arranged in three or four rows opposite to each other, making a W shape. The same crankshaft is used to connect all the pistons in a W engine.

These engines are shorter yet wider than V engine and are commonly used in luxury and exotic cars. Moreover, the W-cylinder configuration perfectly balances the engine, increasing its efficiency. If you are looking for cars with a W engine, here are some options:

  • Used Bentley Continental GT for sale in the UAE
  • Second-hand Audi A8 for sale in the UAE
W engine in luxury cars
W engine is often used in ultra-luxury cars due to its high power generation and displacement

X Engine

Cylinders in X engine layouts are arranged diagonally to each other, creating an X shape. The X configuration adjusts more cylinders in smaller spaces making it compact but heavier. 

The X engines are complicated to design and repair; therefore, it is not widely used in vehicles. However, some brands have experimented with the X24 engine by combining two V12 engines but didn’t use it on a wider scale in their cars.  

U Engine

The U engine is a combination of two straight engines, each with its crankshaft. The engines are then connected through gears or chains. These engines provide higher displacement but are heavier than V engines. Therefore, the popular U engines between the 1950s and 1980s were later replaced by V engines. During this period, brands like Toyota and Hyundai have used U engines in their cars.

If you are eagerly looking for a car with a U engine, opt for a classic car. Here are some places to buy classic cars in Dubai that you can visit to buy a prestigious classic car. 

H Engine

The H engine features two separate flat engines connected through gears or chains. Similar to the U engine, both the flat engines in the H engine layout have crankshafts. The H engine type was previously used in higher agility sports cars, especially the F1 cars. 

These were the different types of car engine layouts that automobile brands commonly use. The engine layout significantly affects the vehicles’ drivability, speed and fuel efficiency. Therefore, it is necessary to consider the type of engine layout when buying a new or used car for sale in the UAE. However, if you want to exclude the hassle of driving a car with an internal combustion engine, switch to electric cars. 

Stay tuned to dubizzle’s auto blog to know what are different engine layouts in a car. 

Share
Tweet
Pin
Share

All About Engine Coolant Temperature Sensor

The Engine Coolant Temperature sensor plays a critical role in vehicle's optimal performance

Modern vehicles are equipped with a plethora of sensors to ensure optimal performance and efficiency. Among these sensors, the Engine Coolant Temperature sensor plays a critical role. It helps in keeping the engine operating at the optimal temperature. This device also helps to maintain the vehicle’s fuel efficiency and emission control. However, regular maintenance and addressing any ECT sensor-related problems is a must to ensure a smooth and efficient driving experience.

Let’s delve into the details of the ECT sensor, its function, its working principles and its location in the engine.

What is an Engine Coolant Temperature Sensor

The Engine Coolant Temperature (ECT) sensor is also known as the Coolant Temperature Sensor or Coolant Sender. Moreover, it is a vital component in a vehicle’s engine management system. The primary ECT sensor function is to monitor the temperature of the engine coolant and provide real-time data to the Engine Control Unit (ECU) or Powertrain Control Module (PCM). This information is crucial for the engine’s performance, fuel efficiency, emissions and overall operation.

Functions of ECT Sensor

The ECT sensor serves two primary functions:

Engine Performance and Fuel Management

The ECT sensor continuously provides temperature data to the ECU
The main function of Engine Coolant Temperature is to maintain fuel and engine performance

Also, the engine’s performance and fuel management are dependent on its operating temperature. When the engine is cold, it requires a richer fuel mixture to start and run smoothly. As the engine warms up, the fuel mixture needs to be adjusted to a leaner ratio to optimise fuel efficiency and reduce emissions. The ECT sensor continuously provides temperature data to the ECU, enabling it to adjust the fuel injection and ignition timing accordingly.

Temperature Warnings

The ECT sensor also plays a crucial role in warning the driver about potential engine overheating. If the engine temperature rises too high, the ECU can trigger a warning light on the dashboard to alert the driver. Additionally, in some vehicles, it may activate the engine’s cooling fan to help dissipate excess heat. In this scenario, you must replace the coolant temperature sensor for better performance.

As a result, if the engine is cold, the ECU enriches the fuel mixture to improve cold-starting and reduce engine wear. Conversely, if it’s hot, the ECU leans the fuel mixture to prevent overheating. The ECT sensor data also enables the ECU to manage the operation of the radiator’s cooling fan. 

Engine Coolant Temperature (ECT) Sensor Working

The ECT sensor utilises a thermistor, which is a type of resistor whose electrical resistance changes with temperature. As the engine coolant temperature varies, the resistance of the thermistor changes proportionally. When the engine coolant temperature is cold, the resistance is high and as the temperature increases, the resistance decreases. Also, this characteristic allows the ECT sensor to generate a variable voltage signal based on the coolant temperature.

For instance, when you start your car, the engine is cold and the ECT sensor’s resistance is high. As the ECU receives this information, it increases the length of the fuel injectors’ pulses. This then enriches the air-fuel mixture and adjusts the ignition timing. As the engine warms up, the ECT sensor’s resistance decreases and the ECU leans out the fuel mixture and normalises the car ignition timing. However, in case of a bad engine control module, your car engine won’t be able to monitor the engine cooling system.

Location of the Engine Coolant Temperature Sensor

The exact location of the ECT sensor can vary
You can find the ECT sensor located near the radiator or thermostat housing

The exact location of the ECT sensor can vary depending on the vehicle’s make and model. However, some common locations include:

  1. Near the Thermostat Housing: In many vehicles, the ECT sensor is placed near the thermostat housing. The car thermostat is responsible for regulating the flow of coolant through the engine based on its temperature. Placing the ECT sensor near the thermostat housing allows it to measure the coolant temperature as it exits the engine. However, make sure you keep an eye on the signs of the bad thermostat to avoid any issues while driving.
  2. Cylinder Head: Another common location for the ECT sensor is on the cylinder head or engine block. Placing the sensor here allows it to monitor the temperature of the engine’s metal components directly.
  3. Coolant Outlet Pipe: In some vehicles, the ECT sensor is located on the coolant outlet pipe. This pipe carries coolant from the engine to the radiator, making it an ideal spot to measure the coolant’s temperature.
  4. Radiator: In a few cases, the ECT sensor is mounted on the car radiator itself. This location provides information about the coolant temperature after it has passed through the engine and is ready to be cooled down.

It’s essential to consult the vehicle’s service manual or a qualified mechanic to locate the specific position of the ECT sensor in a particular vehicle.

Common ECT Sensor Problems

A malfunctioning ECT sensor can trigger the check engine light on the dashboard
A faulty ECT sensor can cause difficulty starting the engine

While the ECT sensor is a reliable component, it can encounter issues over time. Some common bad ECT sensor symptoms are:

Faulty Readings

The ECT sensor’s performance can degrade, leading to inaccurate temperature readings. This can cause the engine to run rich or lean, impacting fuel efficiency and emissions.

Engine Overheating

If the ECT sensor fails to detect rising engine temperatures accurately, it may not trigger the cooling fan at the right time. This can lead to an overheating car engine.

Check Engine Light

A malfunctioning ECT sensor can trigger the check engine light on the dashboard, indicating a potential problem with the sensor or its circuit.

Hard Starting or Stalling

In some cases, a faulty ECT sensor can cause difficulty starting the engine, especially when cold it causes engine stalling.

The Engine Coolant Temperature Sensor may be a small component in your car, but its function and operation are vital for your engine’s optimal performance, fuel efficiency and emission control. A malfunctioning ECT sensor can lead to poor fuel economy, engine damage, or emission test failure. Hence, maintaining a healthy ECT sensor is just as important as any other component of your vehicle’s engine management system.

To wrap up, the next time your vehicle displays a warning light or shows signs of car overheating, remember the crucial role the humble ECT sensor plays. 

Besides, if you buy a used car in the UAE make sure you check its dashboard warning light to avoid any costly repairs. A little knowledge about your vehicle’s workings can go a long way in preventive maintenance and repair.

Stay updated with the dubizzle car blog to know more about car parts and their functions. 

Share
Tweet
Pin
Share

Road Emergencies Made Easy: All About Car Tyre Patching

all about car tyre patching

A screw or nail on the road can lead to a flat car tyre – however, this is not such a big problem. If there are just minor damages with a nail embed or puncture in the tread area, the car tyres can be patched easily. Let’s go through a detailed analysis on how are car tyres patched, the basic steps to patch car tyres and how to assess if they are 

Steps to Patch Car Tyres

all about car tyre patching
Patching is important for the safety, long life and road-worthiness of car tyres

Having a flat tyre on the road is never always an inconvenience, especially if there are no auto shops or mechanics nearby. That said, if the tyre is otherwise in good condition, it can be patched easily by following these necessary steps:

  • Step 1: Find the Leak
  • Step 2: Remove the Flat Tyre
  • Step 3: Patch the Tyre
  • Step 4: Reinstall the Tyre

Let’s go through the steps to patch car tyres in detail.

Step 1: Find the Leak

steps to patch car tyres include finding the leak
To get started with a tyre puncture patch, you have to first find the leak

To find the leak, you’ll have to go through this process:

Inflate the tyre

To locate a leak in your tyre, it is important to first ensure proper tyre pressure. Start by inflating the car tyre with air till it reaches the manufacturer’s recommended pressure level. This can be found in your car’s manual – usually in PSI. This step is necessary to identify the leaks before beginning the process of car tyre patching. 

Visually inspect the flat tyre

Carefully inspect the damaged car tire, and if you observe any cuts, holes, or objects sticking out from the tire, you have successfully identified the source of the leak. Here is a step by step guide to plug a leaky tyre.

Aside from the tyre, properly observe the rims. In case of any damage or bent tyre rims, seek professional assistance and get it fixed.

Listen for a hissing sound

Even if the issue isn’t immediately visible, you might be able to detect it by listening closely. If you hear a hissing sound, it’s a distinct indication that air is escaping from your car tyre. This helps to pinpoint the location of the leak.

Feel the air around them

Gently run your hands over the tyre’s surface to check for air leakage. This way, you may be able to detect the leak, even if it is not audible or visible.

Mix soap and water

If you followed the steps and they did not work, just prepare a soap and water mix. Apply a small amount of soapy water or window cleaner to the tyre’s surface. If you observe any bubbling at any point on the surface, you have successfully identified the location of the leak.

Cover the tyre with the water and soap solution

Apply the soap and water solution to the car tyre’s surface. You can either use a spray bottle to spray the mixture or simply pour the solution over the tyre. 

Watch for any bubbles

The air escapes the tyre and experiences the soapy water to make soap bubbles. If there is bubbling soapy water on any part of the tyre, you’ve located the leak. 

Step 2: Remove the Flat Tyre

steps to car tyre patching involve removing the flat tyres
Remove the flat tyre from the vehicle or take your car to a professional auto shop

The second step for tyre puncture patch is removing the flat tyre. Here’s how:

Loosen the nut

Start by loosening the lug nuts. Use a lug wrench (tyre iron) or impact wrench. Do this before jacking up the vehicle. Keep the vehicle’s weight on the wheels. This prevents them from dangerous rotation when turning the lug nuts.

Jack up the vehicle

Jacking up the vehicle is important in the process of how is car tyre patching done
It is important to jack up the vehicle after loosening the lugs

After loosening the lugs, it becomes necessary to jack up the vehicle to remove the wheels. This procedure should be carried out on a level concrete or another hard, level surface. Here are some essential points to consider while jacking up the car:

  • Consult your service manual for recommended jacking points
  • The typical method for elevating the car is by using a floor jack. Here is how to properly jack up a car. 
  • To ensure stability, use jack stands. 
  • Using a hydraulic lift will also save you time during the process.

Take out the lug nuts 

Remove the lug nuts and extract the wheel from the hub. At his stage, the lug nuts might be loose enough to be removed by hand. If not, remove them with a lug wrench or impact wrench.  Once the lug nuts are off, carefully pull the wheel away from the wheelbase. 

Use pliers to pull out protruding objects


car tyre patching process also involves using pliers to pull out protruding objects
Pull out any protruding objects from the car tyres with pliers

If you notice any protruding object, use a pair of pliers to carefully pull it out. Remember to mark this area with a marker or chalk. This can likely be the source of the leak. If there are no protruding objects, go through the previously mentioned steps to locate the leak and then mark it accordingly.

Extract the valve stem core

Remove the valve stem core with a valve stem core remover. This is a specialised two-pronged tool. With this tool, unscrew the valve stem core from the centre of the valve stem and pull it out. This action will release the tyre pressure, allowing you to break the bead. Here is a list of other important car tyre changing tools.

Separate the tyre from the rim 

Remove the tyre from the rim by breaking the bead that seals them together with a tyre spoon and a hammer. It’s essential to break the bead on both sides of the tyre to completely remove it from the rim.

Besides, if the car tyre keeps deflating, it maybe because of a bent rim. Go through these symptoms of bent tyre rim to identify various tyre problems. Also, explore these common car tyre changing FAQs.

Step 3: Patch The Tyre

car tyre patching process is necessary for your vehicle’s safety
After finding the leak and removing the flat tyre, patch it

Follow these steps to patch the car tyres:

Clean the Hole with an Air Die Grinder 

Clean the hole with the air die grinder. Choose a pointy bit that fits into the hole where the leak is located. By doing so, you will roughen up the sides and clean the area thoroughly, ensuring the patch will bond correctly upon installation.

Swap the bit on the die grinder for a grinding stone bit

Apply a pre-buff cleaner spray on the tyre’s interior where the patch will be placed. Utilise the grinding stone to clean and roughen up the area around the hole, ensuring an approximately two-inch diameter is roughened. This will provide the patch with a clean and receptive surface to securely bond with the tyre in the process of car tyre patching.

Spray compressed air into the area

This eliminates dirt or debris resulting from the buffing process. Ensuring a clean surface is vital for the patch to achieve a strong and reliable bond when patching car tyres.

Apply vulcanizing cement 

Appling vulcanizing cement is an important part of car tyre patching
The application creates a barrier preventing water from entering the hole

Coat the buffed inner surface of the tire with vulcanizing cement. This application creates a barrier to prevent water from entering the hole and seeping into the tyre’s tread. Allow the cement to stand until it becomes “tacky” to the touch.

Peel off the protective plastic 

Remove it from the adhesive side of the tyre patch. This is the side that will make contact with the inside of your tire.

Insert the pointy part of the patch through the hole

insert the pointy part of the car tyre patch
This makes sure the patch goes through the tyre effectively

This ensures the patch goes from the inside of the tyre and comes out through the outside. Employ a pair of pliers to grasp the pointy side of the patch and pull it outward from the tyre’s tread. This will securely fasten the sticky part of the patch to the inner side of the tyre.

Apply rubber patch sealant to the inner side of the tyre

In the car tyre patching process, this ensures you cover the entire patch and extend it over some portion of the surrounding tyre area. This thorough application guarantees a leak-free seal, providing optimal protection against air leakage.

Allow the applied sealant to dry

The sealant dries in just a few minutes. While waiting for the drying process, use a pair of side cutters or scissors to trim the stem of the patch until it is levelled with the top of your tyre tread. Here is everything you need to know about tyre tread patterns.

Step 4: Reinstall the Tyre

after patching the tyre, reinstall it
Reinstall the car tyre after patching it

After the car tyre patching process completes, reinstall the tyre. Here is how:

Apply lubrication to the tyre bead

The bed of the tyre is the inner ring responsible for sealing the rim. Use dish soap to lubricate the entire circumference of the bead.

Gently slide the tire back over the rim

This can be done with tyre spoons. Carefully pry open one side of the tyre with the spoons and slide it onto the rim. After successfully fitting the first side, repeat the same procedure for the second side of the tire.

Install a new valve stem core

For best practice, avoid reusing the old valve stem core and instead, replace it with a new one every time it is removed.

Pressurise the Tyre 

Inflate the tyre and fill it up to the correct pressure. The level is specified on the sidewall of the tyre or in your owner’s manual. This pressure will force the tyre into the correct place on the rim and seal the bead.

Reinstall the wheel 

This can be done by sliding the wheels back onto the wheelbase. Thread the lug nuts on tightly enough to keep the wheel in place while the car is still supported by the jack stands.

Remove the jack stands 

This can be done using the floor jack to lower the vehicle back to the ground.

Tighten the lug nuts

After the weight is restored on the wheels, use a lug wrench or impact wrench to tighten the lug nuts to the specified torque. This is outlined in the service manual. Remember to tighten the lug nuts in a star pattern to ensure an even distribution of force.

Besides, if the tyre is not in a condition to get fixed, do not let a flat tyre sit for a long time. Replace it with another. Here are the common places to buy tyres in Dubai.

Drive your car

You can now drive your car confidently. Assuming the patch was done correctly, the repair should last for as long as your tyre remains in use. 

That is all about car tyre patching. Please note that it is a requirement by the tyre safety rules in the UAE to change car tyres every 5 years. Go through these car tyres for sale in the UAE and select the ones that best suit your driving requirements. 

Stay tuned to dubizzle’s car blog for more on different car parts. 

Share
Tweet
Pin
Share

Hissing Noise from Car AC: Common Causes and Solutions

Car ac making hissing noise and not cooling

The comfort of a well-functioning car air conditioning system on a scorching day can be a true blessing. However, there are times when this essential feature of our vehicles can throw us a curveball in unexpected ways. One such issue that many car owners might encounter is the car AC making a hissing noise which indicates a problem in the air conditioning system. 

That said, here are the common causes and fixes of car AC making a hissing noise.

Causes of Car AC Making a Hissing Noise

A hissing noise from the car AC is not a major issue. However, if the problem persists, it is an indication of a malfunctioning part, causing car AC failure. 

Here are the common causes of a car AC making a hissing noise. Let’s go through them. 

LEAKS IN THE REFRIGERANT LINES 

A refrigerant, also known as Freon, circulates the cool air in the cabin. However, if there is a leak in the refrigerant lines, it will result in the car AC making a hissing noise. These leaks occur due to regular wear and tear and physical damage to the unit, causing small holes or broken seals. Also, due to such leaks, low refrigerant levels cause the car AC to blow hot air.

COMPRESSOR ISSUES 

A bad car AC compressor is another reason for a hissing noise. When it is turned on, it will create unusual noises. A compressor may be affected by various factors such as overheating, lack of lubrication or clutch issues. Other mechanical and electrical problems such as imbalance of sensors or solenoids also affect the working of an AC compressor. As a result, car AC only works while driving.

car ac making hissing noise due to a bad compressor
Compressor issues disturb the working of the AC system, creating unwanted noises

EXPANSION VALVE PROBLEMS 

The expansion valve in a car AC also called an orifice tube in some systems, regulates the refrigerant flow into the evaporator. From there, it undergoes a pressure drop, leading to cooling. If the expansion valve is stuck or damaged, it can cause pressure imbalances in the system, resulting in a hissing noise.

DEBRIS

The evaporator and condenser are essential components for heat exchange in the AC system. If they become clogged with debris or dirt, it hinders the flow of refrigerant and creates abnormal sounds, including hissing.

FAULTY CONDENSER FAN MOTOR 

A faulty condenser fan motor can disrupt the proper cooling process in the AC system. This leads to an imbalance in the refrigerant pressure and causes overheating. These issues cause the refrigerant to hiss as it circulates through the AC system. Besides, it is also one of the probable causes of weak airflow in car AC. 

hissing noise from the car ac due to bad  condenser fan
If the condenser fan motor doesn’t work, there will be a hissing noise and a weak airflow from the car’s AC

LEAK IN INTERNAL VALVE 

The internal valves in the car’s AC maintain the refrigerant pressure. If the internal valves are leaked, there will be no cold air. As a result, a hissing sound will be observed. 

OVERCHARGED AC SYSTEM 

When a car’s AC system is overcharged with refrigerant, it leads to excessive pressure inside the system. This pressure increases and causes the excess refrigerant to escape through small openings or the pressure relief valve. As the refrigerant tries to find a way to release the extra pressure, it creates a hissing noise, audible to the driver or passengers inside the car. 

ac making a hissing sound due to over charging
An overcharged AC system leads to a disturbance in the refrigerant pressure

Fixes of Car AC Making a Hissing Noise

We are now familiar with the potential causes of car AC making a hissing noise. Let’s explore different ways to fix this car AC issue.

REPLACE THE LEAKY VALVE

The hissing noise from the AC will increase with time if the leaky valve is not changed. To so do, you can follow the steps mentioned below:

  • First, recover the remaining refrigerant from the AC system.  
  • Use UV dye or another appropriate method to locate the source of the leak in the AC system. Once identified, pinpoint the exact location of the leaky valve.
  • Carefully disconnect the refrigerant lines from the valve, leaving no refrigerant escapes during the process.
  • Obtain a replacement valve of the same type and specifications as the original one. Apply thread sealant or Teflon tape to the threads of the new valve, and then thread it into place by hand to avoid cross-threading.
  • Using the appropriate torque wrench, tighten the valve to the manufacturer’s recommended specifications. Be careful not to overtighten, as it may damage the valve or the surrounding components.
  • Reconnect the refrigerant lines to the newly installed valve and recharge the car AC system. 
  • Turn on the AC and check for any abnormalities in the cooling performance or any new leaks.

REPLACE THE CONDENSER FAN 

The condenser fan plays a crucial role in the AC system by dissipating heat from the refrigerant as it circulates through the system. If the condenser fan is not functioning correctly, it causes several issues that affect the overall performance and efficiency of the AC system. Therefore, it must be replaced at the earliest under professional guidance. 

fixes of car ac making hissing noise
Check for any leaks and make sure that the refrigerant levels are maintained

CHECK REFRIGERANT LEVELS AND LEAKS 

Certain car air conditioner leaks also lead to a hissing noise. When the low levels fall below a certain level, the refrigerant mixes with the system, causing unusual noises. Besides, There might be leaks in the AC system that allow the refrigerant to escape over time. Check common areas for leaks including hoses, fittings, seals, and the condenser.

SEEK PROFESSIONAL ASSISTANCE 

Apart from the above-mentioned solutions, it is advised to get professional help. A car mechanic will be able to diagnose and treat the issue promptly, preventing any further inconvenience. Several car AC repair shops in Dubai, Abu Dhabi and other Emirates offer services to tend to these issues.

solutions for car ac making a hissing sound
Take your car to a mechanic for a prompt diagnosis

This wraps the causes and fixes of car AC making a hissing noise. You can also follow these car ac maintenance tips for keeping a check on your car in the scorching heat. Additionally, if you are in search of a new ride, go through these used cars for sale in the UAE that suit your preferences. 

Stay connected to dubizzle’s autos blog for more on car problems, maintenance and tips and tricks.

Share
Tweet
Pin
Share

Is Your Automatic Transmission Not Shifting Into High Gear? Let’s Find Out

Automatic transmission not shifting into high gear

Automatic transmission is all about effortless driving. Once you get behind the wheel, the driver experiences a hassle-free gear transition journey. But since no machinery is immune to malfunctioning, the driver may face some challenges with automatic transmission. One such issue the driver could face is the automatic transmission not shifting into high gear. To determine why the transmission won’t shift gears, let’s first understand how automatic transmission works.

How Does Automatic Transmission Work

automatic transmission allows smooth transition between gears
Automatic transmission is a complex system allowing car to swiftly shift between gears

Automatic transmission is a unique combination of electrical, hydraulic and mechanical systems. When these systems work together seamlessly, your car effortlessly glides through gears. The automatic transmission system is often confused with electric car gears which is a completely separate system.

The electrical system takes charge of monitoring gear selection, throttle position and speed. Meanwhile, the electronic control module works as the car’s internal computer and coordinates with automatic gear shifts. The hydraulic system regulates the pressure of transmission fluid. Simultaneously, the mechanical system comes into play during high-speed manoeuvres for a smoother ride.   

Signs of Automatic Transmission Not Shifting Into High Gear

symptoms of automatic transmission not shifting in high gear
Automatic transmission not shifting into high gear may be evident by slow acceleration, engine braking at high speed etc.

There are several warning signs and symptoms of automatic transmission not shifting into high gear. Here are some common warning signs to look out for.

High RPM at High Speeds

If you observe that your engine’s RPM continues to be particularly high even as you are driving at higher speeds, it may be a sign that the gearbox is not upshifting to the higher gears. This indicates that your automatic transmission service is immediately required.

Slow Acceleration

Especially on roads or inclines, an automatic transmission that doesn’t shift into high gear may result in slow acceleration, giving the impression that your car is straining to gain speed.

Poor Fuel Economy 

You may experience poor fuel economy as one of the symptoms of automatic transmission not shifting into high gear. If the engine is not performing up to the mark as the automatic transmission does not shift into high gear.

Overheating

A stressed gearbox can generate more heat, which could overheat the car engine and result in other performance problems for your car.

Engine Braking at High Speeds

Engine braking is one of the common symptoms of automatic transmission not shifting into high gear. It occurs when the engine more abruptly slows the car down when you release the accelerator pedal rather than gently shifting into a higher gear.

Delayed Shifting

When you expect the gearbox to shift higher, there may be a delay in the transmission of gears that you may perceive as a pause or hesitation. This is a common sign of automatic transmission not shifting into high gear.

If you experience any of these symptoms, it is essential to have your vehicle inspected by an auto expert to nip the issue in the bud. If left unattended, transmission issues can lead to more severe problems and costly repairs in future.

High Gear Shifting Problems in Automatic Transmission: Reasons & Fixes

A functioning automatic gearbox should shift gears up, down and into neutral as needed. However, if it fails to do so, there might be an internal problem affecting its performance. Some common reasons for an automatic transmission not shifting into high gear are detailed below along with their resolution methods.

Low Transmission Fluid

reasons and fixes for automatic transmission not shifting into high gear
Low level of transmission fluid is one of the common reasons for automatic transmission not shifting into high gear

Insufficient car transmission fluid can disrupt the proper functioning of the transmission. As a result, the car won’t go into gear or automatic transmission won’t shift into high gear swiftly. 

How to fix it

Keeping a keen eye on the level of transmission fluid can help enhance its performance and life. You can easily check the transmission fluid level using the dipstick method. If you are not comfortable using a dipstick, read out this guide on checking transmission fluid without a dipstick. 

Transmission Fluid Leaks

Leaks in the transmission system can cause a drop in fluid levels, affecting hydraulic pressure and causing high gear shifting problems in automatic transmission.

How to fix it

As part of automatic transmission maintenance, it is important to change the transmission fluid timely. This prevents the buildup of debris and dirt leading to fluid leaks due to cracks in the transmission system.

Faulty Shift Solenoid

Shift solenoids are responsible for controlling the flow of transmission fluid to engage particular gears. If these solenoids malfunction, the driver can experience delayed gear shifting or the car gets stuck in park mode. 

How to fix it

To fix a stuck gear shift, try overriding the shift interlock solenoid. The method of overriding the shift interlock solenoid is explained in this guide for car gear stuck in park mode.

Malfunctioning Transmission Control Module (TCM) 

The TCM is the electronic control module that is responsible for transmission performance. It manages the transmission’s shifting based on sensor inputs. A malfunctioning TCM is one of the common reasons for high gear shifting problems in automatic transmission.

How to fix it

Try identifying the error code for a faulty TCM using an OBD scanner. Also, make sure that wiring harnesses and connectors related to the TCM are securely connected and free from damage or corrosion.

Faulty Torque Converter

The torque converter is essential for transmitting engine power to the gearbox through a hydraulic system. If it fails to function correctly, gear shifting can be affected drastically.

How to fix it

Fixing a faulty torque converter is a complex task that often requires professional expertise and specialised equipment. Therefore, it is advised to get this issue fixed by an auto expert.

With this, we conclude the causes and fixes of why an automatic transmission does not shift into high gear. To determine the exact cause of the problem and find the right repairs, it is better to seek help from an auto expert. Addressing transmission problems promptly can prevent potential car damage and ensure a seamless driving experience.

However, if your car is posing recurring issues which are beyond repair, it is better to buy yourself another car. Browse these used cars for sale in the UAE and find your ideal one. 

For more information on car parts and accessories, stay tuned to dubizzle’s car blog.

Share
Tweet
Pin
Share

Can You Jumpstart a Hybrid Car? Let’s Find Out

how to jumpstart a hybrid car

It can be an unpleasant surprise to meet a dead battery when you slide behind the wheel of a hybrid car. While most drivers are familiar with jumpstarting a traditional car, it might seem like a daunting task to jumpstart a hybrid car. This is mainly because of the unique combination of powertrains in a hybrid vehicle.

But before you drift into panic mode, know that it is entirely possible to jumpstart a hybrid car. To get your eco-friendly vehicle up and running, let’s get into the details of how to do it.

How to Jumpstart a Hybrid Car

Hybrid car batteries are complex but can be jumpstarted easily
Hybrid cars are more complex than standard cars, however, you can jumpstart them if you know your car’s battery

If you are in the middle of nowhere and run flat on a hybrid car battery, it is important to know how to handle it. To get started with jumpstarting a hybrid car, first, let’s understand the basics of a hybrid car battery.

How Does a Hybrid Car Battery Work?

Hybrid cars, mostly HEVs, have two types of batteries; a smaller 12-volt battery and a high-voltage battery. The smaller one helps to start a hybrid vehicle. Whereas, the high-voltage battery either works with or takes over the fuel engine for efficiency. The presence of a 12-volt battery makes it easier to jumpstart a hybrid car.  

While driving, hybrids can switch seamlessly between the two power sources. The combustion engine helps to recharge the high-voltage battery. It also recharges through regenerative braking which is the phenomenon of generating energy from each wheel upon braking. 

Now that you know how a hybrid car battery works, let’s jumpstart your hybrid car the right way.  

Process of Jumpstarting a Hybrid Car

jumpstart a hybrid car by recharging the 12-volt battery
A dead hybrid car battery can be jumpstarted by recharging its smaller 12-volt battery

You can jumpstart a hybrid car with a dead battery just like you do it for any standard car. Following are the steps with which you can easily jumpstart a hybrid car keeping yourself and your car safe.

Step 1: Park the hybrid car and the donor car on a flat and dry surface. 

Step 2: Presumably, the hybrid car might already be off since the battery is dead. Make sure both the donor car and hybrid car and all their electrical components are turned off. Engage the parking brake.

Step 3: Locate the correct battery, that is, the smaller 12-volt battery to recharge it. In some cars, it is located under the car’s hood or in the trunk.

Step 4: Attach the red clamp (+) to the positive terminal of the dead battery or positive jump post. 

Step 5: Place the other red clamp on the positive terminal of a working battery (the donor car).

Step 6: Attach the black clamp (-) to the negative terminal of the dead battery or negative jump post. Some vehicles do not have a negative terminal, in that case, connect the negative clamp to a stationary, unpainted metal point under the hood. 

Step 7: Attach the other black clamp to the negative terminal of a working battery (the donor car).

Step 8: Start the donor car’s engine and let it run for a few minutes before charging the dead battery. Revving up the donor car’s engine can help speed up charging as well. Here is how you can rev a car easily.

Step 9: Now try starting the hybrid car after a few minutes. If it doesn’t work instantly, try starting it again after a little more time.  

Step 10: Once the battery is charged, turn off both vehicles again.

Step 11: Disconnect all the clamps carefully in the reverse order of connection. That is, first remove the negative clamps and then the positive clamps.

Although jumpstarting a hybrid car is a skill drivers must have to avoid unpleasant surprises. However, there are some precautions you must take to prevent potential damage.

Precautions to Jumpstart a Hybrid Car

precautions to jumpstart a hybrid car
Hybrid cars must be dealt with safely as they have a unique set of batteries and are more complex

As hybrid cars have an electric motor you must exercise certain precautions during the process. By following these precautions, you can safely jumpstart your hybrid car and get back on the road without any worries. 

Consult the Owner’s Manual

Read the owner’s manual to understand the manufacturer’s instructions related to jump-starting.

Use Correct Cables

Make sure that you use adequate jumper cables designed for use with hybrid vehicles.

Match Polarity

Failing to match polarity while jumpstarting a hybrid car can cause electrical damage to sensitive electronic parts.

Never Connect to the High-Voltage Battery

Before attempting to jumpstart a hybrid car, know your car batteries correctly. Never connect the jumper cables directly to the high-voltage battery as it is dangerous and highly powerful. 

Moreover, if jumpstarting a hybrid car doesn’t work as it should or you are not confident about the process, it is better to seek assistance from an auto mechanic. There are many hybrid car problems which you cannot deal on your own and need professional help with.

FAQs

Can you jumpstart another car from a hybrid car?

Yes, jumpstarting a car battery from a hybrid car is no different than doing it with a standard car. If the 12-volt battery of a hybrid car is charged and in working condition, it can easily jumpstart another car. 

Can you jumpstart a car without another car?

Yes, you can jumpstart a car without another car simply by using a jumpstart box or the push-start method. 

That’s a wrap on how to jumpstart a hybrid car. Learning the proper way to jumpstart a hybrid car is crucial to prevent damage. Having the skill on hand can be a lifesaver in times of need. However, if you are not comfortable doing it yourself, it’s always best to leave the task to trained professionals. You may want to go through this guide for tips to buy hybrid cars in the UAE and save yourself from future costly repairs.

Moreover, make sure that your hybrid car is well-maintained as it is more complex and expensive than standard cars. Also, protect the hybrid car battery from heat to prevent its depletion before its life span ends. That said, if your car battery is posing recurring issues or frequent breakdowns, it is better to switch to another car. Browse these used cars for sale in the UAE and find your ideal one.

Stay connected to dubizzle’s car blog for more information on car parts and accessories.

Share
Tweet
Pin
Share

What Is Porsche Communication Management?

Porsche Management System

The automobile industry has significantly availed from technological advancements. Integration of technology elevates the driving experience, safety and overall efficiency of a car. A prime example of technological inclusion and its positive impact on the car is the infotainment system. Unlike traditional infotainment systems, the modern one serves multiple purposes and also enhances the driving experience. In fact, many leading brands including Porsche have launched their infotainment systems with varied features. The Porsche Communication Management (PCM) system serves as central control of multiple car features.

Let’s dive a little deeper and elaborate on: what is PCM in a Porsche? What features does it provide and what are its benefits? 

PCM in Porsche

PCM serves as a central control unit for different functions including navigation, communication, audio and other standard functions. To operate all these functions, a high-resolution screen is present at the centre of the dashboard. In simpler words, Porsche’s PCM is an advanced version of the infotainment system which is more efficient than the traditional ones.

The PCM’s screen is similar to that of a mobile phone which helps in controlling features conveniently. Users can even set their most-used features on the home screen for easy access. Mentioned below are some major functions of Porsche’s PCM. 

PCM by Porsche
The Porche’s PCM is an efficient infotainment system that facilitates drivers in multiple ways

Features of Porsche Communication Management

PCM controls many functions which help drivers to connect with their Porsche and environment. Mentioned below are the core features of PCM that you can avail of.

  • Audio: PCM can control the volume, tone and balance of the audio system. Moreover, the system can be used for listening to radio, music or podcasts. 
  • Navigation: PCM not only provides maps for navigation but also provides real-time traffic updates to avoid traffic jams.
  • Connectivity: PCM can synced with the driver’s mobile phone to call and access contacts with convenience. 
  • Vehicular Control: All the basic vehicle functions like controlling light, climate control and adjusting seats can be managed through the PCM. 
  • Porsche Connect: The Porsche Connect app and PCM can be synced allowing drivers to browse through different features of the app. 
  • Drivers’ Assistance: Aside from basic controls, driver-assist features such as a forward collision avoidance system can be controlled through the PCM. 
  • Battery Information: In case your vehicle is a hybrid, the PCM shows all the details regarding the battery life and vehicle performance. 

Pros of Porsche Communication Management

Now that you are aware of the functions and assistance provided by PCM it’s time to move on to its benefits. Here we have listed some pros of using the Porsche Management System. 

Technologically Efficient

PCM is a technologically advanced feature providing real-time information regarding roads and traffic. The high-resolution screen and maps shown in 2D and 3D enable drivers to avail of the navigation properly. 

User-Friendly

The PCM’s screen has an easy-to-navigate menu and all the major functions are easily accessible. Aside from the touchscreen, functions can also be controlled by the buttons and rotary push buttons present along the screen. 

Speaking of touchscreen, Porsche Taycan has one of the biggest car screens, almost 16.8 inches. 

Porsche's Management System
PCM provides real-time information regarding different parts of the car including speed, distance covered and fuel consumed

Higher Connectivity

PCM supports both Apple CarPlay and Android Auto resulting in increased connectivity. Moreover, it has a USB and iPhone port that can be used to connect phones to cars. Drivers’ can also access other features of smartphones by connecting phones and PCM through car Bluetooth.  

Information Collection

The TRIP computer of the PCM collects real-time driving data that can be used by the Advanced Driver Assistance System (ADAS). Information like the distance covered, driving time and fuel consumption are collected and analysed to predict any malfunctioning auto parts.   

What is PCCM & PCCM Plus

Porsche Classic Communication Management (PCCM) and Porsche Classic Communication Management (PCCM) Plus are Porsche’s PCM that can be integrated into classic cars of the brand. The PCCM and PCCM Plus have more or less similar functions as the PCM; however, the first two are specially designed to be integrated into previous models. 

The PCCM and PCCM Plus are available in three different versions:

  • A 3.5-inch display for the cars with smaller radio slots. 
  • A 7-inch display for all vehicles of 911 ( 991 I), Cayman/Boxster (987 I) and Cayenne first generation released till 2008. 

This was all about Porsche Communication Management and its functions. PCM is the advanced version of the infotainment system integrated with a number of features to facilitate and entertain passengers. If you are also interested in availing the PCM, browse through these used Porsche cars for sale in the UAE and buy your very own Porsche. 

Besides, if you want to leverage PCCM and PCCM Plus, here are some top places to buy classic cars in Dubai and other Emirates. 

Stay tuned to dubizzle’s auto blog for more information on Porsche Communication Management’s price.

Share
Tweet
Pin
Share

Discover the Purpose of Different Pumps in Car

Different pumps in car are available for smooth ride

Modern vehicles are engineering marvels, comprising a plethora of interconnected components working harmoniously to ensure smooth operation and optimal performance. Among these crucial components are various types of pumps that play essential roles in the functioning of a car. These pumps are responsible for delivering essential fluids to different systems, enhancing efficiency and ensuring the engine runs smoothly. Following we will reveal the names and functions of the key pumps found in a car.

Different Types of Pumps in a Car

There are eight pumps in your car, each serving different functions. Some pumps operate continuously while the engine is running, while others require manual activation through a button or a lever. 

Let’s discuss each one individually. 

Fuel Pump

 The fuel pump also plays a role in regulating the fuel pressure
Fuel pumps in car helps in regulating fuel pressure

The fuel pump is one of the crucial types of automotive pumps. In addition to delivering fuel to the engine, the fuel pump also plays a role in regulating the fuel pressure. It adjusts the fuel flow based on various factors such as engine speed, load and throttle position. All these factors ensure that the engine receives the right amount of fuel under different driving conditions. Also, keep an eye on the signs of bad fuel pump to avoid any leakage.

The fuel pump operates using an electric motor, which is activated when you turn the ignition key or press the start button. Once activated, it creates the necessary pressure to push the fuel from the tank to the engine through the fuel lines. Some modern cars have advanced fuel pump systems that can adjust the fuel pressure dynamically, improving fuel efficiency and reducing emissions.

Water Pump

The water pump car plays a crucial role in the car’s cooling system. It is responsible for circulating coolant (a mixture of water and antifreeze) throughout all the engine parts  to dissipate excess heat. This essential car water pump function prevents the engine from overheating, which could potentially cause significant damage. Typically driven by a belt connected to the engine, the car water pump ensures a continuous flow of coolant, maintaining the engine at its ideal operating temperature.

Oil Pump

The oil pump in car is typically located in the engine’s oil pan, and it is driven by the engine’s crankshaft or timing belt, depending on the engine’s design. When the engine is running, the oil pump creates a vacuum that draws oil from the oil pan and forces it through the oil filter to remove any contaminants. After passing through the oil filter, the clean engine oil  is then distributed to various engine parts, such as the crankshaft, camshafts, pistons, and valve train.

Proper lubrication is vital to the engine’s health, as it prevents metal-to-metal contact between moving parts, reducing friction and wear. It also helps dissipate heat generated during engine operation, preventing overheating and ensuring optimal performance.

Regular oil changes are essential to maintain the oil’s effectiveness and prevent engine damage. Over time, any type of engine oil can become contaminated with dirt, debris, and sludge, reducing its lubricating properties.

Power Steering Pump

The power steering pump is usually driven by the engine through a belt
The power steering operates automatically when the engine is running

The power steering pump in car is usually driven by the engine through a belt . It operates automatically when the engine is running. When the driver turns the steering wheel, a valve in the power steering pump senses the movement and adjusts the hydraulic pressure accordingly. This pressure then gets transmitted through the power steering fluid to the steering gear, providing the necessary assistance to turn the wheels.

You must replace a bad power steering pump for smooth ride. Here is how you can change power steering pump on your own.

One of the significant advantages of power steering is that it reduces the physical effort required from the driver to manoeuvre the vehicle. This is particularly beneficial for larger and heavier vehicles, making driving more comfortable and less tiring, especially during long journeys or in congested traffic.

Transmission Fluid Pump

In vehicles with automatic transmissions, the transmission fluid pump is crucial. It maintains a constant flow of transmission fluid, which acts as a hydraulic fluid to control gear shifts and maintain the proper functioning of the transmission. It is one of the essential car fluids this is why, a well-maintained transmission fluid pump ensures smooth gear changes and optimal transmission performance.

Washer Fluid Pump

The washer fluid pump, also known as the windshield washer pump, is responsible for spraying washer fluid onto the windshield to improve visibility. When activated, the pump pressurises the washer fluid and delivers it through the nozzles onto the windshield, helping to remove dirt, dust, and debris.

Vacuum Pump

vacuum systems play a vital role in operating various components
Vacuum pump ensures a reliable and consistent vacuum supply

In modern cars, vacuum systems play a vital role in operating various components. One such example is the brake system, where a vacuum is necessary to enable smooth activation of the brakes, making it easier for the driver to control the vehicle’s deceleration.

While some European car models acquire the required vacuum directly from the intake manifold, others utilise a separate vacuum pump, which can either be mechanically or electrically powered. This vacuum pump function in car ensures a reliable and consistent vacuum supply to cater to the different vacuum-operated actuators in the vehicle, contributing to efficient and safe braking performance.

This is all about different pumps in car and their functions. The various pumps in a car play pivotal roles in ensuring the vehicle’s smooth operation, longevity and optimal performance. From delivering fuel to the engine and maintaining the cooling system to circulating engine oil and assisting in power steering, each pump has a specific function that contributes to the overall driving experience.

In case you buy a used car in the UAE make sure you keep up with their maintenance. Regular maintenance and care for these pumps are essential to keep the vehicle running efficiently and to prevent potential issues. 

If you ever encounter any problems with the pumps in your car, it’s essential to address them promptly to avoid further damage and ensure the safety and reliability of your vehicle on the road.

Stay tuned to the dubizzle car blog to know more about car parts. 

Share
Tweet
Pin
Share

Recognising the Signs of a Bad Brake Booster

There are several signs of bad brake booster

Ensuring the safety of both ourselves and others on the road is paramount while driving. A well-functioning braking system plays a vital role in this regard. Among the various components contributing to efficient braking, the brake booster stands out as a crucial element. Acting as a silent sentinel behind the brake pedal, the brake booster assists drivers in applying the brakes with ease and precision. However, like any automotive part, brake boosters can encounter issues over time.

It is essential to recognise the signs of a bad brake booster and address the issue promptly. Let’s explore the common symptoms of a failing brake booster and understand why it requires immediate attention.

What is a Brake Booster 

A brake booster, also known as a vacuum booster, is a device that enhances the force applied to the brake pedal. It also helps in making it easier for the driver to apply the brakes and bring the vehicle to a stop. It is a critical component for all types of car braking systems. The brake booster commonly used to improve braking efficiency and safety.

How Does a Brake Booster Work

A bad brake booster can increase brake pedal effort
The brake booster helps in applying brakes during emergencies

The brake booster operates using the principle of vacuum assistance. It is typically connected to the engine’s intake manifold through a vacuum hose. When the driver presses the brake pedal, a valve in the brake booster opens. It allows the engine vacuum to enter the booster. This vacuum creates a pressure difference on both sides of a diaphragm inside the booster.

As the vacuum is applied to one side of the diaphragm, it pushes against atmospheric pressure on the other side, creating a power-assisted force. This force is then transferred to the master cylinder. This, in turn, applies hydraulic pressure to the brake callipers or drums, initiating the braking process.

The brake booster’s assistance is particularly helpful during emergency stops or when braking at high speeds. This is because it reduces the effort required by the driver to apply the brakes effectively. Without a properly functioning brake booster, the brake pedal would feel much harder to press. Besides, there are some more reasons why it is hard to press brake pedal, check out the causes and fixes here.

Signs of Bad Brake Booster Problems

Recognising the warning signs of a bad brake booster is essential for maintaining your safety on the road. Your brake system and booster play a crucial role in ensuring effective braking. However, identifying these symptoms can help you address any necessary car brake repair. 

Here are the common signs of a bad brake booster.

Increased Brake Pedal Effort

You must change the bad brake pedal for safe driving
A faulty brake pedal can make braking less effective

One of the primary indicators of a bad brake booster is the increased effort required to depress the brake pedal. You might notice that the pedal feels much harder than usual and you need to exert more force to bring the vehicle to a stop. This change in pedal resistance can make braking less effective and potentially dangerous, especially during emergencies when quick and precise braking is crucial.

Prolonged Braking Distance

If you noticed that your car is taking longer to come to a complete stop than usual, it is due to a faulty brake booster. A failing brake booster may not generate enough assistance for the brake system, resulting in decreased braking performance. This can significantly increase the distance required to bring your vehicle to a halt, posing a serious hazard on the road.

Hissing Noise When Braking

During braking, a hissing noise emanating from the brake pedal area is another sign of a bad brake booster. The hissing or sqeaking noise while applying brake indicates a potential vacuum leak in the brake booster system. The brake booster operates with the help of a vacuum created by the engine. However, any leaks can disrupt this crucial balance, leading to inefficient brake assistance.

Unstable Brake Pedal

A brake pedal that feels inconsistent or unstable can be indicative of a failing brake booster. You might experience variations in the pedal’s resistance, making it unpredictable and challenging to modulate braking force. This inconsistency causes difficulty in maintaining steady pressure on the brake pedal, leading to erratic stopping patterns.

Engine Stalling

Brake fluid leaks are serious issues that can impact the brake booster's functionality
A bad brake booster can stall you car’s engine

In some cases, a faulty brake booster can cause the engine to stall when the brake pedal is depressed. This occurs due to the imbalance in the vacuum system, affecting the engine’s performance. Therefore, you must inspect your braking booster and repair it as soon as possible, if you notice the engine stalling upon braking. You can check out used brakes and parts for sale here.

Brake Fluid Leaks

Brake fluid is one of the essential car fluids, this is why its leaking is a serious issues that can impact the brake booster’s functionality. A leaking brake booster can allow brake fluid to contaminate the booster diaphragm, causing it to lose its vacuum-assisting capabilities. If you observe any brake fluid leaks in the vicinity of the brake booster, it’s crucial to address the issue promptly.

Illuminated Brake Warning Light

Modern vehicles comes with a brake light switch on the dashboard that signals potential brake system issues. The warning light may illuminate if the brake booster is failing or experiencing problems. Ignoring this warning light could lead to further complications and compromise your vehicle’s braking performance.

The brake booster plays a vital role in ensuring safe and efficient braking in your vehicle. Being aware of the signs of a bad brake booster can help you address potential issues early on and prevent dangerous situations on the road. If you experience any of the mentioned symptoms, it’s crucial to have your brake system inspected and avoid car brake failure.

If you are planning to buy a used car in the UAE, always remember that prioritising regular car brake maintenance is essential for your safety.

Stay tuned to the dubizzle UAE’s leading car blog for more maintenance hacks. 

Share
Tweet
Pin
Share