Archives Январь 2024

DIY Throttle Body Cleaning

throttle body cleaning

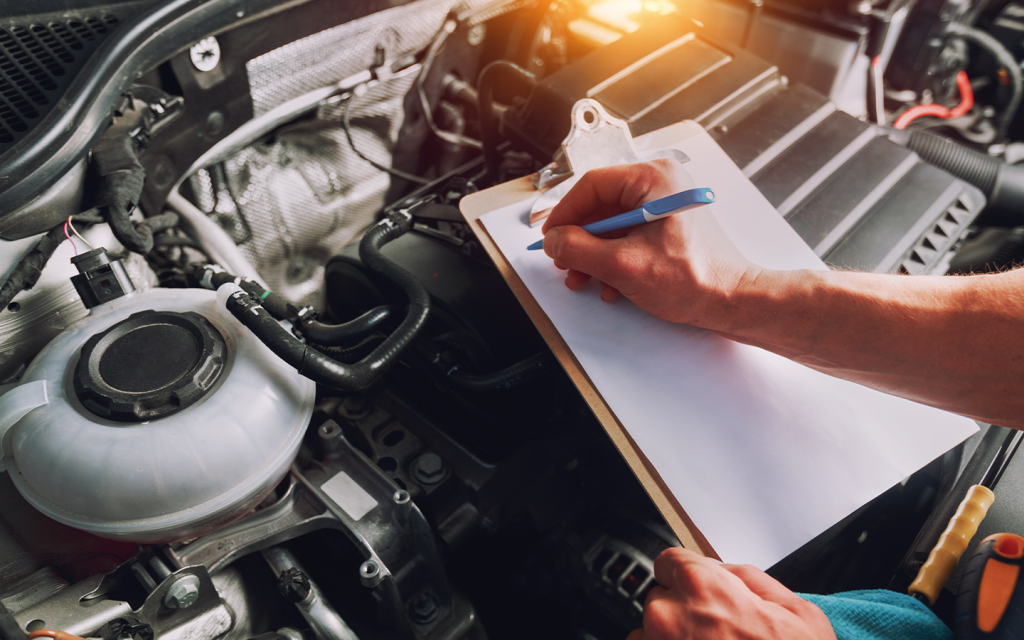
Timely maintenance can significantly increase a vehicle’s running life. For maintenance, cleaning is perhaps the most crucial practice. Dirt or harmful particles settling on car components can cause great damage to the parts – leading to major issues and breakdown in some cases. One of the major engine components that require timely cleaning is the throttle body. Unlike some other car component washing jobs, car owners can do throttle body cleaning themselves.

With some essential tools and cleaning spray, throttle body cleaning can easily be done at home. We will do a step-by-step guide on how to clean a car’s throttle body and ensure good car care.

What is a Throttle Body?

throttle body controls the air intake inside a car’s engine
The throttle body is responsible for controlling the air intake in a car’s engine

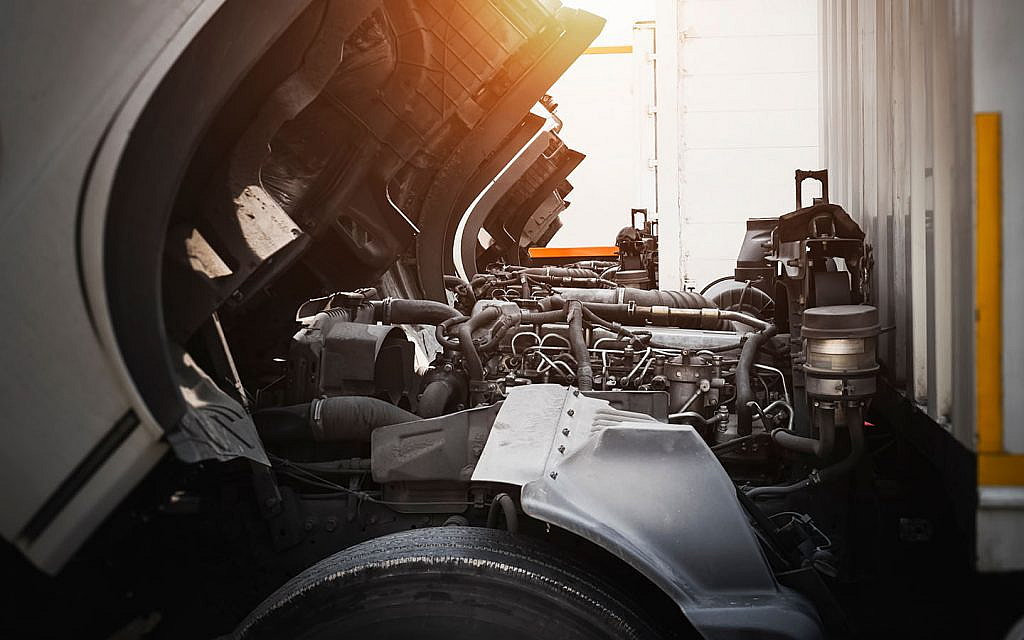
The throttle body controls the air intake inside a car’s engine. For electronically fuel-injected cars, the throttle body works with different types of sensors to regulate the amount of air going into the ignition chamber.

A clean and functioning throttle body ensures good engine drivability. However, with time particles, dirt and varnish can accumulate in the throttle body. This can lead to issues like rough idle, sluggish acceleration, stalling and reduced fuel economy. Therefore, timely cleaning is compulsory to ensure a smooth-running engine.

Steps for DIY Throttle Body Cleaning

A bad throttle body can lead to several problems. For instance, if a car starts rough and smooths out, this could indicate issues in the throttle body. However, if you know the ways to clean the throttle body, some problems can be avoided beforehand.

That said, let’s go through a step-by-step guide on DIY throttle body cleaning.

REQUIRED TOOLS

For a comprehensive cleaning job, drivers need to open the throttle body – which requires some tools. Listed below is a list of tools required for car throttle body cleaning.

  • Throttle body cleaner
  • A clean towel
  • Some petrol
  • A toothbrush
  • Eye protection
  • A flashlight

Additionally, it is a viable option to follow the vehicle manual. This can help locate the throttle body without disturbing any of the car alternators or any other engine parts.

STEP 1 – PARK THE VEHICLE OUTDOOR AND LOCATE THE THROTTLE BODY

throttle body cleaning requires precision and precautions
Cleaning the throttle body is rather easy as compared to some other cleaning jobs

Before getting to the throttle body cleaning part, park the vehicle outdoors and during day time. Make sure to find a spot with ample lighting and a level area. As throttle body parts are volatile, it is essential to take precautions to avoid causing unwanted damage. However, if there’s an indoor area with good lighting, it can be used too.

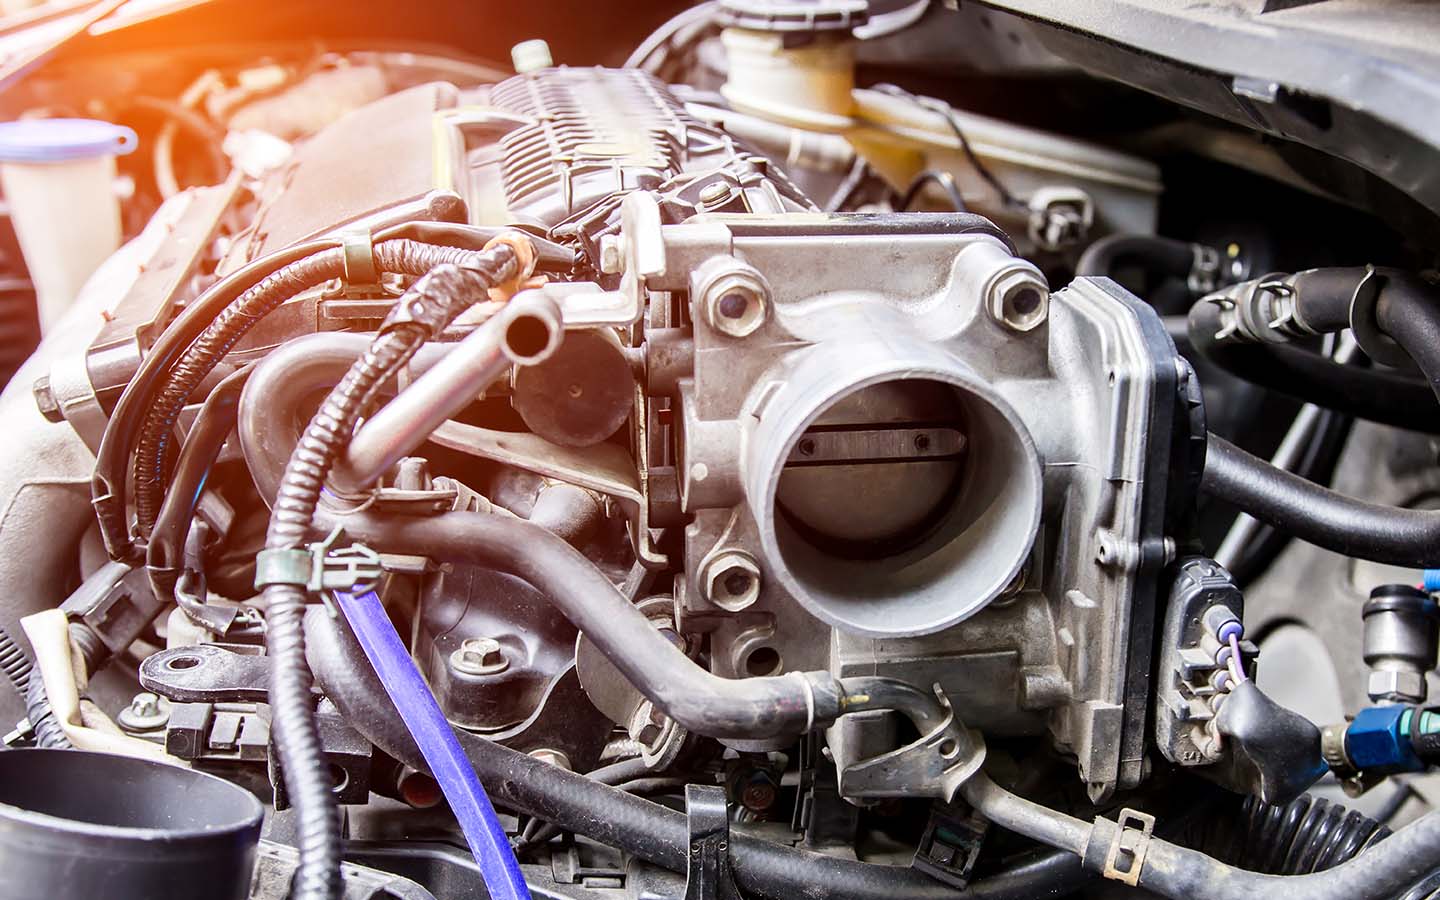
The throttle body can be found on the intake manifold. For better identification, look for a big intake hose going in the intake. Use the vehicle’s manual if still unsure. Moreover, avoid altering or removing any component until the throttle body is located.

STEP 3 – REMOVE THE LARGE INTAKE HOSE

removing the intake hose allows better reach to the inside the component
After locating the throttle body, remove the intake hose

This is a major step in DIY throttle body cleaning. After locating the throttle body, carefully remove the big intake hose. Be extra careful not to alter any of the car engine parts while doing so. Removing the intake hose gives access to the throttle body.

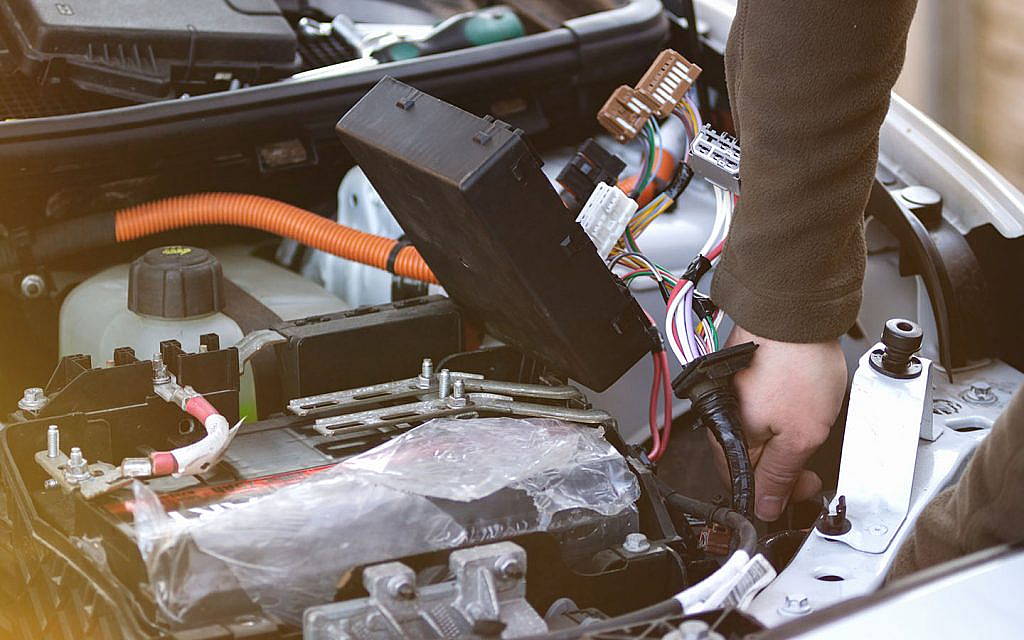
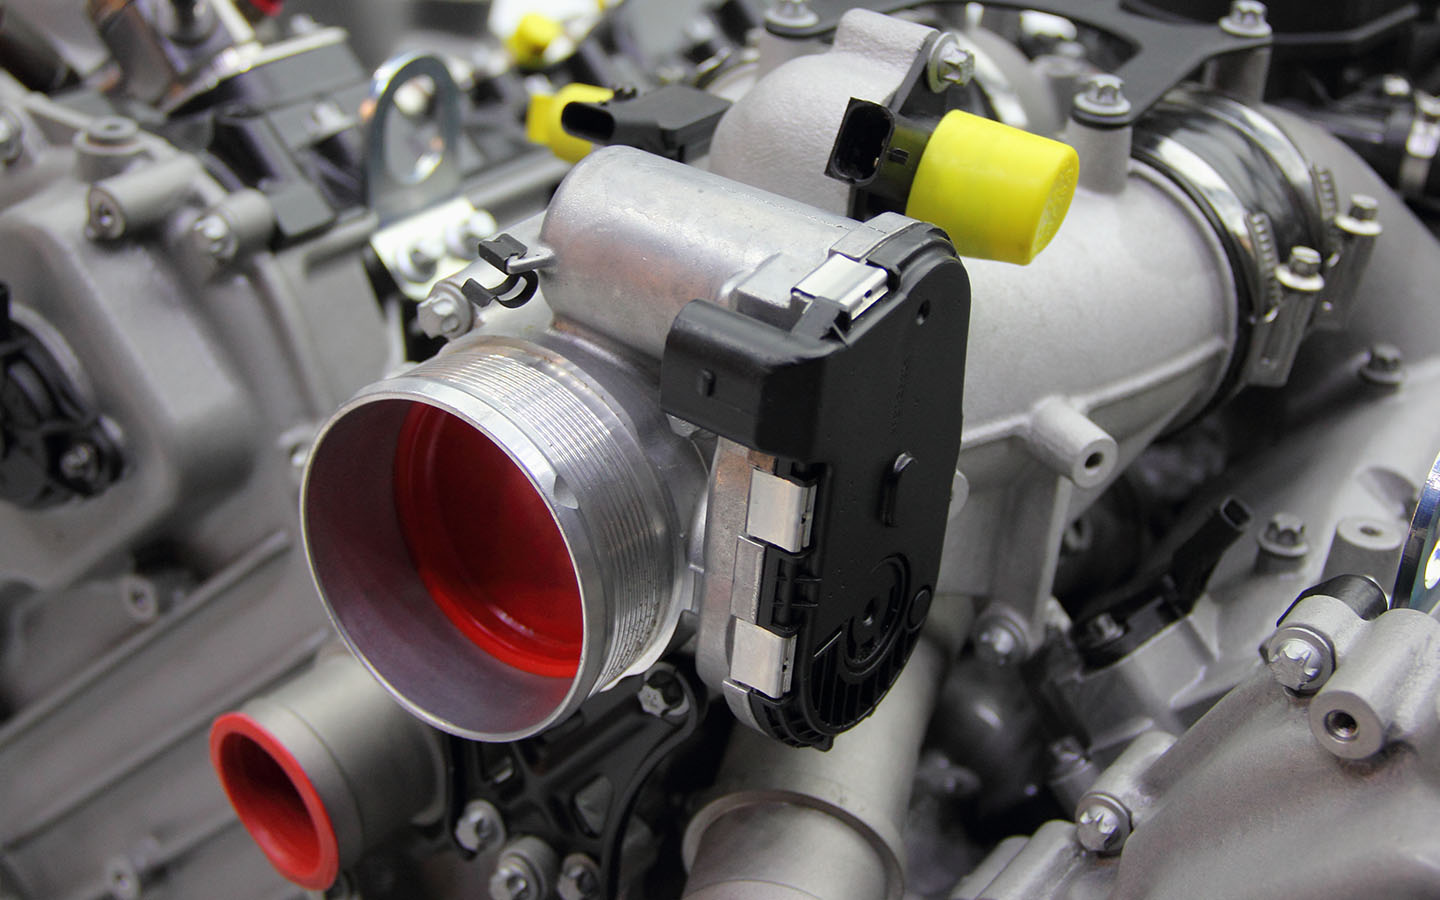
STEP 4 – REMOVE THE THROTTLE BODY

The throttle body can be cleaned after removing the intake hose. However, removing the throttle body is essential for an effective cleaning job. Carefully remove all hoses connected and screws attached to the throttle body.

Additionally, checking all the connected hoses and wires while removing them is among the effective tips to clean the throttle body. If any of the hoses or wires have signs of wear and tear, replace them.

Moreover, use coloured tape or any other method to mark which hose goes where. This can greatly help when reconnecting the hoses.

STEP 4 – OPEN THE THROTTLE BODY FLAP

After removing the throttle body, the next step is to open the body flap. This gives better access inside the throttle body, which helps with proper cleaning. A clogged throttle body is one of the causes of car engine stalling therefore, it is important to clean the inside properly.

STEP 5 – CLEAN THE THROTTLE BODY

use the cleaning spray for an effective cleaning job
Spray throttle cleaner on the flap and let it sit for a few minutes

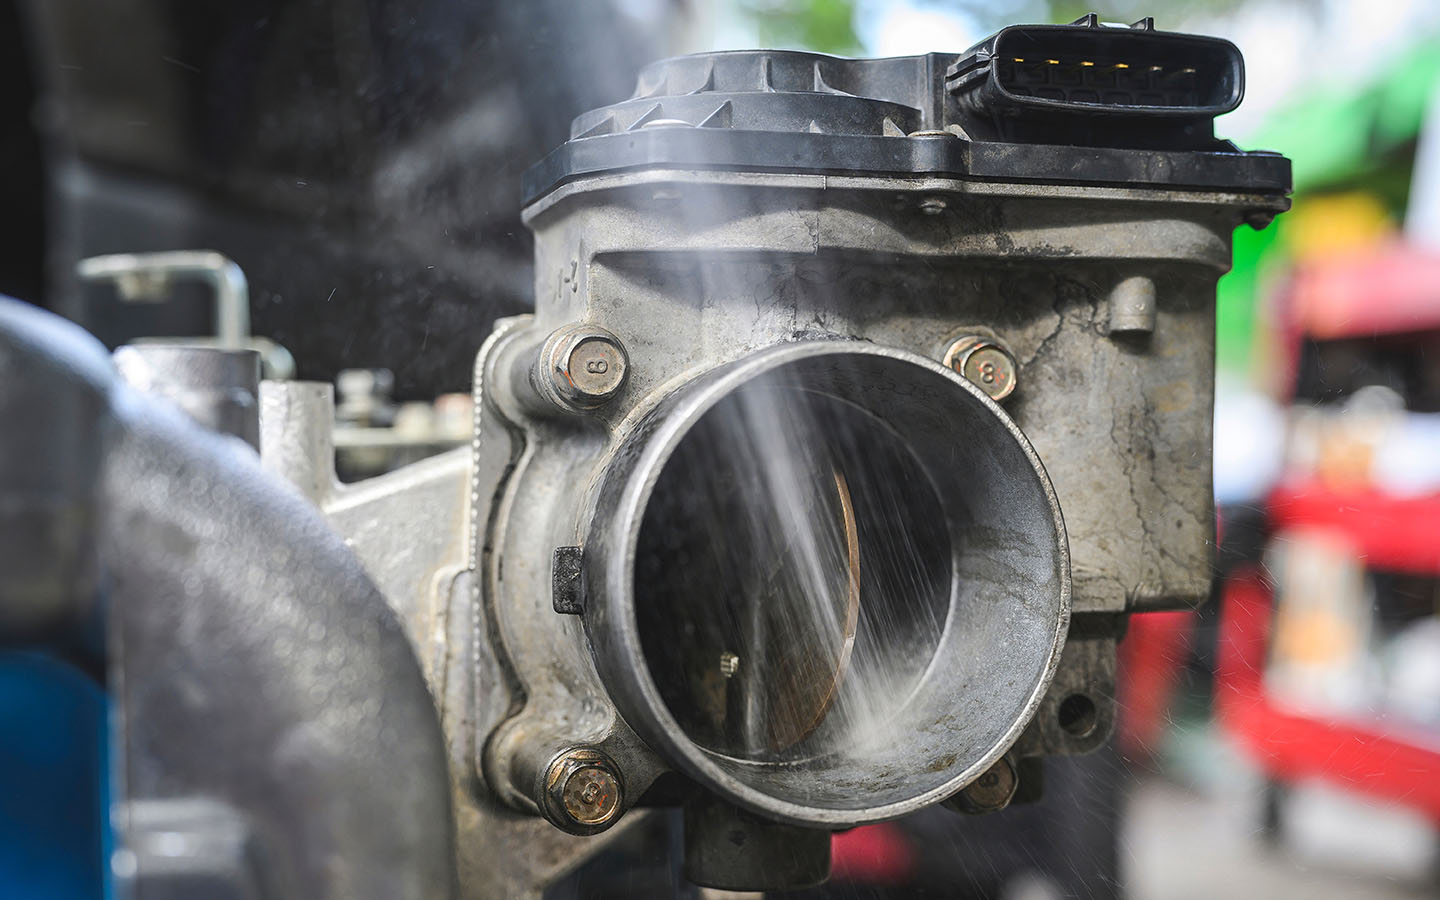
It’s now time to clean the throttle body. Spray the body flap first on both sides with the cleaner and let it dry for a few minutes. After spraying the cleaner and letting the flap dry, take a clean microfiber cloth to clean the body.

Be sure to clean the throttle body sides and flap valve. Moreover, pay extra attention to the edges as uncleaned edges may lead to problems. Use the toothbrush and petrol to remove oil and dirt from all of the throttle body’s inside and corners.

Avoid spraying cleaner on the manifold before removing the dirt as it only elevates the particles further inside. Failure to follow this step may lead to increased emissions.

STEP 6 – REINSTALL THE THROTTLE BODY

Once satisfied with the throttle body cleaning job, it is time to reinstall the component. Carefully, place the throttle body in the place removed from. Reattach all the hoses to the appropriate places they were attached to before.

Reattach the intake hose to the throttle body by tightening all the screws. Be sure to check the intake hose and throttle body are free from any signs of dirt or oil. Moreover, driving a car with low coolant isn’t safe and must be avoided. Therefore, if a fair amount of coolant dropped during the cleaning job, refill them accordingly.

STEP 7 – TAKE A TEST DRIVE

After the cleaning job is done and the throttle body is reattached, it’s time to take a test drive. Drivers may experience a rough idle or stumbling at first. This is usually due to the dirt particles and cleaner residue entering the intake manifold.

Leave the vehicle idle for a few minutes and then begin the test drive. Depending on the previous condition of the throttle body, drivers may experience a change in performance and driveability.

Whether you choose to clean the throttle body without removing it or by detaching it as a whole, taking safety precautions is compulsory. Wear protective glasses to protect your eyes from harmful particles in the cleaner.

Avoid smoking or dropping another object in the engine while cleaning the throttle body. Moreover, be sure to turn off the engine when removing the throttle body.

car performance will get better after throttle body cleaning
Take a test drive after cleaning the throttle body and notice the difference in car performance

This brings us to the end of the throttle body cleaning ideas for an fruitful cleansing job. A throttle body is an integral part of the car’s engine. A dirty throttle body is one of the causes of RPM fluctuations while driving and several other issues.

Therefore ensure timely cleaning to enjoy a hassle-free driving experience. Follow the car maintenance schedule to ensure the smooth running of other vehicle components. Moreover, there are some effective car cleaning tips to help keep the rest of the car in good shape.

If your vehicle throttle’s body often encounters problems, a change of vehicle might be a viable option. Scroll through these pre-owned cars for sale in the UAE and have your pick from a plethora of advanced vehicles listed.

Stay tuned to dubizzle’s auto blog for DIY throttle body cleaning tips and more.

Share
Tweet
Pin
Share

How to Couple and Uncouple Semi-Trailers

Couple and uncouple semi-trailers

A semi-trailer comes without a front axle and front wheels. It can be connected to a truck and used to transfer goods. When disconnected, it doesn’t rest on the ground due to the absence of a front axle. 

Unlike a full trailer, a semi-trailer relies on the fifth wheel coupling located on the back of the tractor to connect and distribute the weight between the tractor and the trailer. The process of connecting and disconnecting is called coupling and uncoupling the semi-trailers.

The process is quite simple but requires detailed attention. A single mistake can injure the person who is coupling or uncoupling. Therefore, here is a step-by-step process to couple and uncouple semi-trailers without causing harm to oneself.

Ways to Couple and Uncouple Semi-Trailers

semi-trailer coupling to the trucks
Inspect the mechanism of the semi-trailer when connected to the truck to ensure proper working

The first and foremost check is that the semi-trailer and prime mover truck mechanisms work together. The best way to ensure that is by learning a safe procedure to couple and uncouple the semi-trailers. However, performing these tasks incorrectly can damage equipment and increase the risk of injury.

Therefore, learning how to couple the trailers and the ways to control heavy vehicles is important. Here is how to couple and uncouple semi-trailers safely.

How to Couple a Semi-Trailer

It is essential to inspect the area and clear any obstacles. Ensure that there is enough lighting. Besides, stop the wheels from moving with a wedge but chocking the wheels isn’t required if the semi-trailer has spring-loaded brakes.

Here are steps to couple a semi-trailer:

Steps to couple the semi-trailers
Ensure that the semi-trailer aligns with the truck and that the connections have a proper lock
  • Examine the coupling devices’ functioning and find out if they fit together. Connect the prime mover and semi-trailer.
  • Use the mirrors to see if the edges align.
  • Check the semi-trailer height. The prime mover truck lifts the semi-trailer slightly.
  • Align the kingpin and turntable.
  • Avoid going under the semi-trailer to see its support with the prime mover since you can injure yourself if the landing gear collapses.
  • Reverse the prime mover and avoid clashing it with the semi-trailer. Stop the truck when the turntable top plate touches the semi-trailer’s apron plate. 
  • Apply the parking brakes in the prime mover truck to take a look at the coupling of a semi-trailer.
  • Now perform a safety check all over again. You must ensure that nothing is missing and all parts are fixed properly.

Whether coupling or uncoupling the semi-trailers, safety check holds the utmost importance. For coupling, ensure that there is no space between the upper and lower portions of the turntable. Also, it is an essential inspection tip for truck drivers to check that the locking lever is in the locked position. Placing a safety catch over the locking lever or manually positioning it can prevent any opening while moving the truck.

Follow these steps to complete the connection after performing the inspection and placing the safety check:

  • Connect the air brake lines of the prime mover to the semi-trailer and ensure that they have safe support.
  • Inspect the connection by taking the weight off the trailer legs and disengaging the clutch. Repeat this step until a proper connection is made.
  • Engage the locking device with the help of an electric cable and check all the lights of the semi-trailers.
  • Remove the wheel chocks once you couple the prime-mover to the semi-trailer.

How to Uncouple a Semi-Trailer

Disengaging or removing the connection between the prime mover and the semi-trailer is known as uncoupling. When you couple and uncouple the semi-trailer, ensure the place is safe and secure with no fluids around to cause slipping. The following steps will help you uncouple the semi-trailer safely:

Ways to uncouple the semi-trailer from prime movers
Check the area and secure the wirings and cables while disconnecting the semi-trailer from the prime movers
  • Position the semi-trailer and put sporting plates or boards under the landing gear of the trailer.
  • Apply the brakes or chocks to hold the semi-trailer and release the kingpin lock lever.
  • Lower the landing gear using a handle that will make firm contact with the support plates or boards. Landing gear will support the semi-trailer and remove the weight off the prime mover, which will stop rising. 
  • Disconnect air lines and electric cables. Secure the cables and lines to avoid any damage to them. 
  • Raise the handle lock pin and release the turntable latch. 
  • Now pull the prime mover and apply the parking brakes. 
  • Check the semi-trailer support and ensure its safety. Slowly pull the semi-trailer by releasing the parking brake.

These were all the necessary steps to safely couple and uncouple the semi-trailers. Semir-trailers are essential for transporting goods within the city. When you buy a new or used truck for sale in the UAE, be mindful of all the safety and maintenance checks. Moreover, always make sure to follow RTA laws for heavy vehicles. You can learn safety tips for truck drivers to prevent any major accidents or injuries. 

Keep reading the dubizzle cars blog as we feature more tips and tricks for heavy-duty vehicle owners and drivers.

Share
Tweet
Pin
Share

The Ultimate Truck Driver’s Inspection Checklist

Truck Drivers inspection tips

Driving a truck or heavy-duty vehicle is quite different from cruising a light transport vehicle (LTV). Although both require maintenance and attention for safe driving, truck drivers need to be extra vigilant since they carry tons of loads. Moreover, these loads can be hazardous chemicals, fuels or any harmful substance.

As a heavy vehicle driver, one should always follow the set of truck drivers’ inspection tips to avoid road accidents. Besides, the drivers must be aware of the fact that they are sharing the road with others, and slight negligence can bring safety into question.

These inspection tips for truck drivers will help ensure safety. Plus, truck drivers will be able to fulfil their responsibility and comply with traffic rules.

Truck Inspection Checklist

Truck drivers should create a checklist before they drive a heavy-duty vehicle. Here’s a complete guideline that includes pre-trip inspection tips for truck drivers.

Check Around the Vehicle

truck pre-inspection checklist for the drivers
In the truck pre-inspection checklist, always examine the vehicle for any cracks, damages or leaks around the truck

It is essential to take a walk around the vehicle and inspect for the following problems:

  • Check if the vehicle tilts towards one side. It may be due to flat tyres. It can also occur due to improper loading or the vehicle suspension may not be intact.
  • Lock the trailer and load doors properly to avoid mishaps.
  • Pack the load and place it properly in the trailer. Check lashings, sliding ramp and other locks before driving the truck. Ensure that all locks are fastened to avoid falling off.
  • Learn the highest point of the truck and check the load height when keeping them in a heavy-duty truck.
  • Inspect for any loose nuts or cracked parts. Also, check for any leaks, such as oil, coolant or fuel leaks. Drivers can also watch out for any causes of an oil leak since they can also result in other parts damage.
  • Check wheel nuts and replace the damaged ones. A bent or damaged wheel or valve stems can be one of the reasons behind the tyres losing pressure.
  • Inspect different tyre tread wear types since they can affect the driving quality. A bad tyre tread can affect the grip and traction. Moreover, heavy vehicles have more tyres and when following inspection tips for truck drivers, problems with one or two tyres can also result in an accident.
  • Always measure the tyre pressure. Although modern trucks have tyre pressure monitoring systems (TPMS), it is recommended to check the tyre pressure manually.
  • Check the brake and fuel system before driving.

Check the Truck’s Engine and Battery

checking truck engine before the trip
When following the commercial truck inspection, check the fluid level and other engine components before setting out for a trip

It is one of the essential inspection ideas for truck drivers to check the engine, battery and electric wiring. Speaking of that, follow the below checklist:

  • Look over the essential vehicle fluid types and their levels. For instance, you may face power steering fluid leaks or low coolant levels can result in many problems. Also, check for fluid leaks. Truck drivers can identify fluid leaks from colour.
  • Inspect the electric wirings and systems before you leave for a journey. Since modern vehicles use car computers (also known as electronic control units), checking all systems can help ensure safety.
  • Check the pulleys and timing belts since they can impact the efficiency of air conditioners, water pumps and compressors.

Inspect the Driver’s Compartment

Ensure the driver’s compartment is clean and there are no loose wires

After inspecting the engine, one of the truck drivers’ inspection tips is to examine the following in the driver’s compartment:

  • Ensure your safety by keeping a fully charged fire extinguisher, first aid kit, repair kits, reflective triangles, spare fuses and headlight bulbs.
  • Clean the mirrors and glasses. Besides, follow the safety tips for truck drivers to avoid accidents in bad weather.
  • Inspect the dashboard and control panel. Check that all gauges, metres and warning lights on the dashboard are functioning correctly. Test the operation of the steering wheel, accelerator and brake pedal. Ensure that the horn, turn signals, headlights and other essential controls are in working order.
  • Examine the storage compartments within the driver’s compartment. Check for proper closure and security, ensuring that no loose items are present that could interfere with safe driving.
  • Inspect any electronic devices, such as GPS systems or onboard computers, ensuring they are securely mounted and functioning correctly. Check for any loose wires or cables that could pose a safety hazard.

These were all the mandatory inspection tips for truck drivers. Besides, follow the ways to control the heavy vehicle to avoid mishaps. Always make a checklist and inspect heavy-duty vehicles accordingly. Whether you buy a new or used heavy-duty vehicle for sale in the UAE, always follow the daily truck inspection checklist to keep your vehicle functioning properly.

Stay tuned to the dubizzle autos blog and keep reading more about driving a heavy-duty vehicle and maintaining it.

Share
Tweet
Pin
Share

What is Nissan’s E-Pedal Technology

nissan e-pedal

The integration of AI in the automobile industry revolutionises vehicles and future mobility. All the top-tier automobile manufacturers across the globe are focused on providing sustainable and efficient mobility solutions including Nissan. Nissan, one of the leading Japanese automobile companies, has embedded technologically advanced features in its vehicles. The prime example of such advanced features is Nissan’s E-Pedal technology.

The E-Pedal is the latest feature which allows the driver to accelerate, brake and decelerate using a single pedal. Let’s dive a little deeper into this technology and elaborate on what Nissan E-Pedal technology brings to the table. 

Nissan E-Pedal Technology Features

Nissan E-Pedal is part of the Nissan Intelligent Mobility which elevates driving experience and aids in driver’s convenience. That said, the E-Pedal allows the driver to control the speed and braking of the vehicle from a single pedal. 

Mentioned below are the core features of the E-Pedal technology of Nissan. 

  • Acceleration: Similar to ordinary accelerator pedals, the E-Pedal allows the driver to accelerate the vehicle by providing maximum throttle response. 
  • Deceleration: For the deceleration, drivers are required to release the E-Pedal and it will automatically reduce the speed of the car. 
  • Braking: The E-Pedal can stop the vehicle when the pedal is released. In case the pedal is completely released, the car will come to a stop immediately. 
Nissan E-Pedal technology
E-Pedal allows the driver to control the speed and braking of the vehicle from a single pedal

How to Use Nissan E-Pedal

The usage of the Nissan E-Pedal is a straightforward process. Here we have mentioned the complete process of turning on and off the E-Pedal. 

  • Press the E-Pedal switch present at the console. 
  • Check the E-Pedal turn-on light on the instrument cluster.
  • Start using the E-Pedal right away

To turn it off, press the E-Pedal button and check the instrument cluster showing the E-Pedal turned-off light.  

Nissan E-Pedal Technology Working

The E-Pedal technology works using a motor and hybrid and electric car regenerative braking system. When the pedal is released, regenerative braking creates a strong deceleration force greater than conventional braking systems, to decelerate or stop the vehicle. The amount of regenerative force depends on the level of pedal release. Therefore, the vehicle does not come to a stop immediately and allows acceleration and deceleration from a single pedal. 

In the case of high-speed, hydraulic brakes, a common type of braking system will be engaged automatically to control the vehicle. The combination of regenerative and hydraulic brakes avoids vehicles from slipping or drifting.

Nissan E-Pedal technology working
The E-Pedal uses regenerative braking to control the speed of the vehicle (Image Credits: Nissan-global.com)

FAQs

How does Nissan’s E-Pedal work?

The working of Nissan E-Pedal is relatively simpler. All you have to do is to lift off the pedal and it will reduce the car. To stop the vehicle, lift off the pedal completely. However, for acceleration, simply press down the pedal. 

How to turn on or off the E-Pedal system?

To turn on or off the E-Pedal system, drivers are required to pull the E-Pedal button present on the console. Remember that E-Pedal is not automatic and it needs to be activated manually. 

Does Nissan E-Pedal save battery?

Yes, the E-Pedal uses a regenerative braking system which recharges the battery. That said, it increases the battery time and excludes any potential chance of range anxiety. 

Is there any difference between Nissan’s E-Step and E-Pedal?

Yes, the difference between E-Step and E-Pedal is visible when using it with Nissan ProPilot. Without ProPilot the E-Step will not completely stop the vehicle; whereas, the E-Pedal would. 

Can E-Pedal work in collaboration with other driver-assist features?

Yes, you can use E-Pedal with other driver-assist features such as intelligent cruise control. 

This was all about Nissan’s E-Pedal technology. The advanced features of Nissan not only assist drivers but also increase safety which makes them stand apart among their peers. That said, the advanced safety features of Nissan elevate the driving experience and increase vehicle efficiency. If you are also interested in availing of these features, browse through these used Nissan cars for sale in the UAE and buy your own Nissan car. Besides, Nissan E-Power Technology is one such step towards the future since they improve car performance significantly.

To know how to use E-Pedal technology properly, read our blog on one-pedal driving. 

Stay tuned to dubizzle’s auto blog for more information on Nissan E-Pedal technology. 

Share
Tweet
Pin
Share

Car Dashboard Lights Not Working: How to Fix

car dashboard lights not working how to fix it

Car dashboard lights play a crucial role in providing essential information about a vehicle’s status. This includes fuel levels, engine temperature and potential warnings. However, it can be quite alarming when car dashboard lights are not working. Fortunately, repairing car dashboard lights doesn’t always require a visit to the mechanic. In this comprehensive guide, we will elaborate step-by-step instructions on how to repair car dashboard lights. From checking the dimmer switch and fuses to replacing bulbs and addressing wiring issues, we will cover everything you need to know to get those lights to work properly.

Reasons Why Car Dashboard Light Is Not Working

Let’s explore some common reasons why car dashboard lights may fail and discuss effective troubleshooting techniques to fix the issue. Here are the common causes and fixes of for car dashboard lights not working.

Troubleshooting the Dimmer Switch

Car dashboard lights play crucial role
Driving with working dashboard lights improves safety

The first step to fixing car dashboard lights is to check the dimmer switch. This switch helps in controlling the brightness of the dashboard lights. Check the switch; it may have accidentally been adjusted to a low setting or turned off completely. 

  • Locate the dimmer switch, usually found near the steering column or on the dashboard itself and adjust it to the desired brightness level. 
  • If this doesn’t solve the problem, proceed to the next step.

Inspecting and Replacing Fuses

Faulty fuses are a common cause of dashboard warning lights issues. 

  • Locate the car fuse box, which can be found under the dashboard or in the engine compartment.
  • Refer to your vehicle’s manual to identify the fuse responsible for the dashboard lights. Visually inspect the fuse to check for signs of damage, such as a blown filament or discolouration.
  • If you find a faulty fuse, replace it with a new one with the same amperage rating. 
  • Keep spare fuses in your vehicle for future emergencies.

Checking the Battery and Alternator

A weak or malfunctioning battery or alternator can impact the functioning of dashboard lights. 

  • Start by checking the battery connections for tightness and cleanliness. 
  • Corroded or loose connections can disrupt the electrical flow. 
  • Clean your car’s dashboard and check for any corrosion and ensure the connections are secure. 
  • Use a multimeter to measure the battery voltage; a healthy battery should read around 12.6 volts. 
  • If the voltage is significantly lower, consider replacing the battery. 
  • If battery issues persist, have the alternator inspected and replaced if necessary.

Replacing Bulbs

A person is fixing car dashboard lights
Wiring problems can disrupt the proper functioning of dashboard lights

Like any other light bulb, dashboard lights can burn out over time.

  • Begin by identifying the specific bulb that needs replacement. 
  • Consult your vehicle’s manual for instructions on accessing and replacing the bulb. 
  • Purchase a replacement bulb that matches the specifications of your car. 
  • Before replacing the bulb, disconnect the negative terminal of the battery to prevent any electrical accidents. 
  • Handle the new bulb with clean hands or gloves to avoid oil or dirt contamination and insert it securely into the socket.

Addressing Wiring Issues

A disrupted functioning of dashboard lights shows signs of car rewiring. To solve this issue:

  • Carefully inspect the wiring behind the dashboard for any visible signs of damage, such as frayed or disconnected wires. 
  • If you have the necessary knowledge and experience, you can attempt to repair or reconnect any loose or damaged wires using appropriate tools and techniques.

However, if you are uncertain, it’s best to consult a professional mechanic to avoid causing further damage or safety hazards.

Seeking Professional Assistance

When your car's dashboard lights malfunction, it's essential to address the issue promptly. B
Seeking professional help ensures the problem is correctly addressed

If all the aforementioned methods fail to resolve the dashboard light issue, it may be necessary to seek professional assistance. A qualified mechanic has the expertise and equipment like an automotive diagnostic tool to accurately diagnose and repair complex electrical problems such as car dashboard light issues. They can conduct thorough inspections, identify underlying issues and recommend appropriate solutions. Seeking professional help ensures the problem is correctly addressed, ensuring your safety and the optimal functioning of your dashboard lights.

When your car’s dashboard lights malfunction, it’s essential to address the issue promptly. By following the step-by-step methods mentioned above, you can troubleshoot and fix common dashboard light problems. Start by checking the dimmer switch and inspecting the fuses. 

However, you can also make a car dashboard interior cleaning product at home and corroded-free. Remember, if you’re unsure or uncomfortable with the repair process, seek professional assistance. Properly functioning dashboard lights are crucial for safe driving, so don’t delay resolving any issues.

If you are looking for modern used cars for sale in the UAE with an updated car dashboard, browse through the list here.

Stay tuned to dubizzle’s leading car blog for more car maintenance tips.

Share
Tweet
Pin
Share

The Soundtrack of Speed: Simulated Engine Sound in EVs

fake engine noise in electric cars

Car enthusiasts often equate engine sound with sportiness and power. The louder the sound, the more thrilling cruising becomes for them, even if they’re just navigating through the traffic. However, producing engine sound is not something that can be naturally achieved in electric cars. Since these vehicles run on battery-powered motors, they offer a quieter and smoother driving experience. 

Given the passion of motorheads for roaring exhaust sounds, different automakers are working on ways to include simulated or fake engine noise in electric cars. Here, we’ll find out how this petrol and diesel-car-specific phenomenon is making its way into the world of EVs.

How Does Fake Engine Noise in Electric Cars Work? 

How Fake Engine Sound in Electric car works
Ford Mustang Mach-E among various other electric cars allow drivers to customise the simulated engine noise

Fake engine noise in electric cars is typically created using software and hardware. A vehicle’s internal and external speaker system produces synthetic or pre-recorded engine noise. The technology uses different types of car sensors to fetch the powertrain data. It then simulates or amplifies the exhaust noise when driving and delivers the desired sound.

The intensity and depth of the simulated engine sound may vary depending on the car’s make and model. Some vehicles make a uniform sound that is always played, while others create it depending on the car’s RPM and speed. 

Moreover, various cars allow drivers to customise the simulated engine noise according to their preferences. They include the Tesla Model 3, Audi e-Tron, BMW iX and Ford Mustang Mach-E, among others.

The UAE authorities have laws and regulations in place for how noisy a car should be. According to the law, the car noise limit in the UAE is 95 decibels. Anything above that would result in penalties and fines. 

There are radars installed on roads that automatically note the number plate of those driving noisy cars in the UAE. Moreover, if you get caught driving a noisy car, the fine will be AED 2000 with 12 black traffic points. Please note that your driving license in Dubai or any other Emirate can get suspended with 24 black points. Meanwhile, here are some other car noises that you should never ignore.

Artificial Engine Noise: How Did It All Begin?

history of artificial car engine noise
Volkswagen Golf GTI was introduced in 2011 with Soundaktor technology

The history of simulated engine noise in cars dates back to the early 2010s. In 2011, the Volkswagen Golf GTI was the first car to use a system called “Soundaktor” to simulate engine noise. Soundaktor is a German term, which means sound actuator. 

The system is based on a small speaker, typically mounted on the firewall between the engine and the passenger compartment. It plays a pre-recorded sound of a turbocharged engine when the car is accelerating.

However, the VW’s Soundaktor wasn’t the first attempt to artificially enhance the engine sound. In the past, Ford installed a resonator pipe in the Mustang GT to amplify the sound of the car’s V8 engine in the cabin. 

It allowed drivers to better hear the snarl of the V8 engine, which is a key part of the Mustang’s driving experience. Other world-famous automakers like BMW, Ferrari, Stellantis, etc. are now also following the trend. Advanced technology is now used to amplify the near-silent hum produced by the newer turbocharged engines and vehicles with electric motors.

Fake Engine Noise in Electric Cars and Pedestrians’ Safety

A fake engine sound in electric cars is now more than just satisfying high-performance car aficionados. In fact, it has other important practical applications. For instance, electric cars are nearly silent. This can pose potential safety risks to pedestrians who are unaware of a car passing by. In such a case, EVs need artificial exhaust or engine sound to alert people on the road. 

Artificial Car Engine Sound and Its Symphonic Future

future of simulated engine sound in electric cars
Different car brands are teaming up with world-famous musicians to create distinct engine sounds

The trend of artificial engine sound is evolving with time, thanks to the innovative approach of performance-car makers around the world. Different brands are busy creating distinct sounds, in line with the legacy of their petrol and diesel-powered cars.

Jaguar, Volkswagen and BMW among other renowned car companies are teaming up with world-famous musicians for this purpose. However, most of these projects are still in the works. We might have to wait for another few years to witness the symphonic future of simulated engine sounds in EVs. 

This was everything about the fake engine noise in electric cars. With the growing trend of EVs and autonomous cars, the car industry is rapidly evolving. It is heading towards a more intelligent and sustainable future. 

You may come across simulated engine noise systems in various types of used cars for sale in the UAE. All you need is to pick your desired car to experience that artificially enhanced revving sound. Here is how you can rev a car properly to ensure there is no carbon build up.

For more updates on cutting-edge technologies that are shaping the future of the car industry, stay connected with the dubizzle auto blog.

Share
Tweet
Pin
Share

Ensure a Safe and Trouble-Free Journey: The Must-Follow RV Maintenance Checklist

the ultimate RV maintenance checklist

A recreational vehicle, commonly known as an RV is a vehicle with living spaces for overnight or long trips. RV owners usually embark on adventurous journeys in their trailers; however, it is important to keep them maintained for every season. We have compiled the ultimate RV maintenance checklist for every season. 

RV Maintenance Checklist Tips

Let’s go through a comprehensive checklist RV maintenance guide
RV maintenance is necessary for the upkeep of your motorhome on road

A pre-trip maintenance is necessary for your RV’s long life even if it is well-maintained. Examine your RV from the inside and outside before going on your next trip.

Inside Your RV Maintenance Checklist

Service your RV inside out for its long life
It is important to follow an RV maintenance checklist for your vehicle’s interior

Walk and examine your RV from the front to back and go through this important RV maintenance checklist to maintain the inside of the vehicle.

Turn off the furnace

The furnace runs on propane – switch it off before you leave the vehicle to avoid potential hazards.

Turn off the water pump

A small water leak can turn into a big problem when you are travelling on the road. Shut off the water pump carefully to ensure nothing leaks from the vehicle when you are on the road. 

Turn off the refrigerator

An important RV maintenance checklist tip is to turn off the refrigerator. Driving with an operating refrigerator can cause the propane line to break in small shifts. Even if the refrigerator has something, it is ideal to turn it off when driving. Usually, an RV fridge filled with ice-cold food and beverages will not drop the temperature and it’s safe while driving.

Check the antenna

Outdoor antennas can easily break or snap. Properly store and lower them before making a trip.

Turn off the water heater

Another important point in the RV maintenance checklist is to turn off the water heater while driving. Just like refrigerators, slight shifts while driving can cause dangerous propane leaks.

Close all the windows and doors

Close and secure all the windows when driving to prevent dirt and debris from entering the RV. Also, close and latch all the interior doors, such as the bathroom doors. Slight shifts in RV frames may cause the doors to open, keeping them latched to avoid damage. 

Close the roof vents

Just like windows, close the vents to avoid dirt and debris from entering the vehicle.

Secure all the heavy items

Even if the TV and computers in your RV are well-mounted, secure and store them properly to avoid damage enroute.

Close and lock the cabinets

To avoid clothes and other items from falling out when the RV is on the road, close and lock all the cabinet doors properly.

Empty the trash cans

Secure all the trash cans and empty them before embarking on a new journey to avoid rolling empty trash cans around in the RV while travelling. Use a collapsible trash can – it uses less storage space and is more convenient on the road. 

Outside Your RV Maintenance Checklist

Service your RV exterior for its proper maintenance
Before making a trip maintain the outside of your RV

Go around your RV and monitor its exterior thoroughly. The following exterior RV maintenance checklist emphasises on the places that need to be checked outside your RV before making a trip.

Check the jacks

The condition outdoors can damage the RV jacks. Look for dents, corroded metal or twisted metal – while travelling the vibration can loosen the bolts. Check for loose bolts and stripped threads. If your RV uses hydraulic or electric jacks, go through the user manual to make sure you check the necessary parts including the hydraulic fluid and the wiring. 

Remove the chocks and store them

Chocks are needed on every stop, ensure to store properly after removing them. Store them somewhere convenient so you can find them easily at your next destination. This keeps your RV secure.

Check the lights and brakes

Make sure all the lights including brake light, turn signal, fog lamps and high beams are working correctly before going to your next destination. Also, make sure the brakes are working properly.

Check the tyres

Inspect the tyre tread and walls for wear and tear and uneven tread. Make sure the RV tyres have proper pressure and that all the nuts are tightened. If the RV needs new tyres, buy them before going for the next trip. If you don’t have a TPMS, here’s how to check tyre pressure without gauge.

Remove the levellers and store them

Remove the system your RV uses for levelling and store them to use at the next stop. 

Retract awning

Retract the RV awnings and securely store them.

Check all the exterior parts of the RV

Close all the doors and latch them properly. If there are any loose latches, tighten them. 

Stow the furniture and secure it

Store all the furniture to secure it to prevent them from loosening while you’re travelling. 

Check the drain and fill hoses

Check the hoses for breakages, holes and cracks. This secures the freshwater, black water valves and grey water from leaking.

Close propane tanks

To avoid any kind of dangerous leaks close the propane tanks. 

Inspect the generator

Check the generator before making the next trip. Make sure it’s in proper working condition without any signs of corrosion or loose wiring issues. If required, change the filters and fluids. 

Remove the water pressure regulator and store it

Store the water pressure regulator in a handy spot.

Fold exterior stairs if any

If your RV doesn’t have retractable stairs, secure and store loose steps or the stools that are used to enter and exit the RV.

Monthly RV Maintenance Checklist

a monthly RV maintenance checklist helps keep your vehicle in the perfect condition
Follow a monthly RV maintenance checklist for your motorhome’s long life

If you’re wondering what is routine maintenance on an RV, know that after the pre-trip maintenance, it is important to follow a monthly maintenance checklist for your motorhome’s long life. Make sure everything is in perfect condition with this monthly RV maintenance checklist.

Check and repair the seals

If necessary, check and repair the seals around the doors, exterior compartment and roof for any water damage on a monthly basis. Repair the seals that are missing or broken and look for signs of water getting in the RV. 

When this happens, you can find standing water, wet interior or water marks inside the vehicle. It can be really expensive to repair the water damage to an RV roof. Moreover, the debris left sitting on the vehicle’s roof can also cause damage. 

Check wet-cell batteries’ water levels

Every month, go over the battery manufacturer’s recommendation and add the required amount of water in the RV on a monthly basis. 

Vacuum and clean air conditioner vents

Make sure to clear the dust and debris from the air conditioner vents and ducts. 

Run your generator

To keep your generator running, check it every month. Go through the RV owner’s manual for your generator to find specific information on how long the generator can run and how much load it can carry when operating. 

Check the engine

Whether your RV runs on petrol or diesel, start your engine and take your RV for a short drive every month. This helps keep the engine components lubricated.

Check and top off fluid levels

When the engine is cool, inspect your coolant, oil, brake, transmission, and wiper fluids. 

Pack emergency toolbox

Pack all the important tools in addition to spare batteries.

Check smoke detectors and carbon monoxide detectors

Check the smoke and carbon monoxide detectors. All RV batteries should be in proper working condition. Make sure to have backups on board.

Check your tyre

Check the tyres monthly. Inspect the air pressure and make sure the nuts are tightened. 

Check under your motorhome

If you are going on the next trip after a month, make sure no animals nest or hang out under your RV for shelter. Also check for entry holes or equipment damage, loose parts, fluid leaks or signs of rust.

Lubricate and inspect slide-outs

RV slide-outs should have a smooth and convenient movement. Examine the latches, hinges and other moving parts of the vehicle every month and lubricate them when needed.

Semi-Annual RV Maintenance Checklist

 semi-annual maintenance checklist is also important
Service your RV semi-annually to keep it running smoothly

You should also service your RV semi-annually. 

  • Wax your RV exterior. Dust and debris from the road, sun exposure and animal droppings can damage the exterior. Clean, rinse and wax your vehicle semi-annually for protection. 
  • Do a detailed damage check, and inspect the problems outside the RV including bubbling, soft and or rusted areas, water damage, holes and cracks that can let dust, dirt, insects and other harmful ailments on the vehicle. 
  • High-wear metal areas including hitches, jacks, slideouts and hinges, among others must be lubricated semi-annually. 
  • Check the water filter and replace it when needed. 
  • Just like the interior, deep clean the RV’s interior. 
  • Load the stuff typically needed for a trip and weigh the RV. Check the vehicle manufacturer’s gross axle weight ratings (GAWR) and the gross combination weight ratings (GCWR). 

Annual RV Maintenance Checklist

Conduct an annual rv maintenance checklist for your vehicle’s effective running
Follow an annual RV maintenance checklist to prevent yourself from major repair expenses

The annual RV maintenance checklist should include what’s on the monthly and semi-annual checklist in addition to the following checks: 

  • Make sure the windshield wiper blades work properly. If they aren’t working or there is a lot of wear, have them replaced. 
  • Check the propane tanks for any wear or cracks on the hoses and seals. Inspect the RV cylinders and hardware for damage or rust and ask a trained technician to make the necessary repairs if needed. 
  • Test all the safety equipment of the RV including smoke detectors, fire extinguishers and carbon monoxide detectors, among others. 
  • Service the brakes
  • Clean and sanitise the freshwater tank
  • Inspect the heating and cooling system of the RV and have a professional service them if needed
  • Make an RV maintenance log
  • Check and rotate the tyres, if they need replacement, go through these used tyres for sale in the UAE and have your pick
  • Check the engine belts and hoses for any cracks or damages. 

This brings an end to our comprehensive RV maintenance guide. Like all other vehicles, maintaining an RV is necessary for its long life and road performance. If you are a beginner, go through these useful tips for RV beginners.

Besides, if you are looking to buy a motorhome for long, adventurous journeys, go through this list of RV motorhomes for sale in the UAE.

Stay tuned to dubizzle’s top auto blog for more on vehicle maintenance, DIY solutions, repair tips and more. 

Share
Tweet
Pin
Share

Auto Diagnosis: What Causes Air Bubbles in Coolant Reservoir and How to Fix the Issue

Air Bubbles in the Cooling System

Ventilation of clean air through a car engine is good for its performance as it helps maintain proper combustion. However, the real problem arises when excess air gets into critical vehicle systems, such as fluid lines. 

Hindering the flow of cooling fluids, trapped air can create hot spots in the engine. This may lead to overheating and other internal engine issues, causing significant damage. However, timely diagnosis and fixing can help avoid potential hazards and costly repairs.

Let’s find out more about the problem of air bubbles in the cooling system. This car trouble is also known as a radiator airlock.

Some Common Reasons for Air Bubbles in the Cooling System

Here are some of the common causes of air bubbles in the car cooling system and their fixes.

Air Pockets

Air can get trapped in the cooling system when the fluids are drained and replaced, during a radiator flush. The trapped air then expands as the vehicle warms up and is forced into the coolant reservoir. 

However, when the engine cools, the expanded air pockets collapse and the coolant is pulled back. This creates a void and results in the appearance of air bubbles. 

How to Fix It

An effective way to get rid of air bubbles in the coolant reservoir is to perform the radiator flush again. Attempt it carefully this time by using the proper tools and techniques. Seek professional help if needed to prevent any excess air from entering the system. 

Regardless of the type of radiator flush attempted, use personal protective equipment (PPE) to avoid potential safety risks.

Problematic Radiator Cap

bad radiator cap also causes air bubble
If radiator cap breaks or doesn’t properly fit, air can make its way into the cooling system

The radiator cap serves as a pressure seal. It maintains the high pressure in the system while the coolant flows into the expansion tank. If this cap breaks or doesn’t properly fit, air can make its way into the cooling system. As a result, bubbles start appearing in the coolant reservoir and cause your car to underperform.

How to Fix It

It is important to know when to replace a radiator cap to stop air bubbles from disrupting the cooling system. Moreover, getting rid of the faulty or incompatible radiator cap can help prevent the frequent loss of fluids. That said, never touch a radiator cap with bare hands after a long drive. It can get excessively hot and may cause serious burns. On a side note, you can follow this step-by-step process to fix radiator leaks.

Malfunctioning Thermostat

A bad car thermostat is among the common reasons for a radiator airlock. When a thermostat malfunctions, it fails to open and close at proper intervals. This results in disrupted lower coolant levels and disrupted fluid circulation, creating air bubbles in the system.

How to Fix It

When facing the coolant reservoir tank bubbling issue, check the thermostat for signs of damage or wear. After carefully examining its condition, determine whether it needs to be repaired or replaced. 

If there is too much air in the coolant reservoir, get it flushed while getting the thermostat fixed. Test the newly restored system by letting the engine run for a while to see if it overheats or not.

If everything is fine and the temperature gauge still gives an erroneous reading, it may indicate other underlying problems. Check for these common causes of the fluctuating temperature gauge and fix them if required to get actual readings.

Leaking or Blown Head Gasket

air bubbles in the coolant system are caused by blown head gasket
Blown head gasket causes visible bubbling at the coolant reservoir

A failing head gasket is among the most common causes of air bubbles in the coolant tank. When the head gasket blows, it causes combustion gases to leak into the water jacket. 

This way the air is forced into the cooling system through the cylinder head. The visible bubbling at the coolant reservoir soon after the engine starts is a prominent symptom of a blown head gasket.

How to Fix It

There are gasket sealers available in the market, but they may only temporarily solve the problem. However, it is recommended to replace the failing parts and prevent further damage. Replacing a head gasket may be expensive, but it will be a long-term solution that may prevent other coolant tank bubbling causes.

Whether replacing or repairing a gasket, both the engine oil and coolant need to be completely drained. This will release all the trapped air in the system. There are different types of head gaskets, make sure to choose the right one when replacing it.

Bad Water Pump 

bad water pump is a cause behind air bubbles in coolant reservoir
A malfunctioning water pump hinders the fluid flow in the cooling system causing air to trap in the system

A water pump circulates coolant and other fluids throughout the system via engine pipes. When a water pump malfunctions, the air doesn’t need the pump input to sneak into the system. As a result, the trapped air makes bubbles when it gets to the radiator intake or coolant valve. A failed water pump is also one of the reasons behind car radiator water leaks.

How to Fix It

Look for signs of overflow and splotches to inspect the condition of the water pump. If the seals are damaged, replace the water pump to get rid of the radiator airlock problem. If available, check the car user manual for instructions and attempt the aforementioned procedure carefully.

Burping the Cooling System to Fix Air Bubbles

removing air bubbles from cooling system through burping
Burping is a process that helps release air bubbles in the car cooling system

A process called “burping” can also help resolve the issue of coolant tank bubbling Here’s how to attempt it.

  • Ensure the engine is cool before proceeding.
  • Remove the radiator cap carefully.
  • Start the engine and let it run.
  • Allow the engine to reach operating temperature. This will cause the thermostat to open and the coolant to circulate.
  • During this process, air bubbles trapped in the system will be released.
  • Keep an eye on the coolant level as the air bubbles are being purged.
  • Top up the coolant as needed to maintain the proper level.
  • Once the coolant is circulating smoothly and no more air bubbles are being released, carefully replace the radiator cap.

If unsure about performing any of the aforementioned steps, seek assistance from a certified auto technician. Besides a radiator airlock, engine overheating is a serious problem. Consider checking and replacing the coolant temperature sensor if it’s faulty or damaged.

These were some of the most common causes of air bubbles in the cooling system and their fixes. While inspecting the vehicle cooling mechanism, check for these signs of a failing radiator fan. If spotted, try to fix them right away to ensure optimal performance of the cooling system.

When buying a used car in the UAE, diagnose its engine cooling system for the aforementioned problems. Maintaining an efficient cooling system is crucial, particularly when driving in the UAE’s hot climatic conditions. Doing so will help you avoid encountering damaging and costly engine issues.

For more car maintenance guides and troubleshooting tips, stay connected with the dubizzle auto blog.

Share
Tweet
Pin
Share

When Does a Car Need Complete Rewiring: Signs and Solutions

Car rewiring is important for driving smoothly

Every car owner experiences electrical issues at some point. Electrical problems can be frustrating and affect the overall vehicle’s performance, from dead batteries to malfunctioned lights. The electrical system in a car plays a vital role in its overall functionality. However, like any other mechanical component, the wiring in a car can deteriorate over time, leading to various electrical issues. While minor repairs can often solve these problems, there are instances when a car requires complete rewiring.

Following we will explore the signs that indicate the need for a complete car rewiring. Let’s delve into the causes behind such issues and discuss the solutions to tackle this complex task effectively.

Signs When a Car Need Complete Rewiring

Here are the common signs that indicate the need for complete rewiring in a car. By identifying these signs early on, you can ensure the safety, reliability and optimal performance of your vehicle’s electrical system

Constant Electrical Failures

A person is fixing car rewiring
Car rewiring becomes essential if you start witnessing its symptoms

One of the primary indicators that a car may need complete rewiring is due to persistent electrical failures. If you find certain electrical components, such as the lights, radio, power windows or central locking system, frequently malfunctioning or stop working altogether despite multiple repairs, it could be a clear sign of underlying wiring problems. 

These issues often arise due to deteriorated or damaged wires, loose connections, or corroded terminals, necessitating a thorough rewiring of the entire electrical system.

Frequent Blown Fuses 

Blown fuses are a common electrical problem encountered by car owners. They are typically caused by electrical issues in the car. While replacing a blown fuse may serve as a temporary fix, if you observe that your car consistently blows fuses, it may indicate a more significant wiring issue. Read on to know more about a car fuse box.

Faulty or inadequate wiring can lead to excessive current flow, resulting in frequent blown fuses. In such cases, complete rewiring becomes imperative to ensure the long-term reliability and safety of the vehicle’s electrical system.

Unidentified Electrical Issues

Mysterious electrical problems can be extremely frustrating for car owners. If you are experiencing strange and unpredictable issues that defy logical explanations, such as intermittent engine stalling, warning light on dashboard, random warning lights, or unexplained battery drain, these problems likely stem from faulty wiring. Electrical issues that seem to have no discernible cause are often traced back to wiring problems that necessitate a comprehensive rewiring job.

Ageing or Damaged Wiring

Over time, the wiring in a car can deteriorate due to various factors such as wear and tear, exposure to extreme temperatures, moisture, or even rodent damage. If you notice frayed or chewed wires, cracked insulation, or other visible signs of wiring damage, it is a clear indication that your car’s electrical system needs attention. In such cases, a complete rewiring becomes necessary to ensure the safety and proper functioning of the vehicle’s electrical components.

Upgrading the Electrical System

In certain situations, car owners may choose to upgrade their vehicle’s electrical system to accommodate additional accessories or modern features. For instance, installing a new audio system, GPS navigation, advanced safety features, or even aftermarket lighting may require a higher electrical capacity than the original wiring. Upgrading the electrical system often involves a complete rewiring to meet the increased power demands and ensure compatibility with the new components.

Causes of Wiring Issues 

You can get your car rewiring done from professional mechanic
Corroded wires and improper installation can cause car rewiring issues

Several factors can contribute to wiring problems in a car. These include:

  • Wear and Tear: Over time, the constant exposure to heat, vibration, and moisture can cause wires to deteriorate, leading to connectivity issues.
  • Corrosion: Corroded terminals and connectors can disrupt the flow of electrical current, resulting in malfunctioning components.
  • Improper Installation: If the wiring in a car is not installed correctly or if shortcuts are taken during repairs or modifications, it can lead to problems down the line.
  • Environmental Factors: Extreme temperatures, moisture, and exposure to chemicals can damage the insulation on wires, leading to short circuits in cars or electrical failures.

Solutions: When to Seek Professional Help for Car Rewiring

Rewiring a car is a complex task that requires technical expertise and knowledge. Unless you have extensive experience in automotive electrical systems, it is recommended to seek professional help when dealing with complete rewiring. 

Qualified auto electricians or experienced mechanics can diagnose the wiring issues accurately, identify the root causes, and perform the rewiring process using the proper techniques and tools. They have the expertise to handle complex wiring diagrams, ensure proper insulation, and ensure the safety and functionality of the electrical system.

While minor electrical issues in cars can often be resolved through repairs, there are instances when a complete rewiring becomes necessary. Signs such as persistent electrical failures or damaged wiring, indicate the need for a complete rewiring job. 

If you are planning to buy used cars for sale in the UAE  and encounter any of these signs, it is crucial to consult a professional to ensure the optimal performance of your car’s electrical system. Remember, a properly functioning electrical system is essential for a smooth and enjoyable driving experience.

Stay updated with dubizzle’s leading car blog and find auto repair tips here.

Share
Tweet
Pin
Share

Why Is It Unsafe to Drive with a Broken Wheel Stud?

is Driving with a Broken Wheel Stud Safe

When it comes to the safety of our vehicles, many components demand our immediate attention when they fail or break. One such crucial part is the wheel stud. Mounted on the vehicle wheel assembly, it is a small but vital component that secures the car wheels when fastened with a lug nut. 

Think what would happen if a wheel stud loses grip or breaks off. Will it be safe to continue driving with a broken wheel stud? Here we’ll answer these questions while exploring the risks involved and the symptoms to watch out for.

Is Driving with a Broken Wheel Stud Safe?

is it safe to drive with a broken wheel stud
Loosened or broken wheel studs affect essential wheel assembly parts, such as bearings, ball joints, drums, etc.

The simple answer is no. It is not safe to drive with a broken wheel stud. The wheel stud helps maintain the connection between the wheel and the vehicle. 

When a stud breaks, it loosens the wheel’s attachment, putting additional pressure on the lug nuts. It affects other essential wheel assembly parts, such as bearings, ball joints and disc brakes or drums. Furthermore, such a situation can cause a vehicle to lose control and pose unavoidable safety risks.

Is It Harmful to Drive with a Missing Lug Nut?

Driving with a missing lug nut may not be as harmful as in the case of a broken wheel stud. However, it is recommended to get the missing lug nut replaced with to avoid any potential damage. Moreover, avoid driving at all if there is more than one lug nut missing. It can cause unusual stress on wheels and tyres, which can be quite harmful and risky.

What Causes the Wheel Stud to Break Off or Become Loose?

Causes of bad wheel stud
A wheel stud is fastened with a lug nut to secure the wheel

Now let’s take a look at the common causes of a broken wheel stud:

Improper Installation of Lug Nuts

Over-tightening of lug nuts when fastening them to secure the tyre causes stress on the wheel stud. Therefore, it is important not to take any risks and ensure to follow the right technique and tools while installing or uninstalling lug nuts.

Corrosion and Rust

Exposure to changing environmental conditions and road debris can cause corrosion and rust to develop on the wheel studs. This weakens their structural integrity, making them prone to breakage.

Damaged wheel hub

Damage to the wheel hub, such as from an accident or striking a curb is among the common causes of bad wheel alignment. This can result in the bending or breaking of wheel studs. Preventing wheel hub damage is one of the obvious reasons why you avoid potholes or other types of road surface impacts.

Stripped Thread

If wheel stud threads are stripped due to wear and tear, it loosens the grip of lug nuts. Due to this problem, the wheel may not securely attach to the hub. To prevent this, regularly inspect the wheel studs, as well as lug nuts, for damage and replace them if necessary.

Broken Wheel Stud Symptoms

is it safe to drive with a broken wheel stud
Loosened or broken wheel studs affect essential wheel assembly parts, such as bearings, ball joints, drums, etc.

Some prominent indicators of a broken or loosened wheel stud are listed as follows:

Wheel Wobbling 

A broken wheel stud can impact the wheel balancing of a car causing the wheels to wobble. Such an issue also impacts the control and stability of a car on the road. This is what happens when a wheel stud breaks

Loose Wheel Nuts

In case of encountering loose or detached wheel nuts, the very first thing to do is to inspect the wheel studs for any loosing or wear and tear.

Noises and Vibrations

A broken wheel stud may cause car noises you should not ignore or excess vibrations, especially when turning or driving at higher speeds.

Welding a wheel stud is not recommended and is generally considered unsafe. Wheel studs are critical components that hold the wheel securely to its hub. That said, any welding done on wheel studs can compromise their strength. Instead, it is advised to go for a long-term solution, such as replacing the broken wheel stud with a new one. 

How to Replace a Broken Wheel Stud: Step-By-Step Process

how to replace a broken wheel stud
Step-by-step process of replacing a broken wheel stud

Replacing a broken wheel stud requires some mechanical knowledge and proper equipment. If you feel comfortable executing such a task yourself, follow these general steps to replace a broken wheel stud. Keep in mind that these steps may vary slightly depending on your vehicle’s make and model. If available, consult the vehicle’s manual for specific instructions:

  • Gather the necessary tools, such as need a lug wrench, jack, jack stands, a hammer, a punch or drift, a socket set, and a new wheel stud.
  • Park the vehicle on a flat surface and engage the parking brake. 
  • Loosen the lug nuts on the wheel with the broken stud but do not remove them yet.
  • Use the jack to lift the side of the vehicle where the broken stud is located. 
  • Place jack stands securely under the vehicle to provide additional support. You can also take help from this guide on how to use a jack to safely lift a car.
  • Remove the lug nuts and locate the broken stud.
  • Using a hammer strike the stud from the backside (where the wheel mounts) to push it out. It may require several strong hits to remove the stud completely.
  • Insert the new wheel stud into the hole from the backside. Make sure it is aligned properly with the other studs. If needed, apply a small amount of lubricant to ease installation.
  • Place a few flat washers over the threaded end of the stud, then thread a lug nut onto the stud. 
  • Tighten the lug nut gradually, using a socket wrench, until the new stud is pulled through the hub and fully seated.
  • Place the wheel back onto the hub, ensuring it is aligned with the remaining studs. 
  • Use the jack to lower the vehicle until the wheel is touching the ground. Finish tightening the lug nuts with a lug wrench, ensuring they are securely fastened.
  • After a short drive, recheck the lug nuts to ensure they are properly tightened.

If you are unsure about any of the aforementioned steps, it is advised to seek the help of a certified auto technician for proper wheel stud replacement. 

This marks the end of our comprehensive piece on driving with a broken wheel stud potential risks, causes and symptoms. It’s important to properly maintain the wheel hub assemblies of a car for a smooth and safe driving experience.

When buying a car in the UAE, make sure there are no performance issues with its wheel hub assemblies and other related components before closing the deal. Here are some wheel hub failure symptoms that you should know about.

Stay connected with the dubizzle car blog – your go-to source for guides on auto parts and repairs.

Share
Tweet
Pin
Share