Archives Январь 2024

Can I Drive With a Cracked Exhaust Pipe: Causes & Fixes

You should not drive a car with cracked exhaust pipe

When it comes to vehicle maintenance, it’s essential to address issues promptly to ensure your safety and the longevity of your car. One common problem that car owners may encounter is a cracked exhaust pipe. The exhaust system is crucial to your vehicle’s performance, emissions control and overall functionality. Following, we will discuss the implications of driving with a cracked exhaust pipe, the potential risks involved and the importance of addressing the issue promptly.

Let’s find out more about the causes and fixes of cracked exhaust pipe.

Understanding the Exhaust System

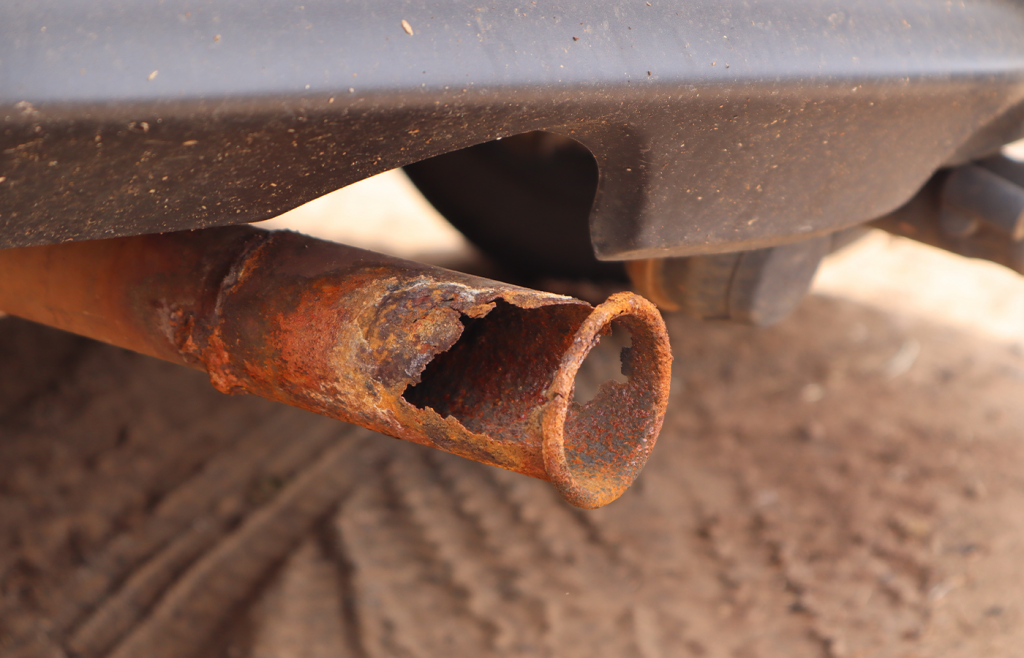
While it is technically possible to operate a vehicle with a broken exhaust, it is important to understand that driving a car in such a scenario is unsafe and illegal. Driving with a damaged exhaust, whether it’s a cracked pipe, partially detached or completely fallen off, poses several problems when you are on the road. Therefore, it is crucial to prioritise immediate attention and necessary repairs.

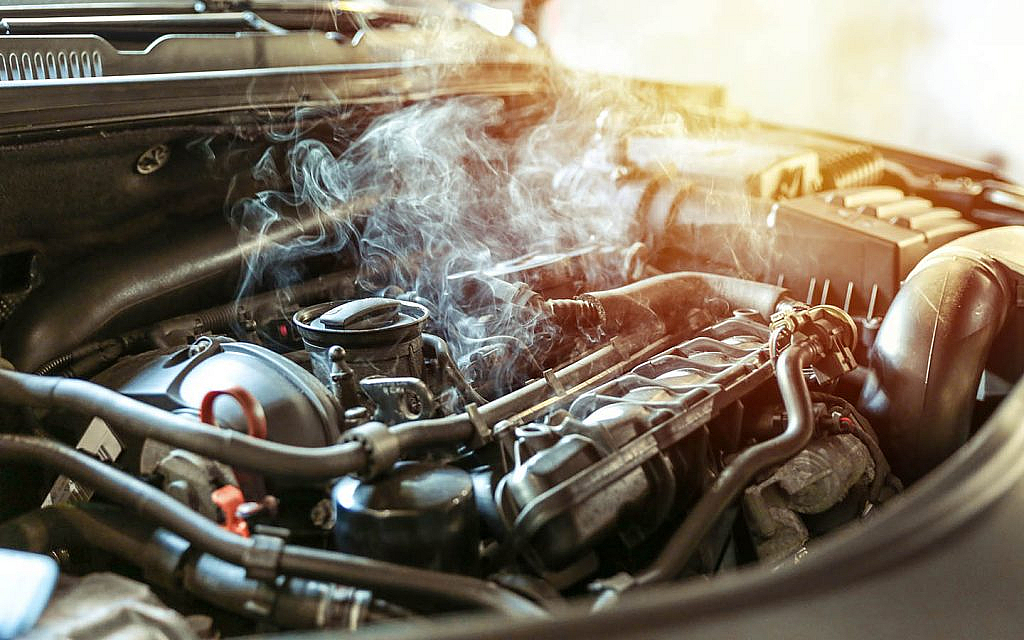
Before we delve into the topic, let’s briefly understand the exhaust system’s role in a vehicle. The exhaust system guides the harmful gases produced during the combustion process out of the engine and away from the car. It includes various components, such as the exhaust manifold, catalytic converter, muffler and broken exhaust pipe.

The Consequences of a Cracked Exhaust Pipe

You must not drive with the cracked exhaust pipe
Driving with a broken exhaust pipe can reduce engine performance

Different types of exhaust systems are available in the market based on their designs and specifications. A cracked exhaust pipe can lead to several problems, affecting your vehicle’s performance and overall driving experience. Here are some of the potential consequences of driving with a cracked exhaust pipe symptoms:

Noise and Vibrations

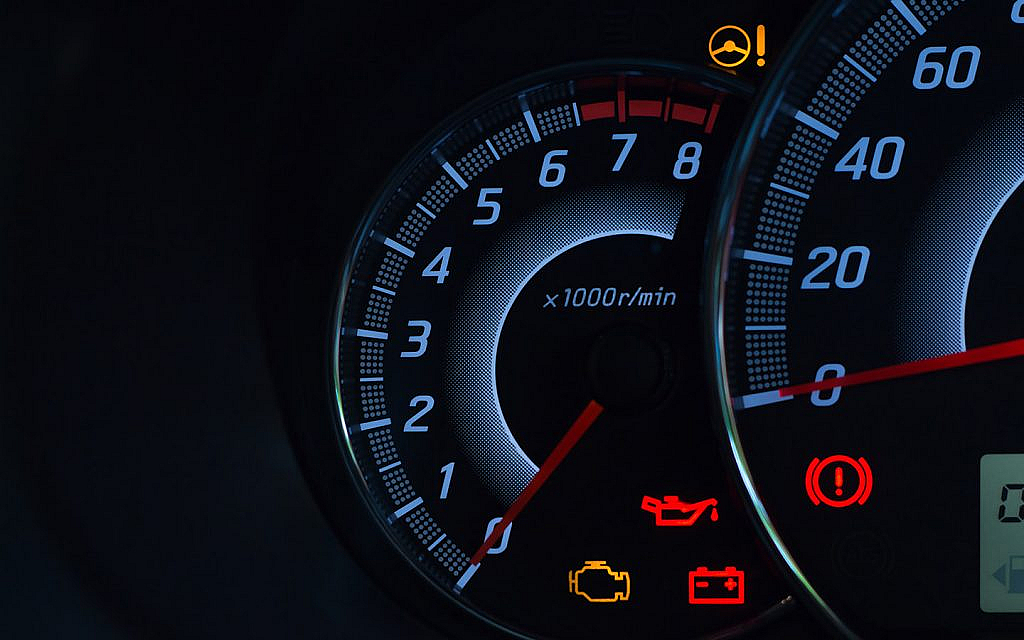
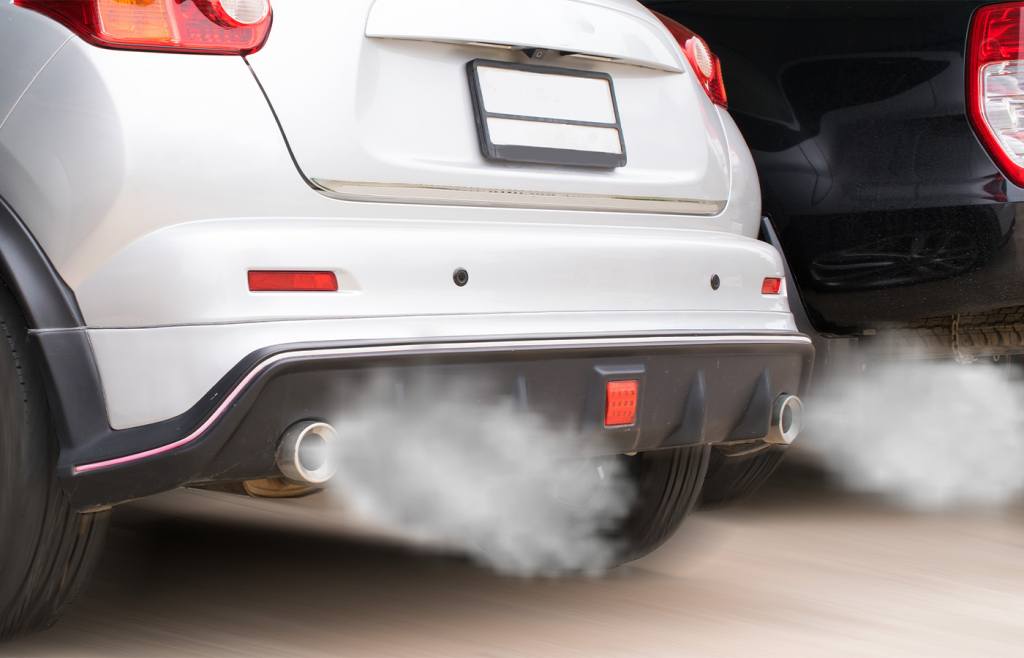
A cracked exhaust pipe can result in loud and unpleasant noises during acceleration or idle. The escaping exhaust gases can create a rumbling or hissing sound. Besides, there could be several reasons behind car exhausts making loud noises. Additionally, vibrations may be felt throughout the vehicle, potentially affecting your driving comfort.

Reduced Engine Performance

A cracked exhaust pipe can disrupt the backpressure in the exhaust system, leading to reduced engine performance. Backpressure is necessary to maintain the optimal air and fuel mixture balance in the engine cylinders. When the exhaust system is compromised, it can impact the engine’s efficiency. This also results in poor acceleration, exhaust backfiring and reduced fuel economy.

Increased Emissions

The exhaust system plays a vital role in controlling emissions and ensuring compliance with environmental regulations. A cracked exhaust pipe can cause leaks, allowing the escape of harmful gases such as carbon monoxide, nitrogen oxides and hydrocarbons. Increased emissions contribute to air pollution and can result in failed emissions tests, potentially leading to legal issues and fines. Here are some more symptoms of exhaust leaks in cars and how you can fix them.

Risk of Fire

A broken exhaust pipe of a car
Driving with a damaged exhaust pipe can cause potential health risks

The hot exhaust gases passing through a cracked exhaust pipe can come into contact with flammable materials underneath your vehicle, such as oil coming out of the exhaust. This contact poses a significant fire hazard and can result in serious accidents or vehicle damage.

Potential Health Risks

Exhaust gases, particularly carbon monoxide, are toxic and can be harmful if inhaled. A cracked exhaust pipe causes these gases to enter the passenger compartment, putting you and your passengers at risk of carbon monoxide poisoning. Symptoms of exposure include headaches, dizziness, nausea and even unconsciousness.

The Importance of Prompt Repair

Considering the potential risks associated with driving with a cracked exhaust pipe, it is crucial to address the issue promptly. Here’s why:

Safety

Your safety and that of your passengers should always be a top priority. Addressing a cracked exhaust pipe ensures that harmful gases are properly expelled from the vehicle, reducing the risk of fire, carbon monoxide poisoning and other potential hazards.

Vehicle Performance

You must get a cracked exhaust pipe repair of your car
Ignoring a cracked exhaust pipe can lead to more extensive repairs

A healthy exhaust system plays a significant role in maintaining your vehicle’s performance. By repairing the cracked exhaust pipe, you can restore proper backpressure, improve engine efficiency and regain lost power and fuel economy.

Depending on your location, driving a vehicle with a faulty exhaust system may be against the law. For instance, driving a noisy car in the UAE can have severe consequences. For instance, drivers get fined AED 2000 and receive 12 black points on their driving licenses.

Moreover, make sure you get your vehicle inspected when buying a used car for sale in the UAE. A cracked exhaust pipe can result in a failed inspection, leading to fines and penalties. However, you can opt for dubizzle inspection services for cars to inspect such car issues. 

Preventing Further Damage

Ignoring a cracked exhaust pipe can lead to more extensive and costly repairs down the line. Continuous exposure to heat, moisture and road debris can cause the crack to worsen, potentially resulting in additional damage to other components of the exhaust system. Prompt repairs can save you from expensive repairs in the future.

Driving with a cracked exhaust pipe is not advisable due to its potential risks to your safety, vehicle performance and legal compliance. The consequences can range from increased noise and reduced engine performance to the risk of fire and health hazards. Promptly addressing a cracked exhaust pipe ensures your safety, preserves your vehicle’s performance and helps you comply with environmental regulations.

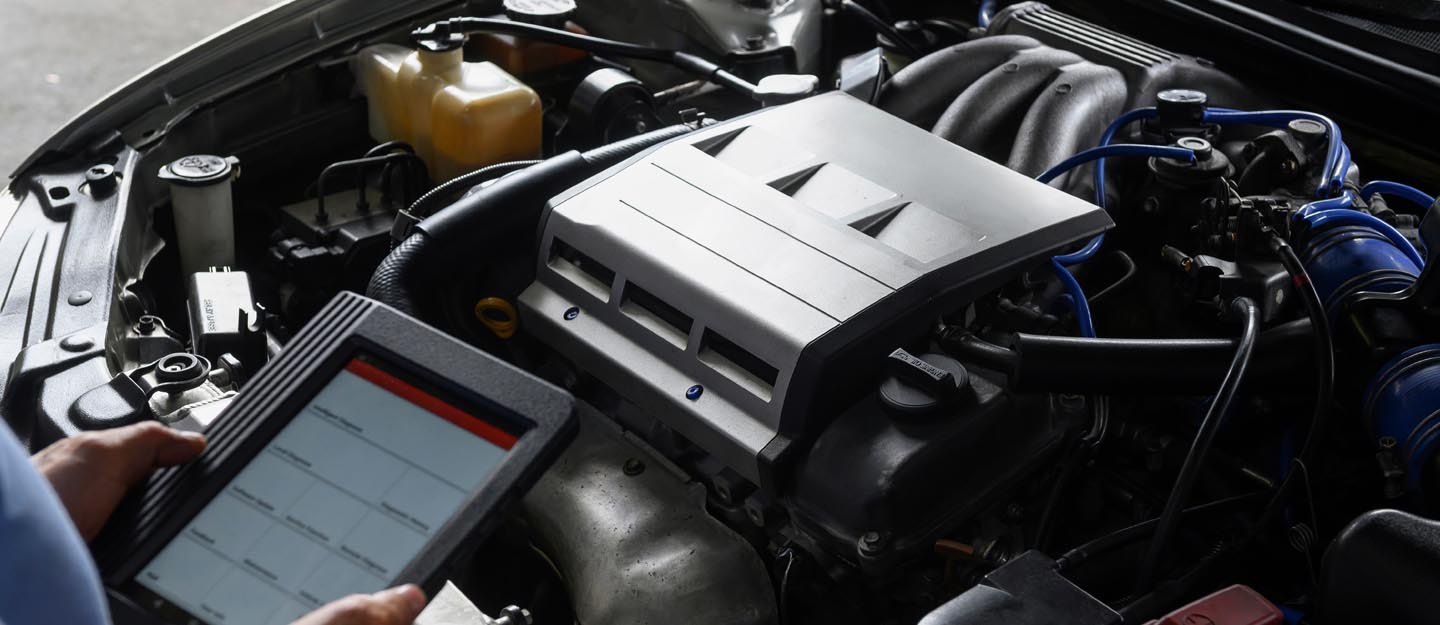
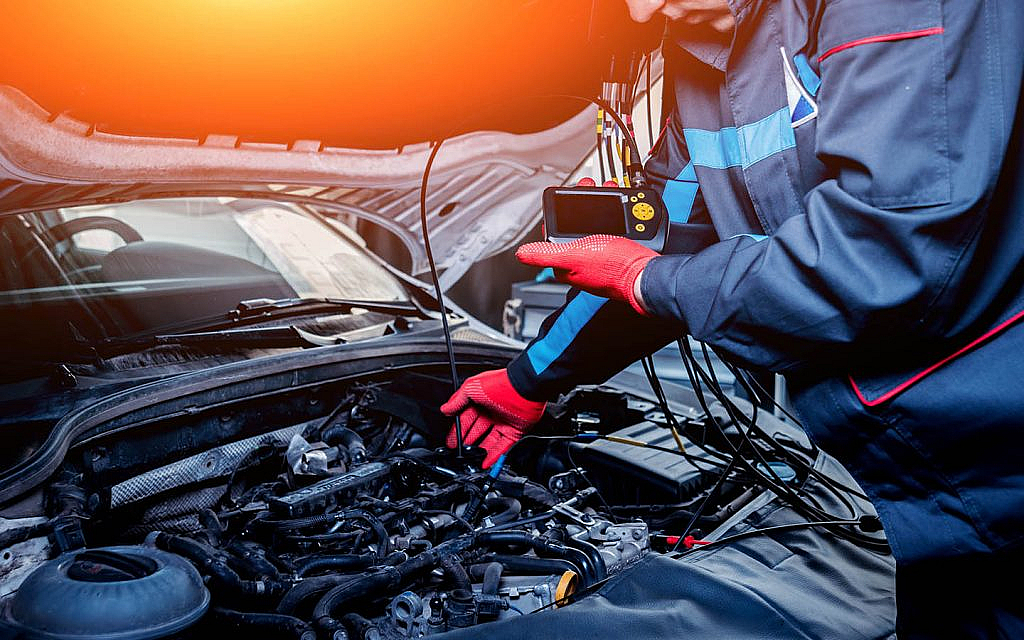
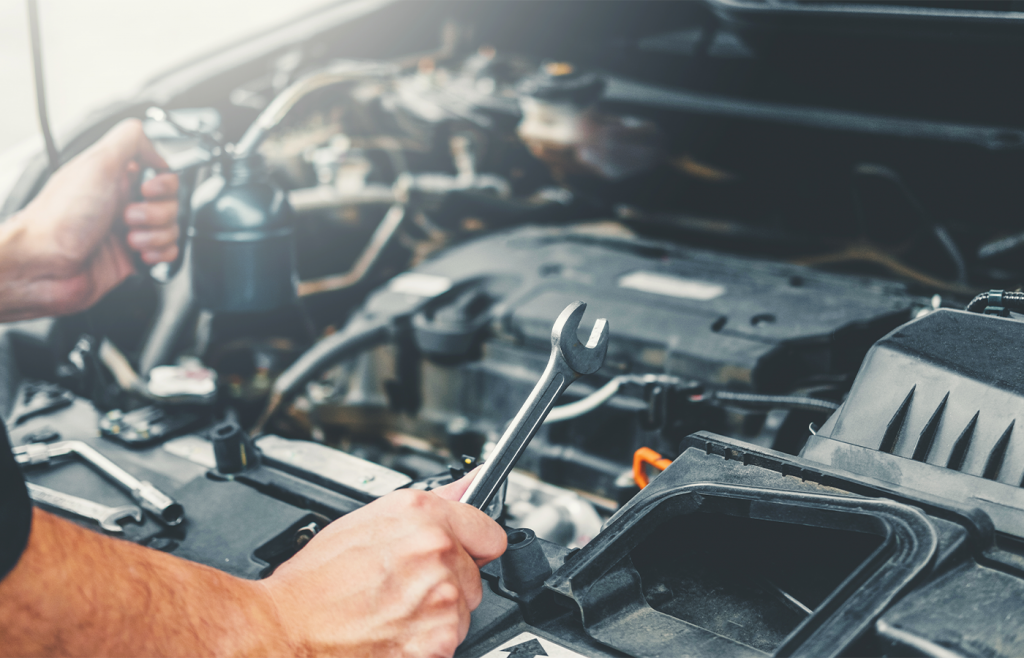
If you notice any signs of a cracked exhaust pipe, such as unusual noises or changes in engine performance, it is recommended to consult a professional mechanic. They will assess the extent of the damage and provide the necessary repairs or replacements to restore the functionality of your exhaust system.

Remember, proactive maintenance and timely repairs are crucial for ensuring a safe and enjoyable driving experience while prolonging the lifespan of your vehicle.

Stay tuned to dubizzle’s auto blog for more car repair and maintenance tips.

Share
Tweet
Pin
Share

Open Loop Fault in Cars: Common Causes and Fixes

open loop fault in cars

In automotive systems, faults occasionally occur affecting vehicle performance and functionality. A common type of fault is an open loop fault in cars. It occurs when a component or circuit in the car’s system fails, disrupting the flow of information or signals. This leads to instability in the car’s functioning, thus, hindering a safe ride experience.

That said, we will explore the common causes and fixes of open loop fault in cars. It is crucial to identify such issues for optimal performance of the car. 

What is An Open Loop (OL) Fault in Cars?

Causes and Fixes of open loop fault in cars
An open loop fault leads to a reduced car performance

An open loop (OL) fault refers to a situation where a crucial feedback loop in the vehicle’s control system is interrupted or broken. It happens when the ECM is unable to switch to a closed-loop state as the car temperature rises. This occurs due to sensor failures, wiring issues, or malfunctions in the control system components. As a result, the car’s computer system is unable to receive accurate information.  

This includes various parameters such as engine performance, exhaust emissions, or sensor readings. Without this feedback, the control system cannot make necessary adjustments or corrections. This ultimately leads to reduced performance, causing bad fuel consumption, or incorrect air-fuel ratio readings. 

It is important to detect such issues at the earliest to avoid any further inconvenience. Now that we know what open loop fault (OL) fault in cars is, let’s go through its potential causes. 

What Causes an Open Loop Fault in Cars?

Here are the details of what causes an open loop fault in cars. They are as follows.

FAULTY O2 SENSOR

Sensors play a crucial role in providing input data to the control system. If a sensor malfunctions, it disrupts the flow of information in the open loop control system. For instance, a defective oxygen sensor may provide inaccurate readings to the engine control unit, affecting fuel-air mixture calculations.

causes of open loop fault in cars such as faulty O2 sensors
If the oxygen sensor fails, it disturbs the open loop control system

CONTROL MODULE FAILURE

The control modules in a car’s electronic system generate control signals based on input data. If it fails or experiences a malfunction, it prevents the proper generation of control signals, leading to open loop faults. This happens due to electrical issues, software glitches, or component failures within the module.

WIRING ISSUES

Faulty or damaged wiring leads to open loop fault in cars. Broken wires, loose connections, or short circuits can interrupt the signal transmission between sensors, actuators, and control modules. This results in erroneous or missing data.

ACTUATOR PROBLEMS 

Actuators, such as solenoids, motors, or valves, carry out physical actions based on control signals. If an actuator fails or gets stuck in a specific position, it disrupts the operation of the system. For instance, when a fuel injector malfunctions, an incorrect amount of fuel is injected into the engine, affecting its performance.

FAULTY MAF OR ECT SENSOR 

causes and Symptoms of open loop fault in cars such as a faulty MAF
A faulty MAF leads to an open loop fault in a car

A damaged mass air flow sensor or engine coolant temperature sensor can cause an open loop fault in cars. The MAF sensor measures the amount of air entering the engine, while the ECT sensor monitors the engine coolant temperature. 

If these sensors fail or provide inaccurate readings, the engine control system defaults to open loop operation. The system relies then on preset values instead of adjusting based on real-time feedback. This leads to misfiring in car engines, reduced fuel efficiency and trigger fault codes.

INCORRECT VOLTAGE LEVELS OR GROUNDING 

When the voltage levels are unstable, it impacts the current flow within the circuit. As a result, an open loop is created. Moreover, poor grounding in the circuit leads to improper current paths, affecting its distribution in the system. 

Fixes of an Open Loop Fault in Cars 

Here’s how to fix an open loop fault in cars through these practical solutions. 

DIAGNOSTIC SCAN 

How to fix open loop fault in cars using diagnostic codes
A diagnostic scan helps to detect the root causes

Perform a car diagnostic test using an automotive diagnostic tool to retrieve error codes and identify the specific component or subsystem causing the problem. These error codes provide valuable information about the nature of the fault.

Doing so also provides real-time data and sensor readings from the car computer system. By analysing this data, technicians can compare the expected values to the actual readings and identify any discrepancies. This analysis helps pinpoint the root cause of the open loop fault in cars.

REPLACING THE SENSORS 

If a type of car sensor is identified as the cause of the open loop fault, test the sensor using the appropriate diagnostic procedures. If it fails the test or provides inaccurate readings, replace the sensor with a new one. Ensure that the replacement sensor is compatible with the vehicle’s make and model.

ACTUATOR INSPECTION AND REPAIR 

If an actuator is causing the open loop fault in cars, inspect it for any mechanical issues, such as stuck mechanisms or broken parts. Repair or replace the faulty actuator as needed. Ensure that the replacement actuator is correctly installed and calibrated.

Apart from the above-mentioned solutions, it is necessary to take the car to a professional mechanic. They will provide timely assistance on how to fix an open loop fault in cars. Moreover, one can also avail of dubizzle car inspection services for professional assistance and advice. 

WIRING AND CONNECTIONS INSPECTION

checking wiring connections to fix an open loop fault in cars
Check the wiring connections which might hinder the signal transmission

Check the wiring harnesses, connectors, and terminals associated with the affected component or subsystem. Look for signs of damage, loose connections, or corrosion. Repair or replace any faulty wiring or connectors to restore proper signal transmission.

This wraps the causes and fixes of open loop fault in cars. Such an issue impacts the functionality of a car and impacts the ride comfort. If you are facing such issues and want to opt for a new ride, go through these used cars for sale in the UAE. 

Stay connected to dubbizle’s autos blog for more on different car problems and how to fix them.

Share
Tweet
Pin
Share

Lock and Go: Exploring the Different Types of Car Door Handles

Types of Car Door Handles

When it comes to the appearance and utility of automotive design, every car part can make a difference. Even something as basic as a door handle can impact the vehicle’s overall design, functionality and safety. As we look back at automotive history, we come across many different types of car door handles. Some contributed to design evolution before becoming obsolete, while others promised more practicality and are still in use. 

Here we’ll explore the different types of car door handles, discussing their designs, features and role in history.

Types of Car Door Handles

types of car lock handles
The styles and locking mechanisms of car door handles have evolved over time

Regardless of their type, car door handles allow access to the car’s interior. However, their styles and locking mechanisms have evolved with time to enhance safety, as well as practicality.

Car Door Handles from the Bygone Eras

We’ll start our list by discussing the car door handles from the primitive era of the auto industry. 

Archaic 

The archaic car door handles were inspired by the household door handles. They were among the earliest car door handle designs, originating from the era of horse-drawn carriages. 

These handles had a bulky appearance and were fragile enough to easily break. Due to these drawbacks, car manufacturers lost interest in these auto door handles. As a result, they remained limited to primitive automobiles.

Flap

The flap-type door handles were introduced in the late 60s. With a more practical and versatile design, these types of auto door handles stayed in trend for decades. They became a common exterior feature in many different cars from the 90s era. 

By pulling back the flap, the handle worked and the door opened. The mechanism of the flap door handles was simple and to the point. However, the design was slowly phased on in the following decades.

Push Button 

Push button type of car door handles
These handles required users to push a button down to open the door

During the 1970s, push-button type of door handles got popular in vehicles. As the name implies, these handles required users to push a button down to open the door. The button on the handle often came with a key opener. This further simplified the unlocking process. 

While the key opener was occasionally located separately, the functionality of the door handle remained unchanged. These types of door handles were also found on vehicles of that time with suicide car doors. However, this style eventually fell out of favour due to changing safety regulations in the global auto industry.

Trigger 

This car door handle was based on a simple working mechanism. It had a trigger tab on the inside instead of a handle on the button. One had to pull the tab to open the door. 

Be it Chevrolet or Ford, almost every other leading auto brand installed these door handles in their car models. The trend of trigger door handles went strong up until the 70s and then they started to slowly disappear.

Types of Auto Door Handles Used to Date

In modern cars, door handles are grouped into a few main categories based on how they open and close. Below are some common examples in this regard:

Pull Up

The pull-up style is another popular design option for door handles, especially in vehicles of the affordable segment. This design gained popularity in the 80s and 90s, especially in GM and Toyota models. 

Some vehicles still have them today since these door handles are very easy to operate and cheap to install. Their popularity also went down as the auto industry started focusing on pull-out door handles in the following years. 

Pull Out

pull out auto door handles
These door handles are found in mid-range and affordable vehicle line-ups

The pull-out type of car door handles are quite sturdy, compared to their pull-up counterparts. They are easier to use and add to the overall aesthetics of a car. When introduced initially in the 90s, they were only installed in premium cars. 

Given their growing popularity, they were also included in the mid-range and affordable vehicle line-ups. Pull-out is the most common door handle design, found on almost every other modern vehicle. 

Due to their outward design, they can also be used to adjust parking mirrors. It is among the many hidden functions of a car door handle.

Push Down

push down car door handles
Push-down car door handles are built for unique car door designs

A push-down type of auto door handle is a rare sight. Built for unique car door designs, it is found in a handful of vehicles sporting a specific design language. This door handle works with the reverse mechanism. Instead of pulling the flap, the handle needs to be pressed down to get the door open. The orientation and positioning of these door handles are specific to the host vehicle. 

Touch-type Handles

With EVs and autonomous driving in the works, the industry is heading towards a tech-oriented future of cars. The introduction of touch-type door handles is another strategic move in this regard. 

As the name implies, this car door handle operates with a simple touch. It is as easy as using a fingerprint scanner on your mobile phone. Moreover, turning to technology can also help avoid the most common locking problems with car doors.

Since these futuristic door handles use advanced sensors, installing them is a little too expensive. This is why not many daily-driven vehicles have them. Tesla has already introduced touch door handles and the trend will eventually be followed by other up-market automakers. 

These were some of the different types of car door handles that evolved over the years. For knowledge and safety, it is important to keep learning about the different car door parts and their functions. 

Whether you desire vintage vibes or a futuristic feel as a motorist, you’ll find plenty of suitable options while browsing these used cars for sale in the UAE.

Learn more about important car parts and DIY repair tips by following the dubizzle auto blog.

Share
Tweet
Pin
Share

All About Bad Engine Ground Strap Symptoms

Here are the bad engine ground strap symptoms

Your vehicle’s engine ground strap plays a crucial role in ensuring proper electrical grounding. This is essential for various components to function optimally. When the ground strap becomes worn or damaged, it can lead to several electrical problems affecting your vehicle’s performance and safety. Here we will explore ten common bad engine ground strap symptoms. Identifying these signs can help you take necessary action to prevent further damage and ensure your vehicle operates smoothly.

What is Ground Strap

The ground strap is also known as the negative battery cable, ground wire, or ground cable. It is a heavy black wire that connects the car battery’s negative terminal to the vehicle chassis. It serves as the foundation of the entire electrical system in your vehicle.

All electrical currents that flow throughout your vehicle pass through the ground strap. When you have a malfunctioning ground strap, it can lead to a wide range of electrical problems. These issues are not minor inconveniences; they can significantly impact your ability to operate the vehicle properly.

Ground Strap Location

You can easily access the bad engine ground strap symptoms
You can easily find the ground strap as it is often situated in a visible location

The ground strap is typically positioned between the car battery’s negative terminal and the car’s body. There is also a ground strap connecting the engine to the vehicle’s body.

Usually, the ground strap is easily identifiable as it is often situated in a visible location. If you are familiar with the location of the car battery, locating the ground strap should not pose any difficulties.

Bad Engine Ground Strap Symptoms

The most prevalent indications of a faulty ground strap include headlights that flicker and difficulties starting the vehicle. Additionally, you may encounter problems such as dashboard warning lights illuminating or experiencing unusual electrical malfunctions.

Following are the bad engine ground strap symptoms that you need to watch out for.

Dimming or Flickering Lights

Dimming or flickering headlights, whether they are interior lights or headlights, can be one of the initial indications of a faulty ground strap. When the ground connection is compromised, the electrical current may not flow smoothly, leading to voltage-level fluctuations. As a result, you may observe your lights behaving erratically, with dimming or flickering patterns. If you notice such irregularities in your vehicle’s lighting system, it is advisable to have the ground strap inspected to determine if it is the cause of the issue.

Your Car Won’t Start

When the ground strap is faulty, it can disturb the flow of electrical current to your vehicle’s starter motor. This disruption in the electrical connection can lead to difficulties when starting your engine. You may notice symptoms such as slow cranking, a struggle to start the engine, or the need for multiple attempts before the engine fires up. 

These issues often indicate a compromised ground strap. If you encounter these starting problems, it is recommended to have your ground strap inspected and potentially replaced to restore proper electrical current flow and resolve the starting issues.

Electrical Component Malfunctions

a person is checking battery terminals
A bad ground strap often causes problems in the car’s electrical components

When the ground strap fails to provide a reliable connection, it can affect various electrical components in your vehicle. You may encounter problems with the power windows, radio, car dashboard warning lights, or any other electrical systems. A faulty ground strap could be the culprit if you notice unusual behaviour or intermittent failures of these components.

Low Voltage

A clear indication of a bad ground strap is the presence of low voltage circulating in your vehicle. You can easily determine if you are receiving full power by conducting a simple voltage test. You can use a digital multimeter to measure the voltage output from the battery terminals.

Typically, a reading of 12.6 volts would fall within the normal range. However, if you obtain a reading below 11.5 volts, a grounding issue is likely causing the voltage drop. In such cases, you must focus on troubleshooting efforts on examining the ground cable as a potential culprit.

Erratic Gauges or Instrument Cluster

The instrument cluster, which displays vital information such as speed, fuel level and engine temperature, relies on the proper electrical ground. A bad ground strap can cause erratic behaviour of the gauges, such as inaccurate readings or sudden drops to zero. Please pay attention to any unusual gauge movements as they could indicate a grounding issue.

Electrical Surges or Spikes

A malfunctioning ground strap can lead to electrical surges or spikes, which can be harmful to sensitive electronic components. These surges can damage various parts of your vehicle’s electrical system, including the alternator, battery and fuses. If you notice any sudden spikes in voltage or experience blown fuses, inspecting the ground strap promptly is crucial.

Poor Fuel Efficiency

inefficient ground strap can affect the performance of your fuel
A filed ground strap can affect the fuel economy of your vehicle

An inefficient ground strap can affect the performance of your fuel delivery system. When the connection is compromised, it can result in poor fuel consumption or disruption in the fuel pump’s operation. Consequently, your vehicle may experience reduced fuel efficiency, leading to frequent visits to the gas station.

Strange Noises

A worn-out ground strap may cause electrical arcing or sparking, leading to strange noises under the hood. You might hear crackling or buzzing sounds, particularly when the engine is running. These noises indicate a poor connection. However, addressing the issue promptly is essential to avoid potential hazards.

Engine Stalling or Misfiring

When the ground strap fails to provide sufficient electrical grounding, it can disrupt the proper functioning of the engine’s ignition system. This can lead to engine stalling, misfiring, or car engine idling. If you experience any of these symptoms, it’s wise to have your ground strap inspected and replaced if necessary. Besides, there could be other reasons why your car’s engine keeps stalling.

Battery Drainage

A failing ground strap can cause excessive electrical resistance, leading to increased current flow and subsequent battery drainage. If you frequently find yourself jump-starting your vehicle or the battery constantly dies, it could be a sign of a faulty ground strap. Here are some more reasons why your car’s battery drains.

If you are planning to buy a used car for sale in the UAE, make sure you check all the parts carefully. Your vehicle’s ground strap is vital to ensure proper electrical grounding and smooth operation of various systems. By paying attention to the signs discussed above, you can identify potential issues with your ground strap early on. 

If you notice dimming lights, electrical malfunctions or poor fuel efficiency, it’s crucial to have your ground strap inspected. Prompt action can prevent further damage and keep your vehicle running efficiently and safely on the road. Remember, a well-maintained ground strap is the foundation of a reliable and properly functioning electrical system in your vehicle.

Stay tuned to dubizzle’s cars blog for more information about car parts.

Share
Tweet
Pin
Share

Off-Road Vehicle: Before & After Journey Maintenance Tips

Off-Road Vehicle Maintenance

Maintenance is an integral part of owning a vehicle. Timely maintenance ensures a vehicle remains in good condition for a long time. Whether a vehicle is parked or is in regular use, maintenance is a must in either case. However, maintenance becomes more important when a vehicle is driven on unfamiliar terrains – off-roading for instance. Off-road vehicle maintenance requires attention to detail because of the tough driving conditions.

Whether leaving for an off-road adventure or coming back from, it is essential to follow the maintenance schedule for the vehicle’s sake. That said, we will go through some effective off-road vehicle maintenance tips to help drivers take good care of their automobiles.

Off-Road Vehicle Maintenance Tips

sandy dunes or different terrains can take a toll on off-roading vehicles
Vehicles are more prone to damage during off-roading, therefore, follow the maintenance schedule

Although many vehicular adventures are available, off-roading is a popular choice for car enthusiasts. The thrill to explore and conquer different terrains is unlike any other. Additionally, a vehicle capable of withstanding the tests adds more appeal to off-roading.

However, different conditions tend to take a toll on the vehicle in one way or another. Therefore, it is important to look after the vehicle before and after the trip. Let’s now take a look at some of the important off-road vehicle maintenance tips. These can help get the best out of the experience and keep the vehicle in good condition.

OFF-ROAD VEHICLE MAINTENANCE TIPS BEFORE SETTING OFF

Before setting off for the off-roading tip, it is important to ensure that the vehicle is ready. Off-roading requires different types of vehicles, particularly those with 4-wheel drive or all-wheel drive. Additionally, there are many off-roading EVs now available that can conquer different terrains. A vehicle encountering problems midway can land drivers in unfamiliar territory – therefore, maintenance becomes integral.

That said, listed below are some pre-departure off-road vehicle tips to follow:

CHARGE THE BATTERY FULL

The battery is an integral part of the car’s system. Not just the engine but the electrical system requires a working battery to function properly. For off-road trips, it is essential to fully charge the battery beforehand.

This can help avoid several issues during the journey, such as ensuring additional car accessories and the electrical system run smoothly.

INSPECT THE TYRES

checking tyre pressure is one of the Off-Road Vehicle Maintenance tips
Check tyre pressure, alignment and any signs of wear and tear before setting off for the trip

Among the different types of tyres available, there are specific ones for off-road vehicles. Be sure to inspect and maintain them before setting off. Worn-off, damaged, improperly inflated or misaligned tyres may fail to manoeuvre in different terrains.

Moreover, damaged tyres may affect the vehicle’s traction, tread integrity and fuel economy. Check the tyres and be better prepared for the journey. It also helps to know when to change car tyres for better vehicle maintenance.

CHECK THE VEHICLE FOR LOOSE PARTS

Loose parts, at times, can come in contact with rocks and hard surfaces and break down. Any major damage can cause the vehicle to shut down. Check the vehicle’s undercarriage – wheel bearings, tie rod ends and bolt joints.

CHECK FLUIDS AND FILTERS

checking the vehicle fluid levels is among the effective Off-Road Vehicle Maintenance ideas
Keep a check on fluid levels and filters to avoid any inconvenience during the off-roading journey

Checking the fluids and filters is also among the major off-road vehicle maintenance ideas and the things to check in a car before roadtrip. During off-roading, a vehicle usually experiences more jolts, bumps and vibrations. At times these unfamiliar conditions may lead to potential leaks.

Moreover, vehicles have different types of car filters serving their respective purpose. Dusty, muddy or other unfamiliar conditions put extra pressure on these filters. The dirty ones may fail to function properly.

Therefore, it is important to check the fuel levels and car filters before going off-roading. Keep the fuel to optimal levels and replace any dirty or worn-out filters.

PROTECT THE EXTERIOR AND LIGHTING ASSEMBLY

A vehicle’s exterior is more prone to damage in different terrains. The vehicle may incur dents or different kinds of car scratches in unfamiliar driving conditions. Therefore, it is essential to take some precautionary measures to protect the vehicle.

Installing rock sliders, skid plates and brush guards can be a viable option to prevent damage. Moreover, using waterproof lights, protective covers and coating can help protect the lighting assembly.

ADDITIONAL MEASURES TO TAKE

for an off-road vehicle. keep the first aid and tool kit for unforseen circumstances
Be better prepared for the off-roading trip by keeping the first-aid and tool kit in the vehicle

Besides following all the aforementioned tips, there are some things to look out for. It is equally important to be ready for unforeseen mishaps during the journey. Always keep the essential off-roading accessories to combat unwanted situations.

The essentials contain a first-aid kit and all the necessary repair tools drivers need for the trip. Additionally, keep an eye on the weather before setting off. If the weather forecast is not suitable, it is better to reschedule the trip.

OFF-ROAD VEHICLE MAINTENANCE TIPS AFTER THE JOURNEY

The aforementioned tips can greatly help to enjoy a hassle-free off-roading experience. However, the work doesn’t end with the trip. For any of the types of off-road vehicles used, aftercare is equally important.

Let’s have a look at some effective tips for off-road vehicle maintenance after the trip is complete.

WASH THE VEHICLE

washing the vehicle after the trip is among the many Off-Road Vehicle Maintenance tips
Thoroughly wash the vehicle after the trip to remove debris

A vehicle is more than likely to get dirty in off-roading adventures. The different off-roading types include muddy and sandy trails among many others. Dirt can stick to the vehicle’s exterior and may be hard to remove if not cleaned promptly.

Therefore, hose down the vehicle thoroughly after the trip. For an effective wash, locate and eliminate any sign of debris on the vehicle. Furthermore, there are many services for car wash in Dubai, Abu Dhabi and other Emirates to help get the washing job done effectively.

INSPECT THE TYRES

Car tyres experience immense pressure during off-roading. When the trip ends, thoroughly inspect the tyres. Look out for signs of wear and tear or any foreign object stuck in the tyres. Additionally, check the tyre pressure and inflate them accordingly.

CHECK THE VEHICLE FOR DAMAGE

check vehicle's filters, chassis and axles for any sign of damage
Cross-check the vehicle components, look for any signs of damage and fix them promptly

The off-road vehicle maintenance tips help to avoid and minimise damage. However, besides all precautions, some parts may experience damage. After the off-roading trip, thoroughly check the vehicle components for any signs of damage.

Look for any signs of bad brake pads, axles, callipers, shocks and brake lines. If any part seems damaged, repair or replace it at the earliest.

LUBRICATE VEHICLE’S MOVING PARTS

Different driving conditions may leave debris on the chassis, drivetrain and suspension parts – leading to decreased lubrication. Driving a vehicle with this condition can lead to further damage. Thus, it is important to lubricate the moving parts before taking the vehicle out for a spin.

In addition to these, store the vehicle in a closed space for some time. This helps prevent potential damage caused by a combination of air particles and debris on the vehicle.

follow the maintenance tips for an off-road vehicle and have a hassle-free experience
Follow the off-road vehicle maintenance tips and extend your vehicle’s running life

These are all effective tips for off-road vehicle maintenance before and after the journey. Off-roading can be a thrilling experience for people looking for vehicular adventure. The off-road modifications in vehicles make driving all more enjoyable and safe – for the drivers and the vehicles.

However, it is important to follow the maintenance tips for a hassle-free experience. Looking for off-roading trails in the UAE? Check out these off-roading places in the UAE and enjoy the unique driving experience.

Additionally, the right vehicle can make all the difference in an off-roading trip. Browse through these used cars for sale in the UAE and have your pick from a wide variety of off-roading suitable vehicles.

Stay tuned to dubizzle’s auto blog for off-road vehicle maintenance tips and more.

Share
Tweet
Pin
Share

What is Nissan Intelligent Mobility

nissan intelligent driving

The automobile industry has witnessed a surge of technological advancements in vehicles. The adoption of technology has resulted in safer, more connected and more efficient cars. Almost all the leading automobile brands are adopting technologies at a faster pace including Nissan. 

To take vehicle connectivity and efficiency to the next level, Nissan has introduced Nissan Intelligent Drive. The Intelligent Drive is a combination of different safety and driver-assist features which aid in improving the driving experience. 

Let’s take a closer look at the Nissan Intelligent Mobility and the features it offers.  

Nissan Intelligent Mobility Features

Nissan Intelligent Drive is a perfect blend of driver-assist and modern car safety features. Following are the Nissan Intelligent Drive features that are offered by the brand. 

Intelligent Driving

The Nissan’s Intelligent Driving feature includes a bunch of driver-assist features which increase vehicle safety and reduce any potential chance of an accident. The intelligent drive uses different types of car sensors to detect traffic, provide traffic and pedestrian alerts and stop vehicles in emergencies. 

The Nissan Intelligent Driving features can be segmented into two broader categories mentioned below. 

Nissan Intelligent Driving feature
The Nissan Intelligent Driving feature is equipped with advanced technological features which increase safety and driveability

Propilot

The Propilot assist feature enables drivers to cruise around the city and on the highways conveniently. The Propiot can be activated with a touch of a button present on the steering wheel. Once it’s activated, set desired speed and distance and leverage from steering assist, automatically controlled acceleration and braking. The system is capable of stopping and accelerating vehicles within 3 seconds. 

Alongside this, Propilot will also provide lane-keeping and lane departure systems, keeping the vehicle within the marked lanes on the road. 

Propilot Park

If you find parallel parking difficult, the Propilot Park system of Nissan is for you. The system helps drivers to park the vehicle by controlling braking, acceleration and gear shifts. 

You can activate the Propilot Park in front of the desired parking space. The ProPilot will autonomously measure the space and park the vehicle. However, pressing the brake or controlling the steering wheel will deactivate the system automatically.  

Intelligent Power

The Nissan Intelligent Mobility is not only limited to driver-assist features, it also includes Intelligent power. Intelligent Power provides Nissan electric cars with 100% instant torque and zero tailpipe emission. 

Nissan Intelligent Power
Nissan Intelligent Power includes electric cars which have longer ranges and better traction

E-Pedal

Nissan has introduced the E-Pedal in its model series Leaf. The E-Pedal provides more control of the vehicle and also generates power for the vehicle. When the pedal is pressed it accelerates the vehicle and when depressed it works as regenerative braking and produces electricity.  

e-Power

The Nissan’s e-Power system increases your driving experience by increasing battery range and additional road grip. The e-Power uses an electric motor to provide instant torque and zero tailpipe emissions. Moreover, the AWD drivetrain system increases the road grip increasing handling and driveability. 

Intelligent Integration

Artificial Intelligence (AI) is integrated into Nissan vehicles to make them more connected and autonomous. The Intelligent Integration system allows cars to become smarter taking the right decisions in tough situations. An ideal example of Intelligent Integration in Nissan vehicles is the Nissan Connect. 

Nissan Intelligent Integration
To elevate the standard of its vehicles, Nissan has integrated several AI-operated features in its cars

Nissan Connect

The Nissan Connect system includes Amazon Alexa, Apple CarPlay and Android Auto. That said, these features aid drivers in playing music, tab social networks and navigating through the updated map. Furthermore, it also provides access to the car through a smartphone. 

EV Infrastructure

Nissan is taking its EV vision to the next level by developing EV charging infrastructure and providing home charging facilities. The Nissan Leaf can provide power in an emergency. Alongside this, Nissan is also planning for an “e-share mobi” car-sharing program that will allow travellers to use Nissan Leaf for car sharing. 

Nissan Intelligent Mobility Models

The Intelligent Mobility System is not offered in all the Nissan models. Here we have listed a few models that are available with Intelligent Mobility.

  • Nissan Sunny is available at a starting price of AED 61,000
  • Nissan Kicks that you can purchase at a starting price of AED 71,000
  • Nissan Maxima is available at a starting price of AED 129,500
  • Nissan X-Trail is available for sale at a starting price of AED 99,900
  • Nissan X-Terra with a starting price of AED 104,000
  • Nissan Pathfinder SV starting from AED 158,000

Apart from above mentioned cars, here is the list of other popular used Nissan cars in the UAE with advanced features. Please remember that the availability of an Intelligent Mobility system in a car is dependent on multiple factors, and it may or may not be available in the above-mentioned models. Therefore, it is suggested to contact the Nissan showrooms in the UAE before selecting the car. 

FAQs

What is Nissan Intelligent Mobility?

Nissan Intelligent Mobility is a complete package including a myriad of driver-assist and safety features which increases driveability and provides convenience to the drivers. 

What are the three core features of Nissan Intelligent Mobility?

The three pillars of Nissan Intelligent Mobility are:

  • Intelligent Drive
  • Intelligent Integration
  • Intelligent Power

What does Nissan Intelligent Mobility promise?

Nissan Intelligent Mobility is a whole new dimension of technological inclusion in vehicles. It promises peace of mind and higher driveability. 

This was all about the Nissan Intelligent Mobility system, its features and the assistance it provides. The Intelligent Mobility of Nissan is a complete package providing maximum comfort and convenience to the drivers. If you are also interested in availing of these features, browse through these used Nissan cars for sale in the UAE and buy a Nissan with an Intelligent mobility feature. 

Stay tuned to dubizzle’s auto blog for more information on Nissan’s intelligent mobility prices.

Share
Tweet
Pin
Share

How to Clay Bar a Car

clay bar a car

The car’s exterior requires regular maintenance to retain its colour and shine. Car owners opt for several different ways of cleaning their vehicles, one being clay bar detail. For clay bar detailing, all you need is a bar of clay and a lubricant. Clay bar is an effective detailing technique, as it is non-abrasive and causes no damage to the car paint. 

For your convenience, here we have mentioned all the steps for clay bar a car.   

Steps to Clay Bar a Car

Car paint holds significant importance as it can affect the car’s aesthetics and even its resale value. That said, clay bar treatment in cars helps remove dirt particles from the exterior without causing any damage. Professionals use different ways to clay bar a car. Mentioned below are the handiest ways. 

Wash your Car

Rinse your car with water and try to remove visible dirt, particles and grime from the surface. Washing cars with water will increase the effectiveness of clay detailing. However, avoid using a pressure washer, as the soap residue left on the vehicle will hinder the car detailing process. After washing it properly with clean water, let it dry for 15 minutes and then dry it using a microfibre cloth. 

Prepare Clay

For claying, you can either use a fine or medium-graded clay bar. Both have the same properties, but the fine-graded clay bar is more effective. If you are doing it for the first time, opt for a medium-graded clay bar. A 57gm clay bar is enough for a normal-size sedan.

Now, squeeze the clay bar in your palm for a few minutes, the body heat will melt the bar and make it moldable. Ideally, a 57 gm clay bar after squeezing should be 1.9cm thick and 3 to 4 fingers wide.

Spray Lubricant and Start Claying

Spray the lubricant over a small area of around 2. ft X 2. ft, also spray the clay bar for extra lubrication. Start from the cleanest areas of the car and gradually move towards the dirtiest parts of the car like bumpers and tyres.  

Make sure to use a proper lubricant for better results. This is because playing with an improperly lubricated area will leave clay residue on the car damaging its exterior. That said, you can browse through these used auto accessories for sale in the UAE and purchase a proper lubricant for clay detailing.  

Rub the Clay Back and Forth

To properly use the clay, flatten your hand, hold the clay bar between your fingers and rub it in up-and-down or side-to-side motion. Apply enough pressure so that clay will not fall from your hand. 

Keep an eye on the area and check the clay after every few minutes. If the clay gets dirtier, fold it in the opposite direction and use the clean part of the clay. Repeat the process until the clay completely changes its colour. 

Rubbing clay bar
Avoid rubbing clay bars in a circular motion as it can damage the car paint

Wipe It Off with a Microfibre Cloth

Once done with all the parts of the car, let it rest for 5 minutes. Now use a microfiber cloth and wipe out the car surface. It is necessary to remove any remaining clay or residue before moving towards the final step. 

The car surface after this step should be smooth. Run down your fingers on the surface and repeat the whole process if the surface is not smooth enough. 

Apply Sealant or Wax

Once done with claying, apply a sealant or wax on the surface. This will avoid car body rusting and fill small holes on the surface. You can use any car wax or polish available in the market. 

Pro Tips to Clay Bar a Car

Now that you are aware of the complete process, here are some pro tips to clay bar a car. These tips will aid in increasing detailing efficiency and avoiding any damage to the car paint. 

Use Clean Clay

The whole purpose of the clay par is to get in contact with the car surface and remove dirt particles. Therefore, it is necessary to use a clean clay bar for detailing. If the clay bar has particles or dirt, it will cause scratches on the car’s surface when rubbed against it. That said, avoid using bars you dropped on the road or used previously.  

Use Zip Lock

As mentioned above, a medium-sized clay bar is enough for a car. If you have purchased a large clay bar, cut it in half and only use the required amount. Seal the remaining clay bar in a zip lock bag and reuse it again. Using a zip lock bag will retain its moisture and keep it reusable for a long time. 

Water is Not a Lubricant

Remember that lubrication is the key to clay bar detailing. However, water can not be used as a lubricant for clay bar treatment in cars. Water will not provide proper lubrication leaving marks on the car surface. 

clay bar a car
Lubricating the car and clay bar is necessary for smooth clay detailing

Time Duration

Ideally, a car needs clay detailing after every two weeks but it varies from vehicle to vehicle. The clay detailing depends on multiple factors like the usage of the vehicle and the weather condition. Therefore, inspect your car’s condition physically and if you find dirt all over the place that is not getting away from regular cleaning, it’s time for detailing. 

However, for interior detailing, you can check the car cabin odour. Also, check the car manual as it elaborates on when the car needs detailing and washing. If you are washing a car for the first time at home, read our blog on where to start cleaning a car for more details. 

This was the complete process of clay bar a car safely. It is necessary to wash and detail your car after every few days to ensure the car paint’s shine and polish. Rusting or chipping car paints requires a fortune to repair and also affects the resale value of vehicles. That said, when buying a used car for sale in the UAE, check its paint properly to avoid any hassle. 

Besides, if you already have a car, avail yourself of the car detailing options in Dubai and other Emirates. 

Stay tuned to dubizzle’s auto blog for more information on the best clay bar for cars. 

Share
Tweet
Pin
Share

Auto Anatomy: Flex Pipe

All About Car Exhaust Flex Pipe

A car exhaust system is made up of several essential components that work together to ensure optimal performance. Serving as an exhaust pipe connector, a flex pipe is among these key parts of the exhaust. As the name suggests, it maintains flexibility by neutralising thermal expansion. This means an efficiently functioning flex pipe protects the vehicle’s exhaust system from cracking up and prevents greater damage.

Let’s develop a better understanding of the function and operation of a flex pipe, as well as explore more about the common causes and symptoms of its failure.

Flex Pipe Function

car exhaust flex joint function
The flex joint connects two car exhaust system components

The primary function of a flex pipe is to provide flexibility within the exhaust system. Also known as a flex joint, it serves as a connection between the exhaust manifold or header and the downstream exhaust components. These components include the catalytic converter, muffler and resonator. 

The supple nature of these joints neutralises vibrations and thermal expansion. It results in reduced stress on the exhaust system and prevents potential damage.

Exhaust Flex Pipe Working

Flex pipes are constructed with a series of interlocking ridges or corrugations, which allows them to move easily. These ridges are typically made of braided steel or other heat-resistant materials. It gives them the required strength to withstand extreme conditions and limit cracking in the system.

The flex joint connects two exhaust system components. When the engine vibrates or undergoes thermal expansion, it allows flexible movements between the connected components, minimising stress on the exhaust system.

The pipe can either be double or triple-braided, however, it depends on the vehicle type. Typically, cars that run on a petrol engine have double-braided flex pipes. On the other hand, diesel engine vehicles have triple-braided flex pipes. They come in different diameters as well as braiding. To learn some other differences between petrol and diesel engine, read here.

Where Is the Flex Pipe Located In Car Exhaust?

Flex pipes are generally mounted near the exhaust manifold, close to the engine. However, their positioning may vary according to the type of car exhaust system, configuration and design of the vehicle. In some cases, there are multiple flex pipes throughout the system, especially in vehicles with more complex exhaust layouts.

Components of Flex Pipe

exhaust flex pipe parts
Flex pipe comprises different parts that contribute to its functionality

A flex pipe is further divided into several parts that work together to ensure its functionality:

Outer Braid

It is the outer layer of the flex pipe that is typically covered with a stainless steel braid. This braid provides additional strength and protection against external elements, such as road debris and moisture. A flex joint has to be sturdy as it is an integral component of a car exhaust system.

Corrugated Section

The main body of the flex pipe features a series of ridges or corrugations. These ridges allow the flex pipe to flex and absorb vibrations and thermal expansion.

Inner Liner

Inside flex pipes, there is often an inner liner made of heat-resistant materials. The inner liner protects the flex pipe from the hot exhaust gases and helps maintain its structural integrity.

Causes of Bad Flex Pipe

bad flex pipe causes
Flex pipe can deteriorate due to constant exposure to varying external conditions

Since flex pipes are beneath a car’s body, several factors can result in their failure or damage. Let’s identify and discuss some common causes of failed exhaust flex joints.

Flexibility Loss with Time

Over time, the flex pipe can deteriorate due to constant exposure to varying external conditions. This leads to flexibility loss, which can also be due to carbon buildup or contaminants in the exhaust gases. This can lead to rigidity, increasing the chances of cracks or failure under stress.

Extreme Temperature Fluctuations

The flex joint is subjected to significant temperature variations, especially during engine startups and shutdowns. Repeated heating and cooling cycles can cause the flex pipe’s materials to expand and contract, eventually leading to fatigue and failure.

Vibration and Mechanical Stress

The flex pipe is exposed to engine vibrations and movements while driving. Excessive vibrations, such as those caused by a misaligned engine or worn engine mounts, can put excessive stress on the flex pipe, leading to cracks and failure.

Road Debris and Impact

Road debris, such as dust, dirt, sand and displaced asphalt can damage flex pipes. Moreover, impacts caused due to speed bumps, potholes or other objects while driving can further add to this damage. They can cause dents, punctures, or even complete separation of the flex pipe components.

Corrosion

Corrosive exhaust gases can also accelerate the deterioration of flex pipe materials. Rust and corrosion can weaken the joints, making them more susceptible to cracks and leaks.

Engine Misfires

One of the most common symptoms of car engine misfiring is unburnt fuel, which can enter the exhaust system. This can lead to increased temperatures and pressure within the flex pipe, causing it to overheat and potentially fail.

Improper Installation

In some cases, improper installation can contribute to flex joint failure. If the flex pipe is not securely attached or lacks proper support, it causes excessive stress and premature failure.

Bad Flex Pipe Symptoms

After learning about the causes of bad flex pipes, we’ll explore the noteworthy symptoms indicating the problem.

Loud Exhaust Noise 

A failing flex pipe may be one of the reasons behind the loud exhaust. It may cause a noticeable increase in exhaust noise, often characterised by rattling or hissing sounds.

Exhaust Leaks

If the flex pipe gets damaged or develops cracks, it can result in exhaust leaks. These leaks may be detected by the presence of a strong smell of exhaust fumes or visible smoke coming from underneath the vehicle. Bad flex pipe can also be one of the causes of leaking oil from the exhaust pipe.

Decreased Engine Performance

A bad flex joint can disrupt the exhaust flow, which is one of the reasons for low engine power. It also reduces fuel efficiency and increases noise and shaking. That said, a failing flex pipe may not directly harm your car engine, but if not addressed promptly it can cause various performance issues.

Exhaust Flex Pipe Replacement Cost

flex pipe replacement cost in the UAE
Make sure to get the new flex pipe installed by a certified auto technician

With a damaged or faulty flex pipe, the car exhaust gets prone to cracking, leaking or snapping off. Therefore, it is better to replace such a crucial component when it starts to fail for a long-term solution. If you don’t have time to visit a market in person, shop for car accessories and parts straight from your couch. 

A new flex pipe price in the UAE is around AED 80-110 on average. However, make sure to get in it installed by a certified auto technician to ensure optimal installation and functioning. The flex pipe repair cost may vary from workshop to workshop.

There you have it – our detailed guide on the flex pipe in a car exhaust system. Furthermore, if you notice any of these causes of exhaust backfiring, address them immediately to keep the system performing smoothly.

Checking the condition of the exhaust system should be on your vehicle inspection checklist while purchasing a used car for sale in the UAE.

For more anatomies of important car parts and repair guides, keep reading dubizzle’s auto blogs.

Share
Tweet
Pin
Share

Overhead Valve vs Overhead Cam Engines: Understanding the Differences

overhead cam vs overhead valve

Automobile manufacturers design engines with different camshaft configurations, each with its own sets of advantages. In this regard, overhead cam vs overhead valve is among the most debated topics when considering car engines, performance, design and utility. Which one has a better or more compact design? Which provides more power?

Here’s a comprehensive comparison between the overhead cam vs overhead valve engines.

OHV vs OHC Engines: What Distinguishes Them?

Several factors distinguish the two engines. The design is the main difference between the overhead valve and overhead cam engines. While OHV engines are cost-effective, OHC engines offer better performance. 

Let’s explore more differences between the overhead valve vs overhead cam engines’ reliability, pros and cons and working.

Design and Configuration

OHV vs OHC working and design
OHC engines have two types, whereas OHV is a type of pushrod engine

An OHC engine has a camshaft on top of the valves, whereas OHV has a camshaft between the valves. That said, both configurations have distinguished functions and working. 

Overhead cam engines come in two configurations, i.e. inline or V-engines. Meanwhile, the OHV is a type of pushrod engine. Moreover, OHC has two types: dual overhead cam and single overhead cam engines. You can learn the differences between SOHC and DOHC engines to understand their design in detail.

After the design, another difference between the overhead valve and overhead cam engines is their working.

Working

The overhead cam engines have a camshaft located at the top actuating the valves. The crankshaft rotates the camshaft. After that, the lobes push the valve stems, causing them to open and close as the lobes rotate. The valve springs provide the return force, while the timing belt couples the overhead camshafts to the main shaft. 

On the other hand, overhead valve engines have only one cam placed between the V of the cylinder banks on the opposite. The single camshaft lobes actuate the pushrods. These pushrods transmit linear displacement to rockers. Then, the rockers redirect the motion down, pushing the valves downward. 

Overhead Valve vs Overhead Cam Engines: Pros and Cons

Both engines have their pros and cons. One must weigh these benefits and drawbacks when buying a car. 

Pros and Cons of OHC Engines

OHC pros and cons
OHC engines provide higher RPM than the OHVs

Learning the advantages and disadvantages of overhead cam engines is essential when buying a car with SOHC or DOHC engines.

Here are the benefits of OHC engines:

  • They provide improved performance compared to other engine designs. The direct actuation of the valves allows precise valve timing and greater control over the intake and exhaust cycles, which can result in better overall engine performance.
  • OHC engines have higher RPM compared to the OHV engine. The lighter valve train and reduced reciprocating mass allow the engine to rev higher, potentially leading to increased power output.
  • Better fuel efficiency is another advantage of an overhead cam engine compared to the overhead valve. Efficient valve control and reduced internal friction contribute to improved combustion efficiency and reduced fuel consumption.
  • Variable valve timing (VVT) technology is also found in overhead cam engines. 

Here are the cons of OHC engines:

  • OHC engines have a complex design with more components compared to the pushrod engines. This complexity increases its weight. Moreover, the manufacturing, maintenance and repair costs are higher.
  • These OHC engines have a narrow torque band that produces less low-end torque, requiring higher RPMs to achieve maximum power. It can result in a less responsive engine at lower speeds.

Pros and Cons of OHV Engines

OHV engines reliability
Overhead valve engines have better durability and reliability

The following are the advantages of the overhead valve engines:

  • It was part of the classic muscle cars by American auto manufacturers that produced high power and performance.
  • The OHV engines have a compact size and less weight than the OHC engines due to the less number of camshafts.
  • Its compact size and design lower manufacturing and maintenance costs.
  • OHV engines are known for their durability and robustness. Its components reduce the vulnerability to extreme temperatures and potential damage. 
  • OHV engines often exhibit strong low-end torque. It is one of the main differences between the overhead valve and overhead cam engines that require ample pulling power or towing capabilities.

Alongside its advantages, here are the disadvantages of OHV:

  • The OHV design may not provide optimal combustion efficiency compared to other engine configurations. The placement of the valves in the engine block can result in less efficient airflow and fuel mixture compared to engines with overhead cams. 
  • The pushrod design limits the speed at which the engine valves function, which can impact the engine’s ability to achieve high RPMs. 

Overhead Valve vs Overhead Cam Engines: Which Is Better?

what to choose from overhead valve or overhead cam engines
When choosing between the OHV vs OHC engines, consider their design, power and performance differences

Both engines have their benefits and drawbacks. It’s important to figure out the power and performance you need while driving a car. 

Overhead valve engines have produced better results in high-performance cars, such as Dodge Challenger and Chevrolet Corvette. However, OHC engines can be found in fuel-efficient vehicles, such as the Mercedes C300 and BMW X5.

This was a detailed comparison between the overhead valve vs overhead cam engines. When browsing through the used cars for sale in the UAE, decide the performance factors you need and the type of engine that will deliver the best before buying the vehicle.

Stay tuned to the dubizzle cars blog and learn more about different types of engines and their designs.

Share
Tweet
Pin
Share

Clean Engine Sludge to Prolong Your Car’s Life

all about how to clean engine sludge

An engine develops the sludge on or around the car’s motor when oil breaks down and starts being collected by the engine. For the engine to work optimally, it is necessary to clean engine sludge. The most important thing for a motor engine’s longevity is the circulation of quality oil. In simple words, oil is like the lifeblood of an engine that cleans and lubricants various engine parts and helps make its movement friction-free. Motor oil also helps the engine from overheating. 

What causes oil sludge?

Let’s go through some useful engine oil sludge cleaning tips
Causes of engine sludge include infrequent oil changes and using low-quality oil, among others

Over time the breakdown of engine oil causes engine sludge. Usually, sludge accumulates within the engine because of low operating temperature, a crankcase ventilation system with a poor or lousy design, crankshaft-induced cavitation or internal water leakage. Other common causes leading to engine sludge include: 

  • Infrequent oil changes: Not changing the oil on time or extending oil change intervals causes an oil breakdown and forms sludge.
  • Low-quality oil: Using low-quality or incorrect viscosity oil can accelerate sludge formation.
  • Short-trip driving: Consistently driving short distances without allowing the engine to reach optimal operating temperature can promote sludge buildup.
  • Contaminants: Dust, dirt, and other contaminants entering the engine can mix with oil and contribute to sludge formation.
  • Combustion byproducts: Combustion byproducts, such as soot and carbon, can mix with oil and lead to sludge formation.

Symptoms of Engine Sludge

Go through the symptoms of engine sludge to identify engine problems
Common symptoms of engine sludge include a poorly performing engine that overheats

Carry a regular oil check to avoid clumps. Look through your engine to identify the accumulation of sludge by removing the valve cover. Failing to do so will clump the engine oil and clog the entire working system of the car’s engine. Go through the symptoms of and process on how to clean engine sludge to evade expensive engine repairs.

  • Poor engine performance: Sludge restricts the oil flow and naturally leads to reduced lubrication and increased friction, resulting in poor engine performance.
  • Overheating: Engine sludge buildup can interfere with the cooling system. This causes the car’s engine to overheat.
  • Reduced fuel efficiency: Sludge can also have a negative effect on the fuel-air mixture and combustion process, resulting in decreased fuel efficiency.
  • Oil pressure warning light: Sludge buildup can obstruct the oil passages, which triggers the oil pressure warning light on the dashboard.
  • Knocking or tapping noises: Insufficient lubrication because of engine sludge can cause metallic components to rub against each other, producing knocking or tapping noises and ultimately causing wear.

Steps to Clean Engine Sludge

Let’s go through the steps to clean engine sludge
A clean engine is important for its smooth operation

Cleaning engine sludge is necessary for optimal performance, smooth operation and maintenance. Let’s go through the steps to clean engine sludge effectively.

  • Prepare the engine: Make sure the engine is cool and parked on a flat surface before you start to clean engine sludge. Block the rear wheels so that car doesn’t move when you’re working under it. Also, disconnect the battery to prevent accidental starts.
  • Jack up the car: After the car is parked in a safe place, jack it with a floor or hydraulic jack to slide under the vehicle easily and carry out the work. Here are the steps to properly jack up your car.
  • Drain old oil: Locate the oil drain plug, it is positioned on the bottom of the engine oil pan. Drain the old oil into a suitable container and then remove and replace the oil filter as well.
  • Add engine flush solvent: Purchase a good quality engine flush solvent from an auto parts store. Follow the instructions on the product label and add the recommended amount to the engine oil fill cap.
  • Run the engine: Start the engine and let it idle for the specified duration mentioned on the engine flush solvent instructions. This circulates the solvent throughout the engine and helps break down the sludge.
  • Drain the solvent: After the recommended duration, drain the solvent. Turn off the engine and allow it to cool down. Then, position a drain pan beneath the oil drain plug, remove the plug, and drain the engine flush solvent.
  • Replace oil and filter: Install a new oil filter and refill the right type of engine oil with fresh engine oil of the recommended grade and viscosity. Also, ensure you don’t overfill oil in the vehicle as that can also damage the engine. 
  • Start the engine: Start the engine and let it run for a few minutes to ensure proper oil circulation.
  • Regular maintenance: To prevent future sludge buildup, adhere to the manufacturer’s recommended oil change intervals and use high-quality oil and filters. Regularly inspect and maintain other engine components, such as the PCV (Positive Crankcase Ventilation) system and clean engine sludge when necessary.

That is all about how to clean the engine sludge, engine oil sludge causes and its symptoms. Please note that intense sludge buildup may require professional help or an engine disassembly for thorough cleaning. If you experience persistent engine sludge issues, consult a trusted mechanic to clean engine sludge. 

Besides, if you are continuously paying for expensive engine expenditure, it is advisable to buy another car with a proper engine. Go through this list of used cars for sale in the UAE and have your pick. Here is how to buy a car from dubizzle.

Stay tuned to dubizzle’s top auto blog for more on engine parts, DIY solutions, repair tips and much more. 

Share
Tweet
Pin
Share